
Transform a finished mix into a release-ready recording that translates across every listening environment.

“Mastering represents the final opportunity to ensure that a song or album translates effectively to listeners everywhere while maintaining the sound that the artist and producer intended.”
Mastering is the final stage of music production, where a finished mix is refined, polished, and prepared for distribution. The goal of mastering is not to radically change a mix, but to optimize its sound, ensure consistent playback across systems, and prepare the final files for release.
One of the most important goals of mastering is translation. A mix that sounds balanced in the studio may behave very differently on other playback systems, such as car stereos, earbuds, laptops, club sound systems, or broadcast environments. Mastering engineers evaluate tonal balance, dynamics, stereo image, and loudness to ensure a recording remains clear and balanced across a wide range of listening environments.
Modern mastering is now largely performed digitally. Professional DAWs and plugins provide precise control over equalization, dynamics, stereo imaging, harmonic enhancement, and loudness. Extremely subtle adjustments—often fractions of a decibel—collectively improve the clarity, depth, and impact of a mix without altering its artistic intent.
In addition to sonic refinement, mastering also ensures that the final files meet the technical requirements of distribution platforms. Streaming services, broadcast systems, and physical media each have specific standards for loudness, peak levels, file formats, and metadata. A properly mastered track meets these requirements while preserving its musical character.
Because mastering processes the entire stereo mix rather than individual instruments, it requires careful listening and restraint. Small changes can significantly affect the balance of a recording. When done well, mastering should be invisible—the music simply sounds clearer, more balanced, and more consistent across playback systems.
Preparing a Mix for Mastering
Before applying any processing, a few basic practices will help ensure the best possible results.
• Avoid clipping plugins, subgroups, or the mix bus
• Use high-quality source files such as 24- or 32-bit audio
• Remove clicks, pops, and editing artifacts, since small noises become more noticeable during mastering
Once the mix is technically clean, mastering tools can be used to refine tone, dynamics, stereo balance, and loudness.
Mastering for Loudness
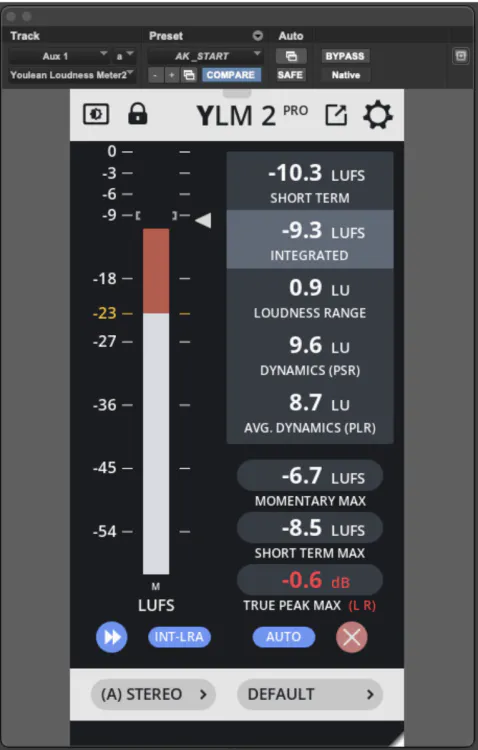
Mastering ensures that a song competes—or flows properly—with the tracks that play before and after it on an album or playlist. Listeners naturally compare songs by how powerful and energetic they feel, which is largely determined by perceived loudness. While the overall energy of a track is largely determined by the songwriting, production, and mix, mastering can further refine the perceived power of the final mix. Loudness is typically measured using LUFS (Loudness Units relative to Full Scale), which represents the average level of a track rather than its peak level. Two songs that both peak at 0 dBFS can sound very different and produce very different LUFS readings.
Much of the processing in mastering is aimed at achieving the appropriate loudness for the music. A club track requires a different level of intensity than an acoustic ballad. Tools such as EQ, compression, saturation, and limiting are used to shape that energy. There is no universal loudness target—the appropriate level depends on the style of music and artistic intent.
Streaming Services and Loudness
Streaming platforms such as Spotify apply loudness normalization, ensuring songs play back at consistent levels for listeners. This prevents large jumps in volume between tracks.
For mastering engineers, however, the goal is not to chase specific platform targets but to focus on producing a balanced master that compares well with appropriate reference material. Streaming services will apply playback adjustments automatically if needed. Your ears are the most important tool for judging loudness, but LUFS meters can help confirm what you’re hearing.
Most DAWs include loudness metering tools. Logic Pro offers a dedicated loudness meter, while Pro Tools provides loudness measurement within the Pro Limiter plugin. Third-party meters such as Youlean Loudness Meter, Waves WLM Plus, and NUGEN VisLM are also widely used.
Audio Maximizers in Mastering
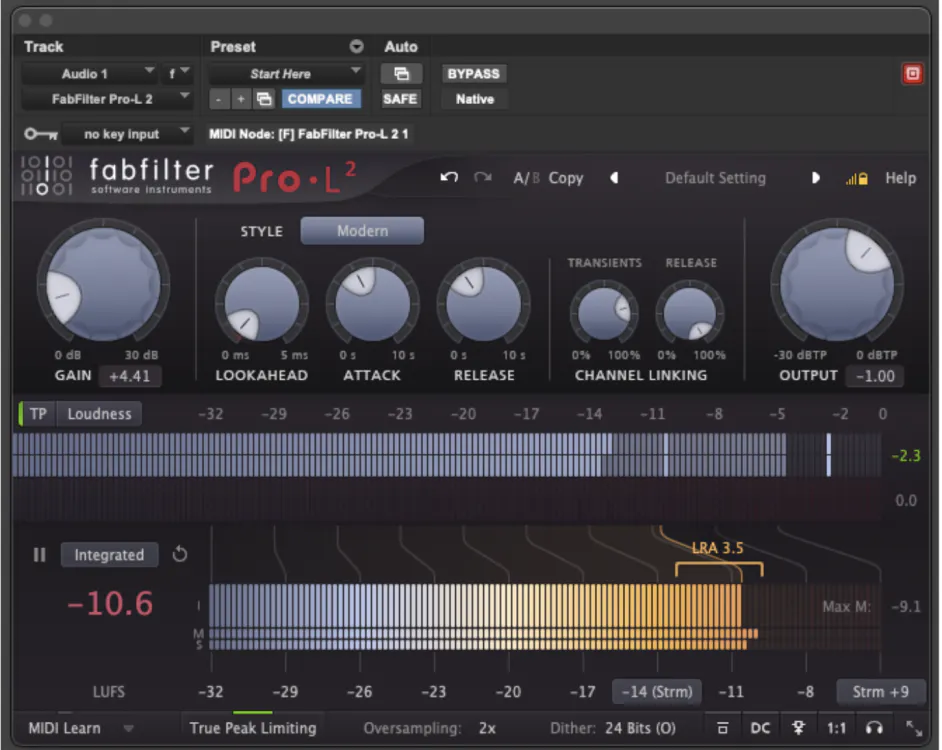
The final processor in a mastering chain is a maximizer, often called a mastering limiter or true peak limiter. This advanced limiter sets the perceived loudness (average level) of a full mix while controlling the signal’s peak level (ceiling). Maximizers can help a master sound loud, punchy, and polished without introducing distortion.
Like a limiter, a maximizer prevents signals from exceeding a defined level. While a limiter simply stops peaks from clipping, a maximizer actively pushes the music up to that ceiling while controlling peaks.
Maximizer Features
Maximizers should not be used to control overall dynamics. Their role is to increase the level while preventing peaks from clipping. Because limiting requires extremely fast attack and release times, it can introduce distortion or reduce the punch of a mix. Maximizers avoid these problems with intelligent algorithms that adapt their behavior to the incoming signal. Styles, like transparent, modern, clipping, warm, or bright, are included to avoid distortion with differing tonal outcomes.
Modern maximizers include several features that improve transparency and audio quality:
• Look-ahead limiting, which anticipates peaks before they occur to decrease distortion
• True-peak limiting, which prevents inter-sample peaks during playback
• Oversampling, which reduces digital aliasing artifacts and reduces distortion
• Dither, which preserves quality when reducing bit depth to 16-bit
Many maximizers also provide additional tools such as transient shaping, stereo adjustments, harmonic enhancement, and integrated LUFS metering.
Using Maximizers Effectively
Increasing the gain of a maximizer inevitably produces some amount of gain reduction. If pushed too far, this can introduce artifacts such as distortion, pumping, or reduced transient impact.
Each production has an ideal loudness for the right balance of density and dynamics. Learning to recognize the point where limiting begins to damage the sound is an essential mastering skill. As a rule of thumb, if a maximizer needs to apply more than a few decibels of gain reduction, earlier stages of processing may need adjustment.
Popular Maximizer Plugins
DAWs include built-in maximizing tools, including Logic’s Adaptive Limiter, Avid’s Maxim and Pro Limiter, and Ableton’s Limiter (in True Peak or Maximizer mode).
Popular mastering maximizers include iZotope Ozone Maximizer, FabFilter Pro-L2, Voxengo Elephant, Waves L2/L3, Sonnox Oxford Limiter, DMG Limitless, and Weiss MM-1.
EQ in Mastering
Equalization is the most important tool in mastering. While mixing EQ shapes individual instruments, mastering EQ refines the tonal balance of the entire mix. Proper tonal balance helps a master sound powerful and full while translating well across different playback systems.
Objectives of EQ in Mastering
EQ is usually the first stage in a mastering chain, where the overall tonal balance of the mix is refined. First, identify frequency ranges that contain too much or too little energy. Excessive energy in one band can mask other frequencies or make the music sound harsh or boomy at higher playback levels. Conversely, too little energy can make a master feel weak, hollow, or lacking in presence—especially at lower listening levels.
Once these issues are addressed, EQ can enhance the master. A subtle lift in the low end may add weight and warmth, while a small boost in the high frequencies can improve clarity and air.
Mastering is not about fixing problems in the mix, but about shaping the overall presentation of the music. Because every EQ adjustment affects the entire mix at once, small moves tend to work best.
Types of EQ Used during Mastering
Different EQ designs produce different tonal results, so mastering engineers typically keep a broader range of EQ tools available.
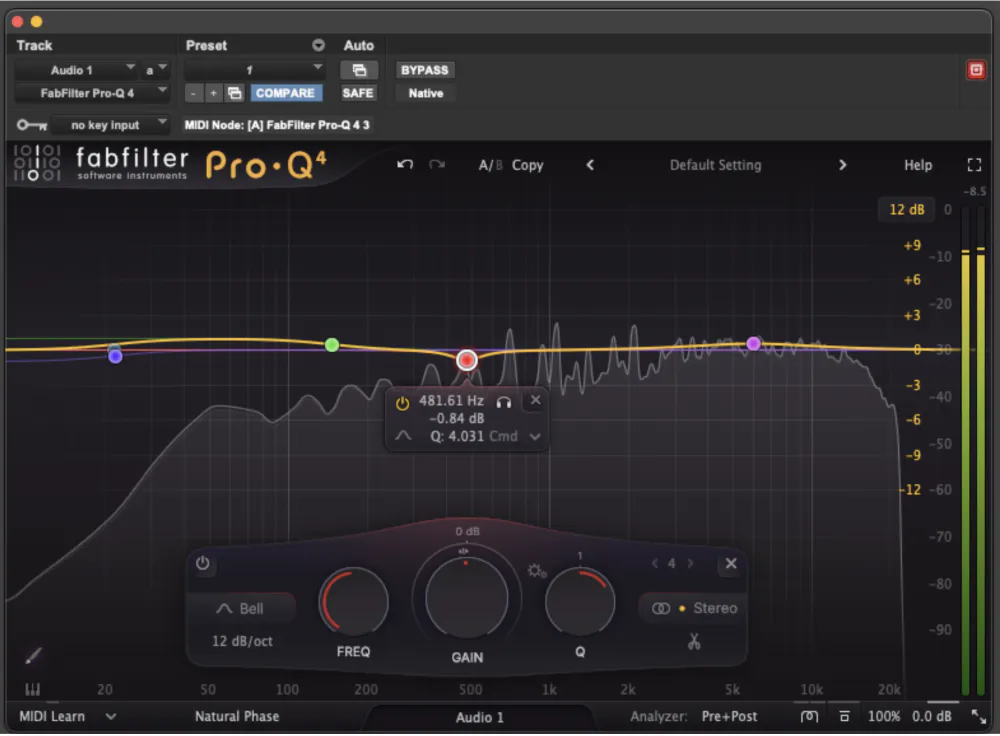
- Digital parametric EQs provide precision and flexibility, making them ideal for surgical adjustments. Some digital EQs also model the bandwidth and subtle distortion characteristics of classic analog gear.
- Passive EQs are valued for their musical tonal character. They often produce warm low frequencies, smooth midrange, and airy highs that can add subtle polish to a master.
- Linear-phase EQs avoid phase shift, which is important for certain applications such as steep high-pass filters, sharp corrective cuts, or parallel processing.
- Parallel EQ blends an EQ’d version of the song with the original version, allowing more extreme tonal shaping while maintaining transparency.
- Mid-Side EQ provides independent control of the center (mid) and stereo (side) information in a mix. For example, low frequencies can be reduced in the side channel to tighten the bass, while high frequencies in the sides can be gently boosted to enhance width and air.
- Dynamic EQs apply equalization only when certain frequencies become excessive, making them useful for controlling occasional problems, like sibilance or resonant frequencies.
In mastering, restraint is essential. Even small EQ adjustments can dramatically affect the balance of a mix. Our goal is not to dramatically reshape the mix, but to ensure that it sounds balanced, clear, and consistent across different playback systems.
Popular Equalizer Plugins
All DAWs include powerful equalizers. Logic Pro includes the Channel EQ, Linear Phase Channel EQ, and Vintage EQ options. Pro Tools includes its 7-band parametric EQ with band-solo functions, as well as passive EQ options. Ableton’s EQ Eight includes mid-side capability and a spectrum analyzer. Third-party companies, including FabFilter, iZotope, Sonnox, Plugin Alliance, and UAD, also offer a wide range of mastering-grade EQ plugins used in professional workflows.
Compression in Mastering
Compression is often misunderstood in the mastering stage. While compression is commonly used to control dynamics and shape the tone of individual instruments, mastering compression can be used to stabilize the overall dynamics of the mix. Mastering compressors should respond to the average level of the music rather than reacting to brief peaks.
When applied carefully, compression can reveal quiet details and help the mix feel more cohesive. This effect is often described as “glue.” Professional mastering engineers use very little compression—sometimes less than 1 dB of gain reduction—because a well-balanced mix rarely needs heavy dynamic control.
To preserve the punch and movement of a mix, use slower attack times and moderate release settings. This allows drum hits and musical accents to pass through while gently smoothing small dynamic variations. If compression adds distortion or causes drums to sound weak or distant, the settings should be adjusted—or the compressor replaced. The result should be a mix that feels both controlled and energetic.
Compression is not always necessary during mastering. If compression improves the overall balance but slightly affects stereo width or low-end clarity, those aspects should be adjusted with additional processors later in the chain.
Typical Compression Settings for Mastering
Although every track requires a unique approach, the following settings are common starting points for mastering compression:
- Ratio: Typically between 1.2:1 and 2:1
- Attack: Slower attack times, often 50–100 ms
- Release: Usually 100–500 ms, or timed to the tempo of the music
- Knee: Generally soft for smoother gain reduction
- Threshold: Set for 1–3 dB of gain reduction during louder sections
- Sidechain filter: Often used to prevent low frequencies from causing pumping
- Only 1 dB of compression can sometimes noticeably improve a master.
Types of Mastering Compressors
Different compressor designs produce different sonic characters. The behavior of a compressor is shaped by both its gain-reduction circuit and its amplifier design.
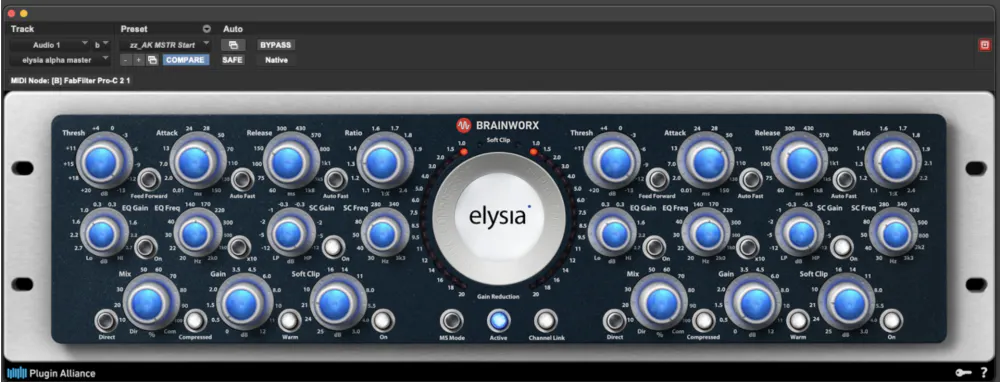
VCA Compressors
VCA compressors provide pclean, precise dynamics control. They are commonly used in mastering for subtle glue and dynamic stabilization.
Examples include the Elysia Alpha Compressor, API 2500, Vertigo Sound VSC-2, FabFilter Pro-C 2, and TDR Kotelnikov.
Vari-Mu Compressors
Vari-mu compressors use tube circuits to produce smooth, musical compression. They are often chosen when a mix benefits from warmth and gentle leveling.
Famous examples include the Fairchild 670, Manley Variable Mu, SPL IRON, Pulsar Mu, and Klanghelm MJUC.
Optical Compressors
Optical compressors are less common in mastering, they can provide smooth, program-dependent compression.
Examples include the Shadow Hills Mastering Compressor (which combines VCA and optical stages) and the Softube Tube-Tech SMC 2B.
Mid-Side Compression
Mid-Side compression allows independent control of center and stereo elements, making it possible to stabilize vocals or bass without affecting stereo ambience. Elements with the most energy—such as kick, snare, bass, and lead vocals—typically reside in the Mid channel, while stereo effects, guitars, and keyboards often occupy the Side channel.
Popular mid-side mastering compressors include the Elysia Alpha Compressor, FabFilter Pro-C 2, iZotope Ozone Dynamics, and DMG Audio Compassion.
Multiband Compression
Multiband compression can target dynamic problems in broad frequency ranges, such as sub-bass or sibilant frequencies. Multiband processing should be used with care, as it can cause unwanted distortion and tonal shifts.
Popular multiband compressors include the FabFilter ProMB, Waves C4/C6, and iZotope’s Dynamics.
Saturation in Mastering
Saturation is a subtle but powerful tool in mastering. Once the tonal balance and dynamics are under control, subtle saturation can be used to add density and harmonic richness to the master. Unlike EQ, which directly shapes frequency balance, saturation adds harmonic content to the audio signal. It can increase the perceived loudness, density, and warmth of a mix, smoothing transients and gently compressing peaks. This can reduce the need for aggressive limiting later in the mastering chain.
In mastering, saturation is applied very lightly. If the distortion becomes clearly audible, it is usually too strong. Saturation plugins may also be called “exciters.”
Types of Saturation Used in Mastering
In mastering, different saturation styles can be blended very subtly—often just enough to increase perceived density without making the distortion itself audible.
Tape Saturation
Tape saturation gently compresses peaks and produces mostly even-order harmonics, creating a warm and smooth character. It can add density and soften transients, helping a mix feel fuller and more cohesive.
Tube Saturation
Tube circuits generate strong even-order harmonics that add richness and warmth. Used subtly in mastering, tube saturation can enhance midrange presence and smooth harsh frequencies.
Transformer Saturation
Transformers introduce subtle harmonic distortion along with slight low-frequency changes. This can add weight and energy to a mix while tightening the overall sound. Transformer saturation can add energy and character without sounding overly distorted.
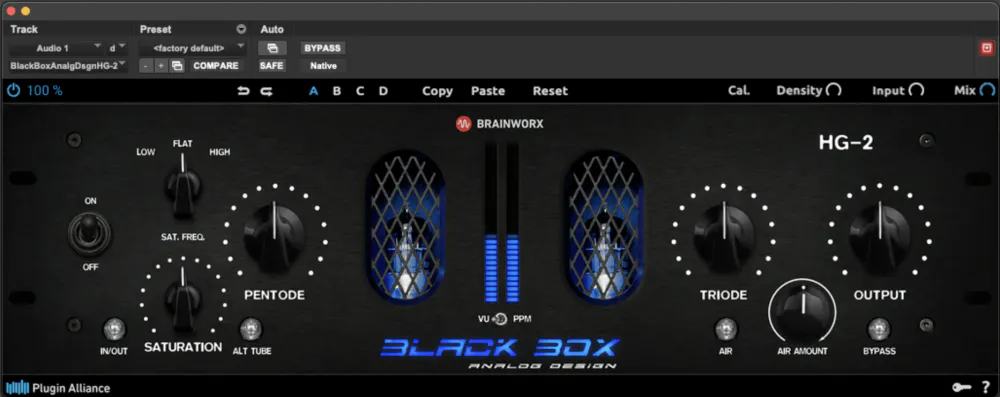
Popular Saturation Plugins
Popular mastering saturators include Black Box HG-2, Kazrog True Iron, FabFilter Saturn, Oxford Inflator, and tape emulations such as UAD ATR-102.
Stereo Image Processing in Mastering
Stereo image processing allows mastering engineers to refine the width, depth, and balance of a mix across the stereo field. Unlike mixing, mastering works on the entire stereo mix, so any adjustments must be extremely subtle.
Stereo processing can also be useful when mastering an album, where individual songs may feel slightly narrower or wider than others. Small adjustments can help create a more cohesive listening experience from track to track.
Types of Stereo Image Processing for Mastering
Mid-Side EQ
Mid-side EQ allows independent processing of the center (mid) and stereo edges (side) of a mix. Gently boosting high frequencies in the side channel can enhance the sense of air and stereo width, while rolling off low frequencies in the side channel can tighten the bass and improve clarity.
Popular mid-side EQ plugins include FabFilter Pro-Q, Brainworx bx_digital V3, and DMG Audio Equilibrium.
Stereo Imagers
Stereo imagers adjust the apparent width of a mix using techniques such as phase decorrelation, shuffling, or other psychoacoustic methods. Some widening algorithms can create mono compatibility problems or weaken the center image.
Mastering-grade stereo imagers include iZotope Ozone Imager, Leapwing StageOne, and the stereo width controls in Brainworx bx_digital V3.
Mid-Side Compression
Mid-Side (M/S) compression can also influence stereo width by changing the dynamic balance between the mid and side signals. Compressing the mid channel slightly can make a mix feel wider, while compressing the side channel can narrow the stereo image and increase center focus.Ratios below 1.5:1, slow attack and release times, and less than 0.5 dB of gain reduction are common starting points.
Popular mid-side compressors used in mastering include Elysia Alpha compressor, FabFilter Pro-C 2, iZotope Ozone Dynamics, and DMG Audio Compassion.
The Complete Mastering Chain
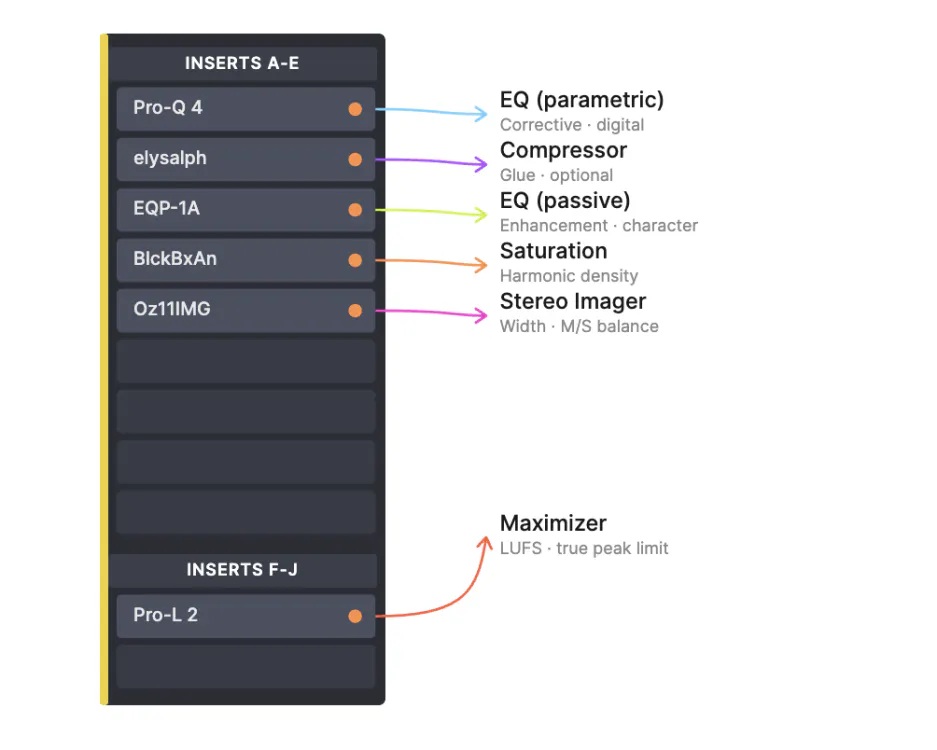
A typical mastering chain sequence these processors—each making subtle improvements to tonal balance, dynamics, stereo image, and final loudness.
Keep in mind that every production is unique, so start with a simple structure and adapt as needed, but a common workflow might look like this:
Stage 1: Equalizer (Corrective)
This EQ stage addresses obvious tonal problems and imbalances in the mix.
Stage 2: Equalizer 2 (Enhancement)
A second EQ can be used for subtle tonal shaping—small boosts or cuts that enhance the musical character of the master.
Stage 3: Dynamic Processing
A compressor is optional, but it can add glue, density, and some tonal color.
Stage 4: Saturation
This stage adds harmonic interest, density, and perceived energy.
Stage 5: Stereo Imaging
Stereo processing adjusts the width and balance of the mix. Tools such as mid-side EQ, stereo imagers, or mid-side compression can refine the relationship between the center and the stereo edges.
Stage 6: Maximizer/Mastering Limiter
The final limiter prevents clipping and sets the master’s average level (LUFS).
The Final Word on Mastering
Keep in mind that our goal in mastering is to achieve a subtle improvement to an already strong mix, though more corrective work may be needed when mixes are less polished. A minimalist mastering chain might consist of only an EQ, a compressor, and a limiter, while a more involved chain may include additional stages.
Finally, the importance of accurate monitoring cannot be overstated. Reliable monitoring ensures that mastering decisions translate consistently across different playback systems and helps reveal problems that may have been missed during recording or mixing.
Continue learning by reading our other articles around the topic of mastering:
Learn about the history of mastering
Discover how to improve mixing technique by learning mastering


