In the 1970s, few engineers outside of New York had heard of parallel compression. Today, thanks to the Internet, it’s ubiquitous. In a software mixing environment, with unlimited plug-ins at our disposal, parallel compression ought to be easy to implement. In practice, though, mixing in the box has made it both easier to get right and easier to get wrong.
What’s Parallel Compression, And Why Do We Need It?
In any mixing context, there are two basic ways to apply processing. One is to insert the processor across a track, a submix or the master bus. The other is to set up a send and return structure, whereby we can tap signal from one or more sources, route it into the processor and return its output to a new track. We could describe these two approaches as being transformative and additive respectively. An insert processor transforms the source signal. A processor used on an aux send makes an additional contribution, which is later blended with the dry sound.
Reverb is a good example of an effect that is usually used in a send-return context. Whether we’re patching in a plate or loading up a digital plug-in, we don’t want to completely replace the dry source with the reverb that’s created. We want the dry signal and the reverb both to be available on separate channels in our mixer, so that we can balance them to taste. And that’s exactly what the send-return structure delivers.
By contrast, compression in its basic form is a transformative process. The job a compressor is to reduce the dynamic range of a signal, and the most effective way to do this is to pass the entire signal through it. Allowing some of the unprocessed signal to combine with the compressed signal would tend to undermine its work. Consequently, the standard way to use a compressor is as an insert processor.
What those New York engineers of the 1970s realised, however, is that although blending dry signal in with the compressed signal does lead to a smaller reduction in dynamic range, it does so in a different way from reducing the compression ratio or raising the threshold. Combining compressed and uncompressed versions of the same signal produces an effect that is similar to upwards compression, whereby low-level detail is accentuated. This can’t easily be reproduced with a standard compressor on an insert.
Compression & Colour
Many classic compressors do interesting things when pushed hard. For instance, the UREI 1176 has four buttons to select different compression ratios. Jamming all of them in at once delivers a unique, brutally squashed sound. If you want that ear-catching effect but don’t want your source to be completely obliterated, how is that to be achieved? Not by driving the compressor less hard, but by mixing some of the unprocessed sound back in.
When a compressor is used in parallel, we also have the option to aggressively equalise only the signal feeding the compressor. As an example, if we want to beef up and stabilise the bottom end of a source, we could filter off everything above 200Hz in the compressor path. This would generate a flattened-out signal containing only the low-frequency elements, which could then be blended back in to reinforce the bass.
The 1176 ‘all buttons in’ trick is an extreme case, but most classic compressors have a distinctive sound. They don’t just reduce the dynamic range of the source; they also transform it tonally, add saturation, or otherwise introduce character. What if we want to hear the character of more than one compressor on a single source? We could place the compressors in series, and indeed this is commonly done with the 1176 and Teletronix LA-2A to combine their very different dynamic behaviour. But we might prefer to combine separate versions of the source that are independently processed by multiple compressors. This is the basis of Michael Brauer’s famous ‘Brauerizing’ technique, and is a simple extension of basic parallel compression.
Finally, one of the key features of the send-return structure is that we can send from multiple sources to a single destination. It’s often desirable to add the same reverb to lots of different things, to make it seem as though they are all sharing the same space. The most efficient way to do this is to set up a single reverb on an auxiliary channel, and send to that channel from all of the source tracks. Doing the same with a compressor can produce interesting results that are not easily achievable in other ways.
Implementing Parallel Compression
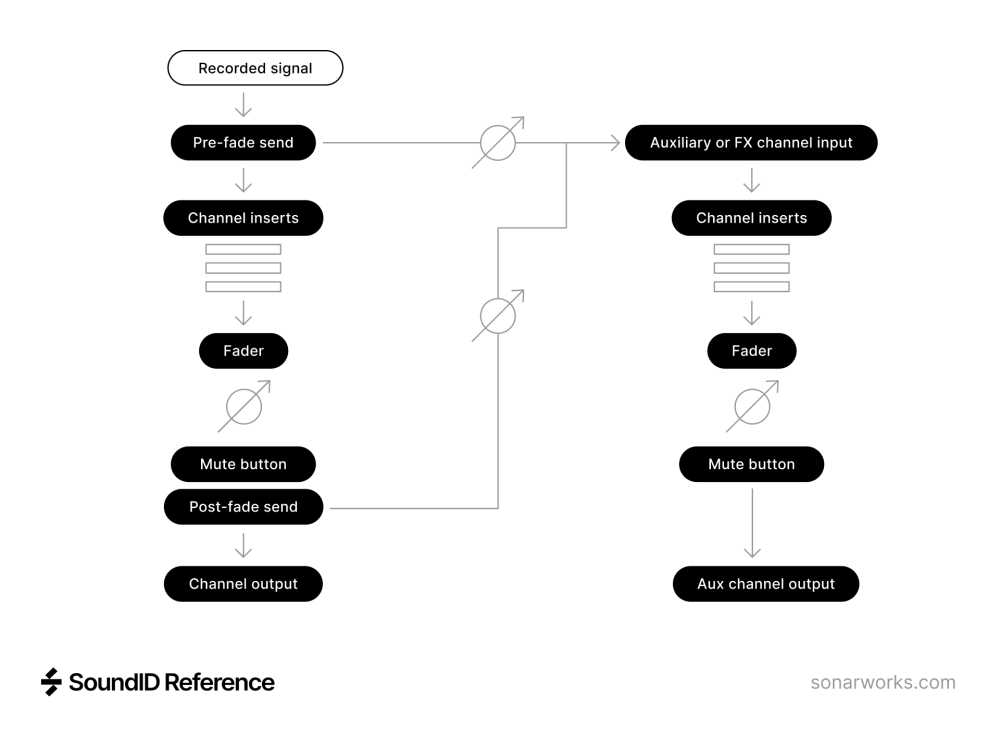
With an analogue mixing console, there was only one way to implement parallel compression. You’d use the auxiliary sends on the mixer to route the signal to a hardware compressor via a patchbay. The return signals from this compressor would then be brought into a separate channel on the mixer. In a modern DAW-based setup, we have more choice about how to implement it, but we also have more ways of messing it up.
For the time being, let’s assume we’re working entirely in the box, using software compressor plug-ins. In this case, it’s easy to set up a compressor that we can send audio to. Create an auxiliary or FX track (different DAWs use different terminology here) and insert the compressor on that track. Then select the mixer channel for the source to which you want to apply parallel compression, and create a send to the compressor aux.
The level at which you send to this channel is vitally important. When we’re setting up a reverb on an auxiliary send, we can adjust the amount of reverb we hear in two ways: by changing the level of the send, and by moving the fader on the auxiliary channel. There may be minor differences, but the net result will be broadly the same. That’s not the case with parallel compression. By its nature, a compressor reacts to signal level. If the signal is low, it will do nothing. So in this case, the send always needs to be turned up high enough to trigger compression. To change the amount of compressed signal being fed into the mix, we must use the fader on the auxiliary channel, or the make-up gain control on the compressor itself.
Adding this compressed version of the source to the mix will, of course, make that source louder. We may want to reduce the level of the dry version to compensate for this. Here is another trap for the unwary. When you set up the send-return structure described above, most DAWs will automatically assume you want the send to be post-fade. What this means is that even if you don’t change the level of the send itself, reducing the fader on the dry channel will reduce the level feeding the send. To avoid this happening, switch the send that feeds your parallel compressor to pre-fade.
Another thing to be wary of is that in most DAWs, auxiliary or FX channels are stereo by default. Unless you change this, you’ll thus be sending to a stereo compressor plug-in. Depending on the plug-in, this can mean that the position of the compressed signal within the stereo field is different from that of the source signal. With a mono source, it’s safer to use a mono aux channel and set its pan control to be the same as that of the source channel. If you’re sending multiple mono sources to a stereo compressor, pay attention to the pan settings on the sends.
Although the compressed signal is going to be blended with the dry signal, it’s useful to be able to hear it in isolation, so that you can set the compression parameters appropriately. In most DAWs, you can easily do this by hitting the solo button on the auxiliary channel. The major exception is Pro Tools, where the mixer works more like an old-school analogue console. Solo an aux channel in Pro Tools and you’ll hear nothing unless the source channel that’s feeding it is set to Solo Safe — and in that case, you’ll hear both the dry source and the compressed aux channel. Normal practice in Pro Tools is to set aux channels to Solo Safe. Then, to hear just the compressed signal, solo the source track and mute it, or pull its fader all the way down. As long as the send is set to pre-fade, signal will still reach the aux channel with the compressor.
Making Sends Make Sense
The send-return approach described above is endlessly versatile. It allows any number of sources to be sent to any number of compressors, and gives you complete freedom to balance the resulting signals. But it’s not always very ergonomic. For every source to which we want to apply parallel compression, we have to manage two faders rather than one. And that complication quickly multiplies. For example, suppose we are using parallel compression to shape the sound of a lead vocal part. Very likely, we’ll also want to apply reverb, delay, and other effects to that part. Do we send to those only from the dry vocal? Only from the compressed vocal? Or both? And if we want to automate the level of the vocal within the mix, do we now have to record two sets of fader moves?
The best way to deal with this is often to create another auxiliary or bus channel, and use that to recombine the dry lead vocal and its compressed duplicate. We can then create a single layer of automation and a single set of reverb or delay sends on this channel, rather than doubling everything. But we’ve now been forced to create three mixer channels for a single lead vocal, and even then it only works if the compressor channel is being used exclusively for the vocal.
This approach also precludes the use of parallel compression on the master bus, because master busses typically don’t have sends. Sending from a master bus to an auxiliary channel routed to the master bus would create a feedback loop. Sending to an aux that wasn’t routed to the master bus would be pointless, because we wouldn’t hear it.
Compressors With Mix Controls
To make parallel compression simpler and easier to set up, and to permit its use on the master bus, many compressor plug-ins (and some hardware units) have a wet/dry mix control. In essence, this implements something akin to a send-return loop within the plug-in itself. The input signal is duplicated, one copy feeding the compressor and the other being routed straight to the output of the plug-in, with no processing applied. The mix control then determines what proportion of each signal is heard at the output.
The major benefit of this arrangement is that it allows us to apply parallel compression directly to a track or bus, with no need to create sends and returns. We simply insert the compressor on the track, set it up to taste and then adjust the mix control. There’s limited freedom to combine different sources feeding a compressor, or to use multiple parallel compressors on one source, but those are arguably niche applications in any case.
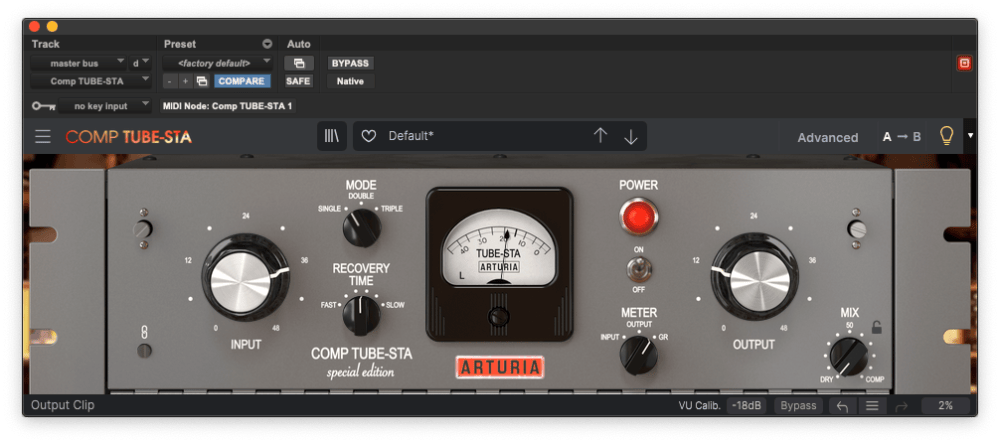
The down side is that there is no standard as to how plug-in compressors balance the wet and dry signals. The seven compressor plug-ins shown in the screen shots all do this in different ways. Even though each of them has a wet/dry mix control, the same setting is likely to deliver very different results on all of them.

Softube’s FET Compressor and Arturia’s Comp TUBE-STA are both vintage-style compressors with a fixed threshold. To achieve more compression, you turn up the input gain. In the Arturia plug-in, the dry path is unaffected by the input and output gain controls. But in Softube’s plug-in, both of these act on the dry as well as the wet path, and there’s no make-up gain control tha applies only to the compressed signal. So, for any given wet/dry mix setting, the FET Compressor plug-in will produce a much greater dry component than Comp TUBE-STA.
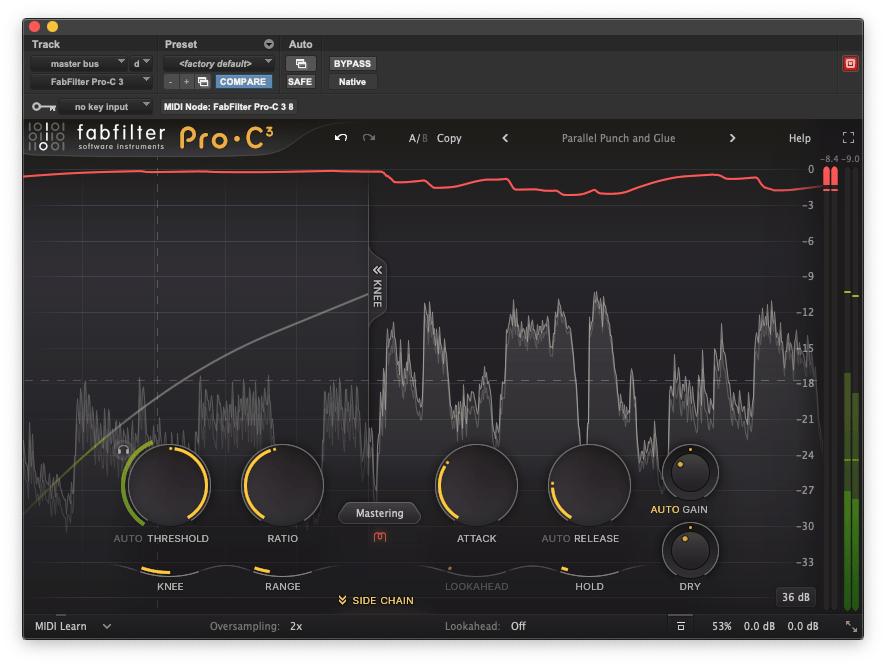
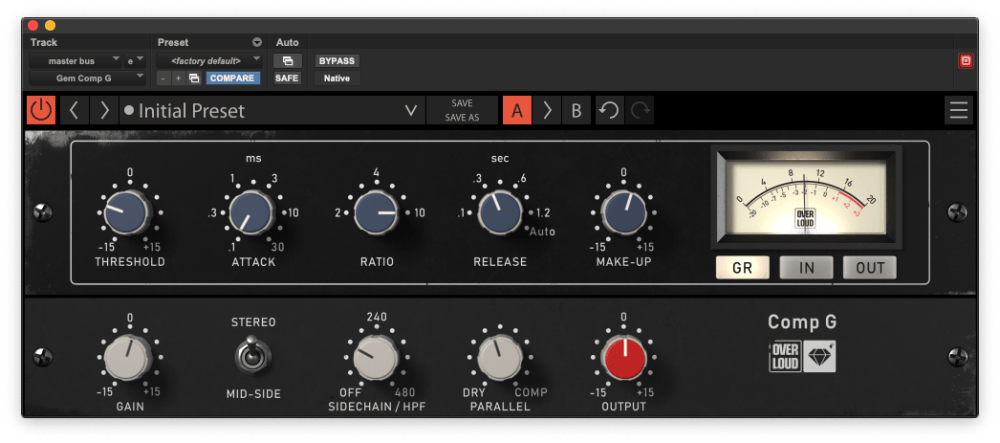
Overloud’s GEM Comp G is subtly different again. The input gain and make-up gain controls act only on the signal passing through the compressor, and not on the dry signal; but the output gain control is located after the mix control and so adjusts the level of both equally. FabFilter’s Pro-C 3 takes another different approach, offering separate output gain controls for the compressed and dry paths.
Arturia’s Bus Force takes this to the next level, effectively building a small mixer into the plug-in itself. This lets you balance the relative levels of three channels, two of which can optionally include the compressed audio.
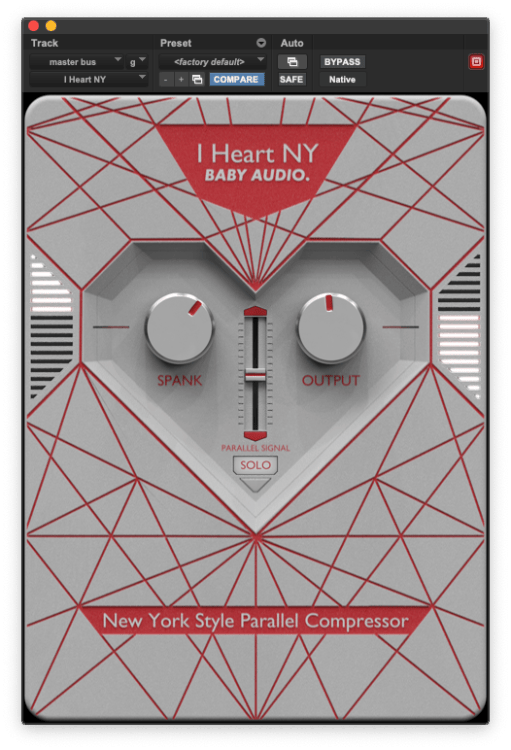
Finally, Soundtoys’ Devil-Loc Deluxe and Baby Audio’s I Heart NY are both designed to simplify the implementation of parallel compression — but they act completely differently. In I Heart NY, the output gain control governs the level of the mixed signal, but there’s no independent control over the level of the dry component. Essentially, it’s either on, or off (when the Solo button is pressed). The other two controls adjust the amount of compression and the make-up gain of the compressor. Devil-Loc Deluxe, on the other hand, has no gain controls at all. The plug-in automatically adjusts the level of the compressed signal to match that of the dry signal, and so with the Mix knob at its halfway point, you’ll get an equal balance of both.
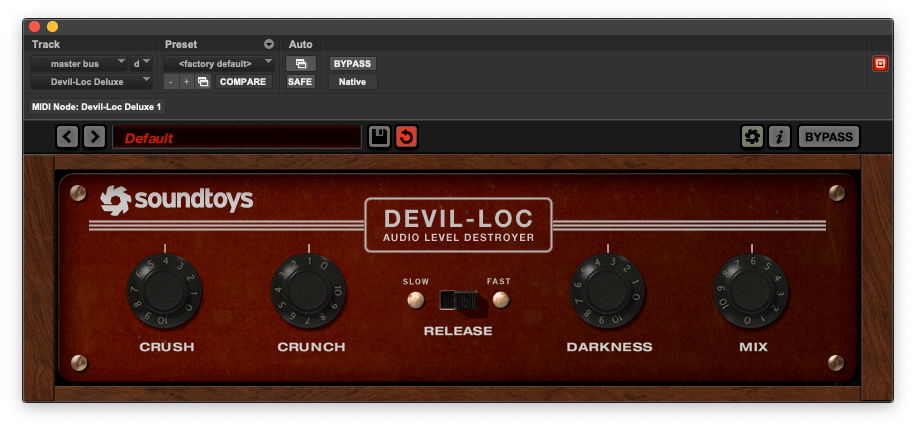
The lesson here is simple: use your ears, and don’t assume that setting a compressor’s wet/dry mix knob to the halfway position will necessarily give you 50 percent compressed audio and 50 percent dry signal!
Hybrid Parallel Processing
Many engineers still feel that plug-in compressors don’t sound as good as the best hardware compressors. They’ll mix in the box, but keep hardware processors hooked up to their computer using ‘hardware inserts’. This is a feature that nearly all DAWs now support, and in effect, allows you to patch a hardware device into an insert point in the DAW mixer. Behind the scenes, audio is routed from this insert point to an output on your audio interface, where it can feed an outboard processor (perhaps via a patchbay). The same insert point then picks up the interface input to which this processor is routed.
Quite a few modern hardware compressors now have wet/dry mix controls, which makes parallel processing just as easy to achieve as conventional compression. Once again, it’s important to get to know your hardware and understand how the wet and dry signals are balanced, but as long as you’re able to set up a hardware insert and pass a signal through it, all should be good. Things get a little more complicated with hardware compressors that don’t have a mix control. Rather than inserting it across the source track, you’ll need to set up a send-return structure using your hardware insert on an auxiliary or FX track within your DAW. In principle, this is no different with an outboard compressor than it is with a plug-in, but there’s a catch.
Most hardware compressors are analogue devices, and thus do not delay the signal passing through them. But the process of routing audio out of and back into your audio interface inevitably does introduce a delay. This is called latency, and the length of the delay is related to the audio buffer size setting in your DAW. When this latency is quite low, as it will typically be at a 32- or 64-sample buffer size, it’s not really noticeable in isolation. But if you are combining dry and compressed versions of the same signal, they must be absolutely in sync, or you will hear audible ‘phasing’ between them. So if you want to use a hardware compressor in parallel, it’s vital to learn to use your DAW’s ‘ping’ system to set up appropriate delay compensation.
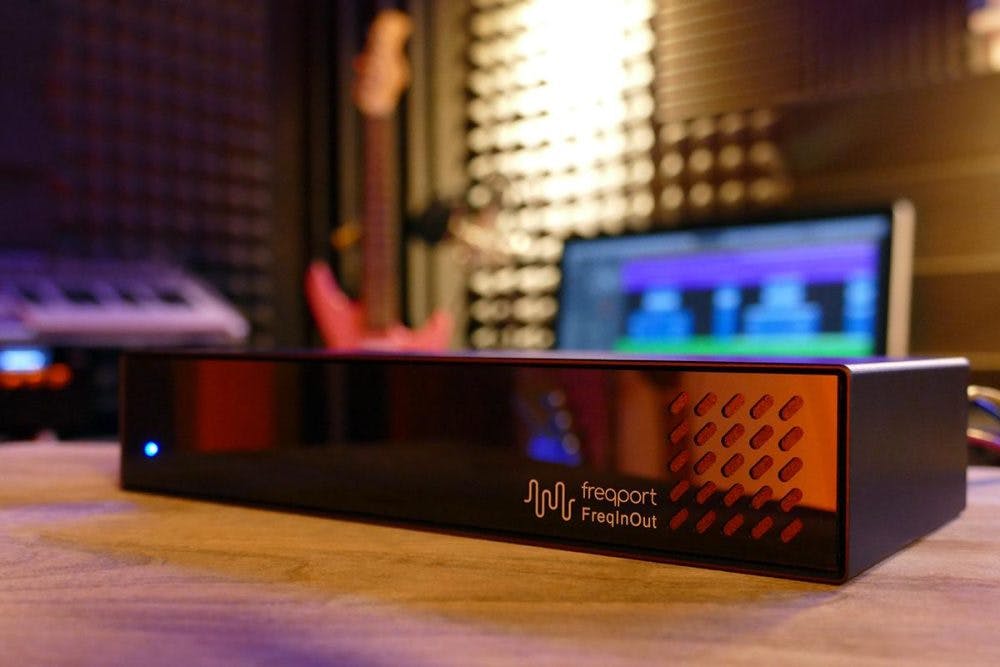
If this is too complex, or if you find it impossible to get it to work, one solution you could consider is Freqport’s FreqInOut FO-1. This is a USB audio interface that is dedicated to the job of routing audio out to external processors, and instead of using your DAW’s hardware inserts, uses a proprietary plug-in to make everything work. Alternatively, if you want analogue processing with the convenience of digital, consider McDSP’s Analog Processing Box system. From the user’s point of view, this is no different from using conventional plug-ins, but in the background, audio is being routed to analogue processing chips.
Continue reading about:
Serial and parallel effects in mixing