
This is the second article in a series on mixing drums. This one covers drum compression, while a previous article covered Drum EQ Tips. If you’re at all unclear on the basics of compression, you may want to review our previously published article on the fundamentals of compression.
The Scenario
You’ve removed the boxiness from your drums by cutting the mids just right. You’ve tamed the cymbal ringing by dipping the hi-mids. You’ve sculpted the snare perfectly. You’re carving away to create some of your best signature sounds. Despite all that EQing, the drums are still not moving you.
Let’s get some compression going to really get your drums grooving.
I’ll assume you mainly mix in the box, and that’s also my preferred way of working.
Most modern mixes are aching for a punchy drum sound and this goal can be achieved with the right kind of compression. Getting the sound right at the source, though, is paramount to achieving your goal. It helps to start with a great drummer, great drums, a great-sounding room, and great recording techniques.
Many drummers aren’t consistent in the way they hit the skins and their intensity and how and where they strike the drums changes from beat to beat. This can make the pulse of the track feel inconsistent, eating at your groove and making the drums less solid. The mighty compressor is one of our best tools for making up for a sloppy drummer’s lack of technique and also for making a solid drummer’s performance feel razor-sharp.
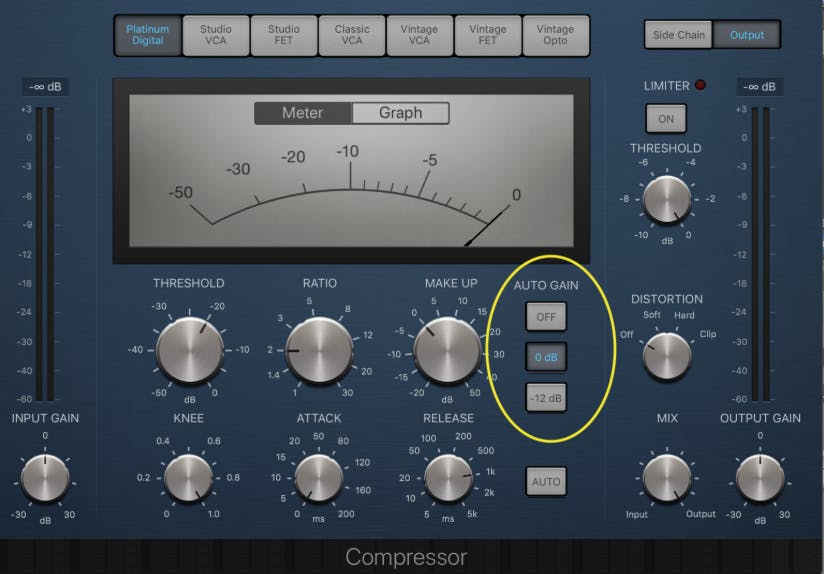
Important Note: Whenever setting up compression, make use of the make-up gain knob on your processor. This control provides a way to maintain a consistent volume when comparing processed to unprocessed signals. It’s very important to occasionally bypass the plugin (after setting the make-up gain correctly) to compare the original sound to the processed sound. This allows you to hear exactly what your settings are doing to the sound. Without the correct makeup gain, you can be fooled into thinking that the louder signal (usually the uncompressed one) sounds better. Plugins that have auto-gain options (such as the free MeldaProductions MCompressor or the Izotope Neutron 3 compressor module) spare you the headache of having to set up the make-up gain yourself.
Compressors for Drums
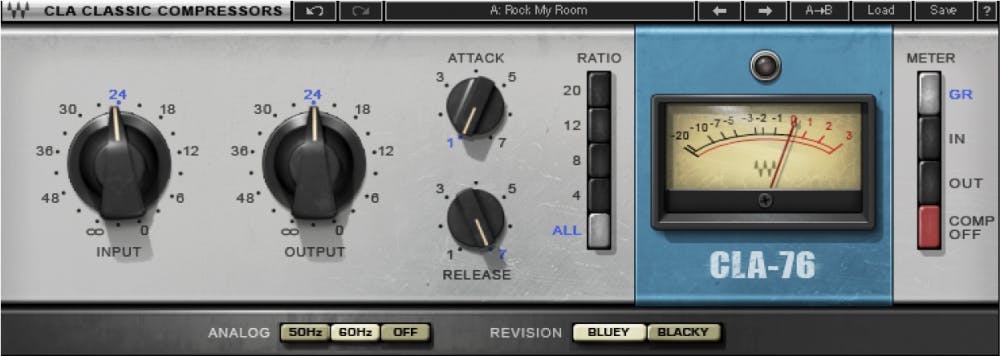
The most often used types of compressors when it comes to processing drums are VCAs and FETs. Both compressor types can be set to have very fast attack and release, and they can color the sound in pleasant ways if driven hard. Don’t discard Opto or Tube compressors, though, as their tone and frequency sensitivity can sometimes be just the right thing for your drums. As an aside, sometimes the easiest way to increase or decrease the attack and sustain of your tracks is to use a transient designer, which is not a compressor and therefore will not be discussed here.
General tips
When compressing a well-played and well-recorded drum sound you might only need 1 or 2dB of gain reduction and a low ratio. The attack and release times of the compressor will be very forgiving when you’re working with such small gain reduction amounts.
Attack!
The easiest way to set up your attack time and release time is to start with a slow attack and medium release time. Try starting with 100ms attack and release. Slowly increase the attack time until you start losing the impact of the transient and the drum starts feeling less bright or punchy. Now slow the attack until you bring back the initial attack of the drum. On a digital compressor, like the Avid DynamicsIII, an attack between 11ms and 25ms usually seems natural.
Make sure the attack isn’t set too fast. Too fast an attack will make the drum sound less punchy, regardless of what the gain reduction meter shows you. On the other hand, a fast attack will provide you with more control over the sound.
Release!
Next, move the release as slow as it goes and increase the release time until the compressor starts to move in time with the song. Too slow a release will just keep the volume of the drum soft all the time, and an overly fast release will let the body of the drum come up too fast. The compressor should be finished releasing before the next big hit comes along.
If you want the kick and snare to feel like they’re in your face, aim for 3-6dB of gain reduction. With this much compression, you really start hearing your compressor working and its attack, release, and ratio settings become very important.
Kick
If you’re looking to increase the punch of your kick, set the attack time just slow enough that you let the initial attack through. Set the release time so that the compressor releases before the next kick. Increasing the ratio will make the kick even punchier. Quicker release times may increase the sense of ambience around the drum, so try some shorter times to hear what fits your groove. Extremely short release times can create distortion artifacts, which can be ugly or appropriate depending on your style of music.
Snare
If your snare is too dark, instead of boosting the high-end with an EQ, try using compression. Set the attack slower than usual, allowing the transients to pass through, creating the illusion of a brighter attack.
Do you want a phat (full-bodied) snare sound? Use a very fast attack coupled with a super-fast release. This squashes the attack of the sound and lets the body of the snare come up in level.
In case you want to emphasize the decay and sustain of the drum, like in a traditional country song, try this: Use fast attack and release settings. Set the threshold low enough to catch the attack of the drum, but high enough to be above the sustain level. This lowers the attack and helps bring up the body of the snare.
To emphasize the attack of your snare, use slow attack with medium to slow release settings. The threshold has to be set low enough to attenuate the sustain of the signal.
Is the tail of your snare too long? In this case, a compressor might not help, so use an expander/gate to fade out the tail of your snare. Go for a fast attack with a fast or medium release and set the threshold high enough to eliminate as much ‘tail’ as needed.
Is the tail of your snare too short? Like in the previous tip, instantiate an expander, but this time duplicate your snare track and put the expander on this new (parallel track). Set the expander as follows: slow attack, fast release, threshold low enough to where even the quietest signal triggers the gate to open. The slow attack will hide the attack of the snare, but then the body of the snare will be heard. Play this track along with the original snare track.
Toms
When it comes to toms, they’re somewhere in-between a kick and a snare drum, so you can easily adapt the above tips to your tom tracks. In aggressive genres, such as rock and nu-metal, using heavy compression settings can thicken your toms a whole lot.
Overhead microphones
Overheads can take a special compressor or really carefully adjusted settings to get the compression just right. For instance, compression that releases too fast may make your cymbals distort. For many mixers, a FET compressor provides the fast attack needed for drum control, while a Tube compressor, like the Manley Variable-Mu®, can add color and depth without messing up any clean transients.
If there is too much snare drum in the overheads, here’s what you can do: Open a sidechain compressor on your overhead track and use the snare track to trigger the compressor that affects the overheads. (See the sidechain compression explanation in this other post). Use fast enough attack and release settings so that the snare track brings down the snare in the overheads. Make sure the compressor fully releases the overheads as soon as the snare’s attack is finished. This way you’ll have less snare in the overheads, without bringing up the hi-hat.
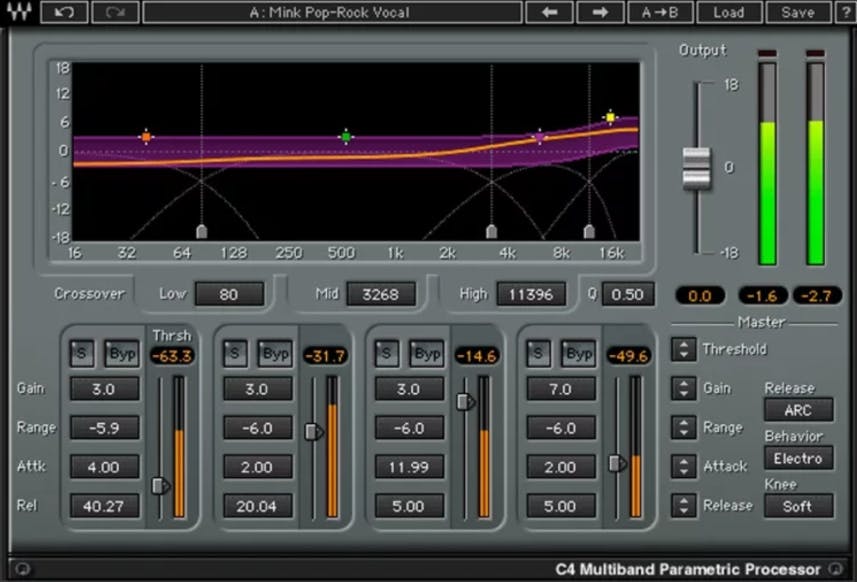
Sometimes, the drummer nails the kick while only feathering the snare drum. To level out this type of playing style, consider using a multiband compressor on your overheads. Set the crossover points to where one band only affects the kick and one band mainly affects the snare. Try to leave the cymbals and hi-hat untouched. Izotope’s Neutron 3 Compressor makes this type of compression easy. Press the Learn button, play the drum track, and Neutron 3 will automatically set the crossover points for you. Multiband compressors have attack, release and ratio controls for each band, so once the crossover points have been set, go ahead and tweak the kick and snare bands until the drum set sounds more balanced.
Room microphones
Room microphones can be used as the connective tissue or the glue of a drum kit. This approach to using the room microphones greatly benefits from a pretty serious amount of compression—anywhere between 6-10dB of gain reduction. In most modern productions, room sounds are heavily compressed, which thickens the overall drum sound. Most mixers go for more than 10dB in order to achieve this effect.
Your aim is to increase the size of the room sound, so use a slow enough attack time so that the transients are unaffected by the compressor and have the release set timed to the track. Set the ratio at around 6:1. If you want the room tone or natural reverb to be emphasized more, use a faster release time.
If the drums have been recorded in a bad-sounding space, with unpleasant sounding reflections and a low ceiling, you might have a problem. One way to mitigate a bad sounding drum room is to set the attack time fast enough to cut the transient. Then make sure the release time is long enough that the ambience isn’t exaggerated. The next step is to bring the compressed room tracks up under the other drum tracks just enough so you feel them, without necessarily hearing their awfulness.
Serial Compression
“Serial compression” is a fancy way of saying “more than one compressor in your signal chain, one feeding into the next.” Say you’re compressing your kick drum, then the drum buss, followed by compressing the all-instrument buss. Lastly, you add a bit of compression on your mix buss to glue everything together. By the time you’re done with your mix, you will have compressed your kick drum at least 4 times.
Alternatively, you may want to put more than one compressor on an individual track. One advantage of using multiple compressors on a single track is to apply only a slight bit of compression with each compressor. The end result of serial compression can wind up being more transparent than if you simply used one compressor and worked it too hard.
There are (almost) no rules when it comes to great-sounding music, but there are some important guidelines when it comes to the order of your serial compressors:
- faster compressors go before slower compressors
- higher ratio compressors go before lower ratio compressors
The reasoning behind the above is this: the faster, more aggressive compressor will shave off some of the initial transients, making each hit more consistent. The more even sound is then fed into the slower compressor, where you can bring back some of the initial attack, but more consistent than before.
Parallel Compression
Parallel Compression is a trick that mixing engineers have been using since the 1970s. It’s used to greatly increase the punchiness or attack of a track while keeping it sounding natural.
How do you know you’ve chosen the right compressor settings? The key to this is knowing what you’re trying to achieve. Once you know that, you’ll be able to decide whether the compressor settings are right or not.
Thick Drums
To add density and power to an entire drum mix, make a copy of your drum buss and put a compressor on the parallel copy. Set your attack to be as fast as possible a threshold where the drums are constantly being compressed and set the release fast enough where the compressor releases before the next and allows in some of the drum’s ambience to fill out the sound.
A gentle ratio, such as 2:1 will sound more natural but still very intense since the threshold is so low. Higher ratios give you a more distorted/crumbly sound. As the ratio gets higher, the compressor will start introducing pumping artifacts, culminating with it distorting.
Hard-Hitting Drums
To get a forward-sounding drum track, again make a copy of your drum buss and put a compressor on the parallel copy. Begin with a 2:1 ratio, but even lower ratios can still be very effective. Set the release to be slow enough so that the room noise isn’t brought up. Any “air” noises are undesirable as well. Your gain reduction meter should show a number as close to 0 as possible during the later part of the sustain of the sound.
Urban Bottom
808-style kicks usually have a lot of low end, which sounds much better when controlled. To achieve control without taking away the power of the 808 sound, apply some parallel compression, with fast attack and release. Watch out for distortion if your release becomes too fast.
Rock Punch
Rock snares sometimes need an exaggerated “pop” to the transient. Really compression on the parallel track (fast attack, slow release, medium ratio) can add a certain impact to an otherwise fat snare.
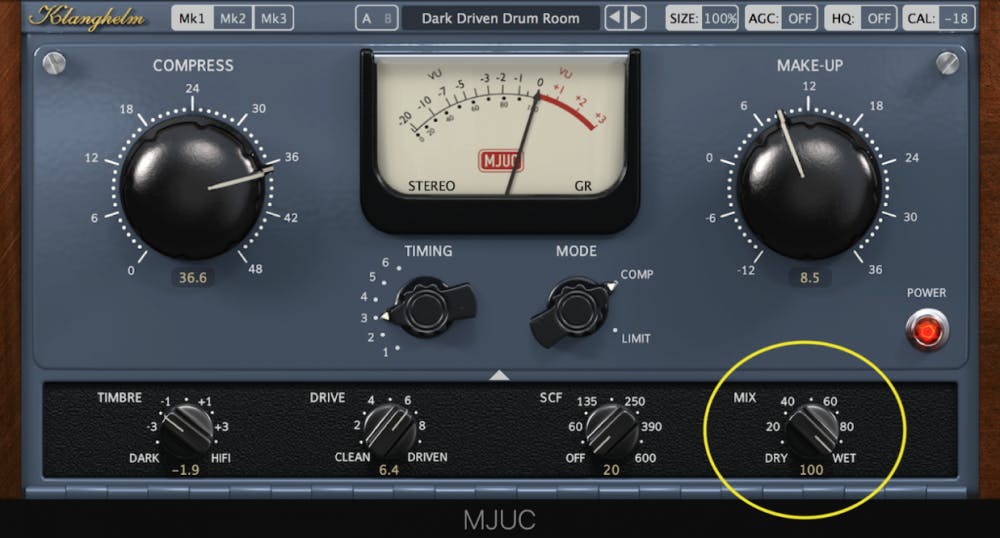
Note: a great feature that many plugin compressors have is the dry/wet (or mix) knob. They allow you to apply parallel compression without having to duplicate tracks. Bear in mind, though, that the compressed signal will most likely not sound good when listened to by itself.
New York-Style Compression
This type of parallel compression was developed in New York City and used by every mixer that worked in the city. The name was coined by engineer/author Bobby Owsinski in his book The Mixing Engineer’s Handbook. The following steps will help you get a bigger, more controlled-sounding rhythm section, without it sounding overcompressed.
What you want to do is this:
- Route the drums (and often also the bass) to a buss with a stereo compressor inserted. This buss will play along with your current drum buss, hence parallel.
- Adjust the threshold until you’re getting 10dB (or more if it sounds good) of gain reduction
- This is optional but worth doing: add some high end and low end to the compressed signal. Go for 6-10dB at 10kHz and 6-10dB at 100hz.
- Bring up the level of the processed buss right to where you can barely hear it.
- Many mixers like to pan this parallel buss in to make it mono. This will have the effect of centering punch of the drums while keeping a wide stereo feeling. Try it both ways.
Conclusion
Compressing your drums is definitely a fun activity, but don’t get lost in the weeds. The end goal should always be the overall feel of the song you’re mixing. If you’re working on a jazz tune, you probably shouldn’t over-process the drums until they sound like cannons. Similarly, if you’re working on a Muse-inspired track, one mustn’t have wimpy drums.
The topic of compressing drums is very diverse and very hard to cover in-depth in an article.
Feel free to post questions in the comments below this article and start a conversation.