
Mixing is about efficiency. As mixers, we are constantly drifting between right-brain (creativity) and left-brain (technical/analytical) activities. We should try to maximize our creative focus and activities by minimizing our technical load. A little forethought and planning go a long way to freeing our mind from distracting technical issues that inevitably arise during complex mixes. Effectively using subgroups and the main mix bus provides a lot of flexibility as we get into our mix and starting out with an appropriate bus strategy will keep the workflow moving forward. Stopping a mix to change routing or the entire gain structure of a mix can really break the creative momentum.
Reasons for mix groups
- Mixing with a single stereo mix bus may cause loud instruments, like the lead vocal or kick drum, to adversely affect the overall mix bus processing
- Subgrouping allows for processing groups of similar instruments (drums, keyboards, vocals, etc.) with plugins or even analog processors.
- Proper use of subgroup and master faders facilitates maintaining proper gain structure throughout the mixing process.
- Groups allow for easy parallel mixing techniques (usually for adding either punch or dirt to an instrumental group)
- Subgroups simplify printing stems after a mix is finished.
- Clever routing can provide separate monitor paths for reference tracks and the mix.
- The mix bus lets us monitor the mix with meters and analyzers and even check for mono compatibility.
Mix Bus or Subgroup Bus
Personal style dictates how you will set up the bussing for a given mix. A simple vocal and guitar session that contains just a few audio and effects tracks probably needs only one stereo mix bus.
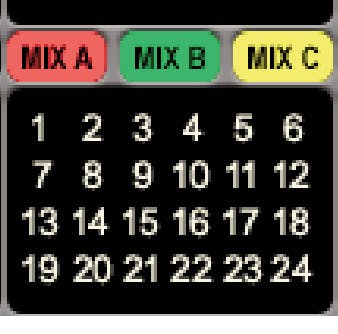
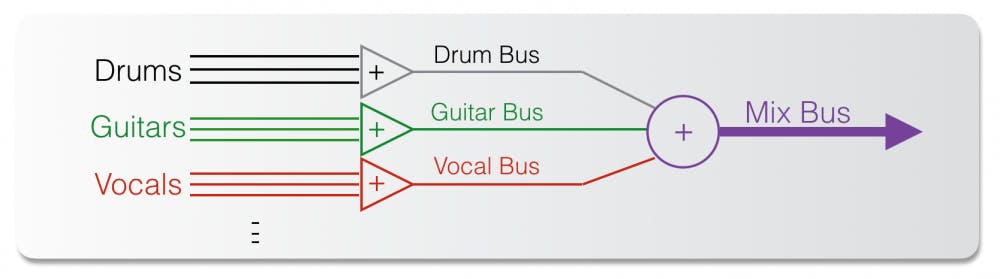
A 100-track pop production that contains countess drum, keyboard, guitar, vocal, and effect tracks may require multiple subgroup busses with some processing before summing into the stereo mix bus. For our purposes, subgroups and busses are synonymous—the stereo mix bus is just the main mix subgroup!
Some mixers, like Michael Brauer, organize instruments into subgroups based on energy or function. Low-end instruments, lead instruments, percussive instruments, energetic instruments, smooth instruments may each be blended for specific signal processing. Other mixers prefer to bus each instrument section to a bus, like a drum bus, keyboard bus, acoustic guitar bus, lead vocal bus, etc. Top-down mixing is another specific style of subgrouping and utilizing mix bus processing that we covered in another blog post.
These techniques or any variations you can imagine are perfectly valid, as long as the strategy makes sense to you and allows you the freedom to experiment and achieve your goals. Choose a method that makes sense and keep refining your system over each consecutive mix.
Technical Considerations to Bussing
Each DAW works differently, so you need to learn about your particular DAW, but I’ll explain how Pro Tools utilizes Aux faders versus Master faders to control busses. Pro Tools allows both Aux faders and Master faders to control any bus and multiple Aux and Master faders may be used in a given session. Each type of bus fader has certain benefits and limitations that help you decide which one is appropriate for a given purpose.

The Aux bus channel has an input, output, insert slots, and send assignments. Any signal routed into an Aux channel can be processed via the Aux’s inserts and sent on to somewhere else, like the mix bus or a physical output. If an Aux channel is overloading, the individual instruments feeding into the Aux must be lowered to avoid clipping the Aux input. Aux channel inserts are pre-fader and the sends can be set to pre- or post-fader. Both the input and output of an Aux channel can be internal busses or physical inputs/outputs to/from the audio interface.

A Master fader also controls a mix bus, which can be a subgroup bus or a physical output from the audio interface. Master faders don’t need an input and an output, just an assignment to the bus they control. Master fader inserts are post-fader and there are no sends on a Master fader. Unlike an Aux channel, if you overload a Master fader, simply lowering the Master fader effectively increases your headroom and removes any clipping.
In Pro Tools, if you create a Master fader set to Bus 1-2 and also an Aux fader with its input set to Bus 1-2, the Master fader affects the subgroup signal before it hits the Aux fader. So, Master faders work well when you know you may need to adjust your gain structure without having to rebalance dozens of audio tracks.
Mix Bus Processing
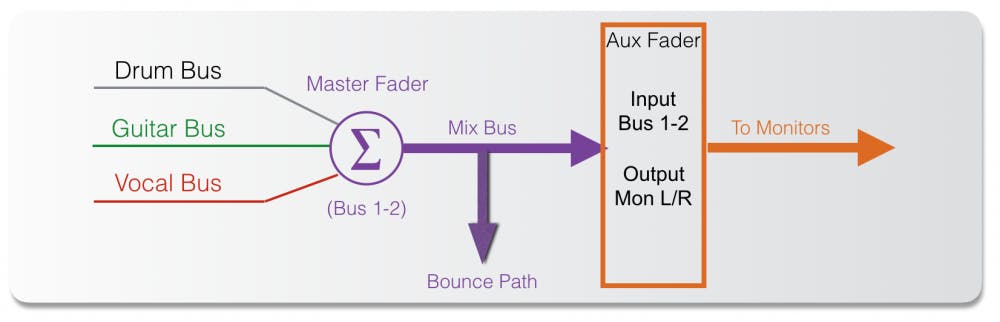
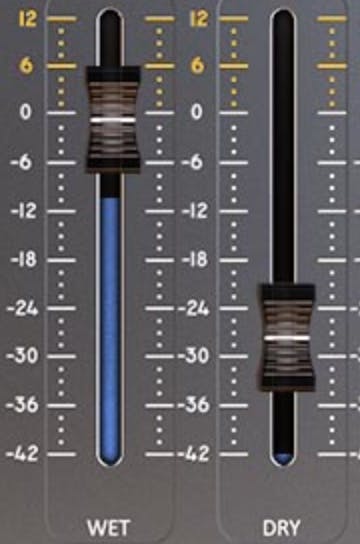
The mix bus is our final stereo mix path and everything we want to hear winds up there. The Mix bus is the source that we bounce or print from and also what we monitor while mixing. Any compression, EQ, saturation, or stereo image processing can be applied to individual subgroups and also to the stereo mix bus. In Pro Tools, the Mix bus can be controlled by either a Master fader or an Aux fader.
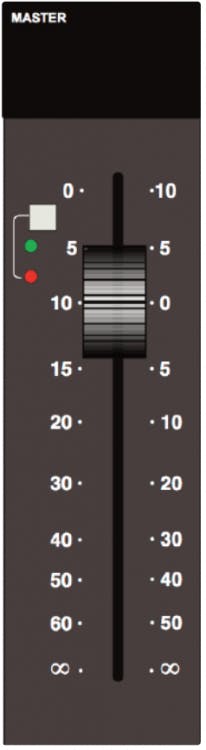
If your mix bus uses a Master fader, the fader controls the headroom of your mix bus, meaning if you start to overload your mix bus, you can simply lower the Master fader and you will regain your headroom. This doesn’t sacrifice quality in any way and it may just save your butt from time to time. The Master fader adjusts the mix level before the plugins, so you can control the level, or “drive,” into your bus processing. I often automate the Master fader level to hit the mix bus processing a little harder (by just 0.5 to 1dB) during the choruses to provide an extra sense of energy during the hooks.
Since the fader is before the plugins, fading out the mix on a master fader may cause the mix bus compressor to “let go” of the mix and you may hear the level of the mix change in a strange way as the fade begins. In practice, this is not usually an audible problem, but you may want to wait until mastering to create the fade-out for your mix.
If your mix bus uses an Aux fader, you can only control the level of your mix bus by adjusting all your individual tracks. The fader on an Aux track is post-processors, so your compression won’t change if you adjust your Aux fader level, such as during a fade-out.
In Pro Tools, I use a Master fader to process my mix bus (usually Bus 1-2 renamed to MIX) but since the Master fader is processing a bus and not a physical output, I can’t yet hear the MIX bus. So I need to set up the Master fader and also an Aux fader with its input set to MIX (Bus 1-2) and its output set to Mon L-R. As on an analog console, the Master fader controls my main mix bus and the Aux fader becomes my monitor volume control.
Subgroups, Parallel Processing, and Stems
Let’s say we decide to put all of our drums and percussion tracks into a subgroup so that we can add compression and EQ to that group. We would use an Aux track with Bus 3-4 as its input, route all of our drum tracks to Bus 3-4, and set the output of the Aux track to our Mix bus. The process would be repeated for any other instruments we decide to subgroup. Certain individual tracks, like reverbs or delays, may simply be routed directly to the stereo Mix bus.
If you decide you would like to add parallel processing to your drum subgroup for a bit of dirt or saturation, you could simply duplicate the drum Aux channel. This new channel will have the same input and output assignments as your main drum Aux and you can apply some saturation to that parallel bus and mix it against the main drum Aux. Any subgroup can be duplicated for an instant parallel processing chain.
As mentioned earlier, if you know you will need to print stems at the end of a mix session, subgrouping instruments during the mix may simplify setting up for printing, since you can just create new audio tracks and set their inputs to receive each subgroup bus—drums, bass, keyboards, etc. This way, you can print all of your stems in one record pass. Additionally, you could create an “instrumental” subgroup and an “all-vocal” subgroup to facilitate printing a full mix, instrumental, and acapella all at the same time.
Bussing Reference Tracks
I import the artist’s rough mix as well as a few reference tracks into every mix session, and when I listen to those tracks, I need to make sure I hear them without any of my mix bus processing. I need to route the reference tracks to my monitor output, but not through my mix bus. Each DAW is slightly different, but here is my workflow in Pro Tools. Remember that I have a Master fader on my mix bus (Bus 1-2) and an Aux fader that routes that mix bus to my monitor outputs, Mon L/R.
Any reference track is routed directly to the Mon L/R outputs so it goes directly to my monitors, but not through the mix bus. This way, I can A/B between my mix and the reference mix just by soloing the reference track. Further, if I choose to use the Sonarworks Reference plugin (instead of Sonarworks Systemwide) on my monitor fader, these plugins do not affect my MIX bus. They only affect my monitor bus. When I bounce or print my mix, I set the bounce source as the mix bus, not the Mon L/R output! Flexibility is key to an effective mixing and monitoring workflow.
Meters and Analyzers
Where should metering plugins go? I usually place my metering plugins on my monitor fader (the Aux fader) and not on my Master fader. The meters go after all of my mix processing and before my monitor volume control, so they accurately display information about my mix. Meter plugins could be inserted as the last plugins on your master fader, but placing them on my monitor (Aux) fader keeps things a bit more tidy and organized.
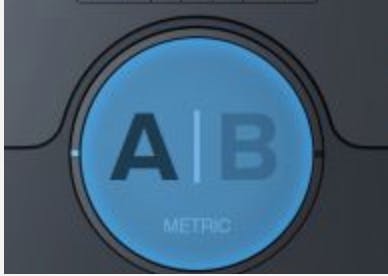
I usually include a LUFS meter, a spectrum analyzer, and maybe Meterplugs’ Loudness Penalty plugin. You may also choose to include a reference track plugin utility, like ADPTR’s MetricAB or Mastering the Mix’s Reference plugin. (See this post for more about reference track utility plugins and this post for specifics about metering.)
Along with metering and analyzers, you may wish to include a plugin that auditions your mix in mono for checking mono compatibility or simply starting your mix in mono. Your DAW may provide a utility for converting your output to mono, or you may use one of many plugins that folds the stereo mix to mono. For free, try the bx_Solo from Brainworx or Maat Digital’s 2busControl.
Analog Summing or Mix Bus Processing
We often want to include the coloration of real analog processing or analog summing to our in-the-box mix and you might want to plan for that as you set up your initial subgroup bussing. If you desire only stereo mix bus processing, you can simply insert an analog processor on your DAW’s master fader, if your DAW allows that. Otherwise, you may need to route the mix bus to a stereo output of your interface, patch into an analog processor, and return the signal to a new aux input or audio track in your DAW (with input monitor engaged).
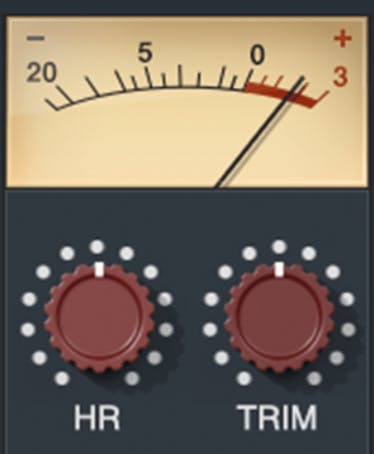
Keep in mind that most analog gear works best with a signal level around +4dBu (0VU), which correlates to an average digital level around -18 dBFS in your DAW. If your master fader is showing average levels above -18 dBFS and peaks above -5 dBFS, you may want to add a trim plugin before your analog insert or reduce the DAW fader that feeds your analog gear. You can always bring up the level with plugins after you return the signal back to your DAW.
If you wish to add an analog summing mixer into your workflow, you can simply assign each of your DAW subgroups to analog outputs of your interface. Your routing will vary depending on how many channels you are able to sum. For eight-channel summing, I would recommend drums and bass (1-2), guitars (3-4), keys (5-6), and vocals (7-8). Your reverbs and effects can go wherever makes sense to you. For 16-channel summing, you can split out the subgroups as you see fit. Then return the summing mixer’s stereo output into an aux input that feeds your mix bus in a way that prevents any sort of feedback loop.
Routing to Multiple Monitors or Headphones
You may wish to switch between different sets of monitors or headphones while mixing and you can accomplish this from inside your DAW, even without a dedicated monitor controller. Additionally, switching via your DAW allows you to apply different Sonarworks Reference settings to each monitor/headphone output.
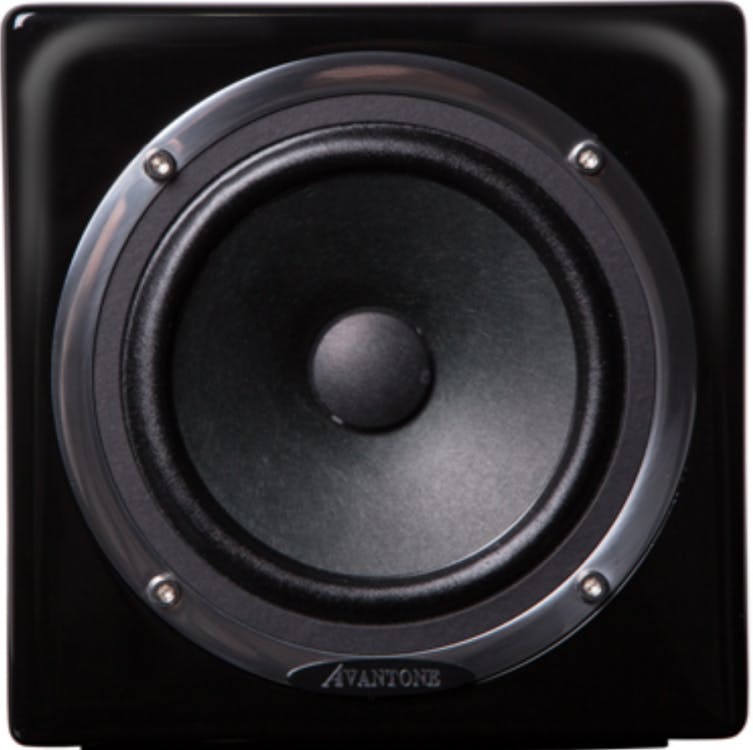
For this, simply create two or more monitor faders (Aux channels in Pro Tools). Each Aux fader will have its input set to the MIX bus and its output set to a stereo monitor output of your interface. For instance, output 1-2 could go to your main speakers, 3-4 to your Mixcubes, and 5-6 to your headphone amp. This setup allows for one Sonarworks Reference plugin on each Aux channel and individual faders for volume control of each monitor path.
Setting Default Routing Preferences
In each DAW, you should be able to set a preference to assign newly created channels to a specific bus or output. In Pro Tool I/O setup, you can assign a “Default Output” bus for new tracks and set them to Bus 1-2, the MIX bus. Each DAW also allows you to rename your busses and you should do this to help keep things organized. As you develop more complex routing strategies, update your templates to reflect your new routing options and start new mixes from the template that is appropriate to your workflow for that project. Alternatively, you can simply import tracks from sessions that are similar to your current project and work from there.
Subgrouping and bus processing may seem confusing at first, but the sooner you start to use subgroups, the sooner you will discover a new world of mixing possibilities.


