
Ages ago, when digital audio starting gaining some steam, detractors complained that it sounded sterile and/or harsh. In many cases they were right.
Analog equipment, like tube and transformer-based preamps and consoles, typically improve sound on its way to tape. Also, the tape itself helps tame transients and sibilance, smoothing harsh frequencies and softening transients.
On the other hand, analog to digital converters and digital recorders faithfully record and reproduce whatever you put a mic in front of, with very little change in sonic color. So for engineers with an established analog signal chain, recording to digital formats meant that if your signals contain a lot of harsh frequencies the audio would be recorded and reproduced in its full splendor, including any and all harshness. Bright mics and gentle sibilance that sounded reasonable on tape didn’t sound so good on digital recordings.
Over the past two decades, digital converters have improved and we have re-thought our signal path choices to record audio that retains the warmth and naturalness of the original signal. Lately, though, there has been an explosion of inexpensive microphones and affordable recreations of vintage gear that allow us all to purchase a variety of recording tools.
Unfortunately, sonic contributions of inexpensive gear often include harshness in the high frequencies due to cheap capacitors and poor headroom as well as a lack of the good kind of harmonic enhancement due to transformerless designs and, again, poor headroom. Simply compare almost any of the inexpensive modern U87 “clones” to a 1970s Neumann U87 and you will quickly understand that the 10% advantage in audio quality of the real U87 is well worth the extra zero in the price tag. Like everything, the last 10% of audio quality is hard (and expensive) to achieve.
Thankfully, plugins provide tools we can use to help tame any harshness: de-essers, dynamic EQs, automatic resonance removal software, and even some saturation plugins. The latter type of processor can be used to soften harsh transients and achieve that sought-after “analog sound.”
Before we move on, one word of advice. While mixing and mastering, avoid listening to boosted or soloed harsh frequencies for longer than a few seconds at a time, especially if you’re using headphones. These frequencies fatigue your ears unbelievably quickly, making it much harder to trust what you hear without frequent breaks to reset your hearing.
I. EQ
It’s a known fact that there is a reciprocal relationship between the perception of low and high frequencies. While it may seem obvious at first to simply raise frequencies that seem shy or lower frequencies that seem to loud, performing the reciprocal movement will sometimes create a more pleasant and natural tilt. For instance, dip the lows and the whole song will sound brighter. The opposite stands true as well: if the song sounds harsh you may lower the highs, but also try boosting the low mids a bit.
Use a medium-to-wide Q and take care so sure you don’t introduce any boxiness. This technique works best on acoustic genres such as jazz, folk or classical.
II. Dynamic EQs
Dynamic EQs behave somewhere in-between an EQ and a compressor.
Dynamic EQs works only when the level of a chosen frequency crosses above or below a user-defined threshold. Let’s say a singer sounds great across a whole song, but whenever she belts, her voice becomes a bit harsh. We could apply a normal EQ to dip the harsh frequencies, but that would result in the voice sounding a bit dull when she’s not belting. Alternatively, we could manually automate the EQ as needed, but that’d be a waste of time. The dynamic equalizer automatically boosts or cuts a specific frequency band to maintain a consistent frequency balance.
Instead, we can:
- Open a dynamic EQ.
- Set a cut at the offending frequency (let’s say 6kHz), with a medium Q.
- Set the attack just slow enough to let the transients pass. Use a fast/medium-fast release so that the processor recovers quickly.
- Set the threshold so that the EQ only works when it’s supposed to.
- Use a high enough ratio to fix the problem, but low enough for it to be as transparent as it can. This tip applies only if your plugin of choice has a ratio control.
One of my favorite dynamics EQs is the TDR Nova—and it’s free! They do have a more advanced version that you have to pay for, but it’s totally worth it. I suggest you try the mid-side mode by selecting “sum or diff” instead of “stereo” at the top of the toolbar. Sum is mid, or mono information, diff is the side, or stereo, information.
The idea with mid-side is to process the offending sound (the vocal in the mid signal) without affecting the other sounds, like the keyboards and drum overheads in the side signal.
III. De-Essers
De-Essers are made to deal with harsh high frequencies. They perform a dynamic process, making them great for dealing with harsh cymbals, vocals or guitars in a mix without making the whole mix dull.
First, try to use the de-esser in split-band mode. Listen to the sidechain monitor and adjust the frequency parameter to find the eyebrow-burning frequencies. Then, tweak the controls of the plugin until the harshness is gone. One of the most important features for a de-esser to have is the ‘delta’ or “audition” button. This lets you hear what part of the audio signal the plugin is removing, so you don’t affect parts of the sound you don’t want to affect.
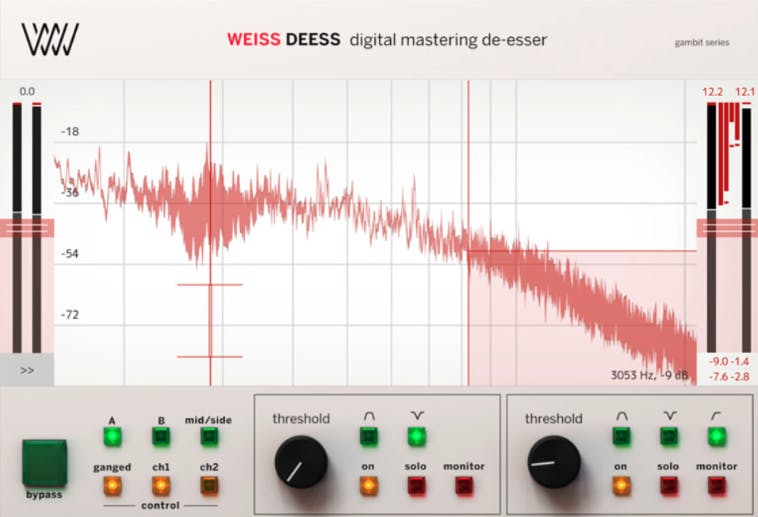
I heartily recommend Softube’s Weiss Deess and Airwindows’ Debess for use as mastering de-essers. Debess is free since Airwindows is an entirely Patreon-supported business.
I use Airwindows plugins on almost every single mix and master.
IV. Harmonic distortion
Harmonic distortion is a term that’s interchangeably used with saturation. Applied in moderation, this pleasant effect can add depth, richness, and density to the sound. This saturation is what many people refer to as ‘analog sound’. Harmonic distortion rounds off overly strong transients, which contributes to de-harshing a mix.
You can either use a single-band processor or a multiband one to saturate the track you’re working on. Tape-emulation plugins to add this type of saturation and my all-time favorite tape emulation plugin is Softube’s Tape.
To reduce harshness using a tape emulator, turn the “amount” knob high enough until you hear the high frequencies get smoother. Try different tape types, which change the frequency response of the plugin, as well as the characteristics of the harmonic distortion. One type might work better for your needs than another.
Fun tape tip: The “Crosstalk” effect, if used in moderation, can bring a lot of focus to your low end.
A surgical, much more precise way of using harmonic distortion involves a few steps:
- Reduce the harsh frequencies with a transparent, surgical EQ. The result should be a boring, dull-sounding track.
- Use a harmonic distortion plugin on the low mids via a multiband exciter.
- Focus on the frequency range where 3rd-order harmonics will positively affect the area you reduced in the first step.
- After this, duplicate the EQ instance you used in the first step and invert the cut into a boost.
The end result should be something that sounds just like the original signal but without the harshness.
Some of my favorite multiband harmonic distortion plugins are Izotope’s Ozone 9 Exciter and Wavefactory’s Spectre.
V. Specialized plugins
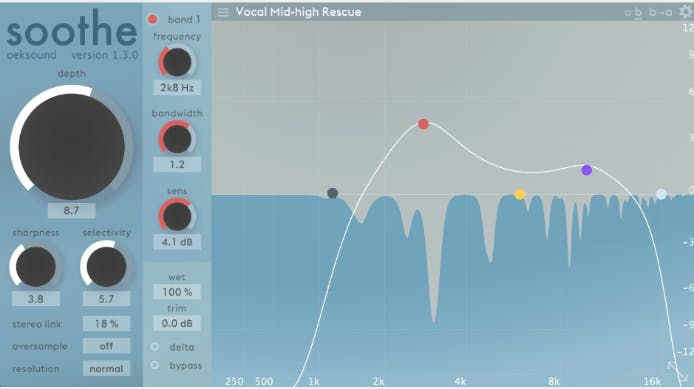
Specialized plugins are generally the way to go; they’re tailor-made to deal with harshness in sounds. Oeksound’s Soothe is the best-known modern de-harshing tool. The OD DeEdger is a solid offering from TokyoDawn, a company I’ve already mentioned. iZotope’s Ozone Advanced contains the Spectral Shaper module. Brainworx’ Refinement is the first plugin specifically designed to reduce harshness.
Soothe is a deep plugin, offering a lot of customization, whereas DeEdger is similar in ease-of-use to Waves’ OneKnob series. Spectral Shaper and Refinement are somewhere in between.
Soothe is a unique dynamic EQ. It has intelligent self-adjusting frequency bands that analyze the audio in real-time, changing the frequency of the EQ according to the input signal. This saves you from having to manually cut problem frequencies, such as sibilance.
The reduction is only active when and where it’s needed. Soothe uses very tight notches, so it doesn’t affect neighboring frequency areas.
Say the cymbals are so bright you can light a match just by placing it in front of your speakers. Slap Soothe on the track, and you’re probably instantly good-to-go. If not, grab one of the nodes, move it around until you hear the cymbals become tamed. Soothe also has a delta button, allowing you to solo the processed signal and tweak the plugin so that it only affects the nasty frequencies.
DeEdger lets you choose the frequency you want to focus on, as well as the bandwidth and the ‘depth’ of the effect. The plugin also has a ‘compensate’ button, which keeps the perceived loudness of the processed signal similar to the unprocessed one. ‘Focus listen’ has the same effect as the delta control mentioned earlier.
DeEdger seems to be the most gentle of the four processors I’ve mentioned when it comes to the intensity of the processing.
iZotope’s Spectral Shaper is a multiband compressor which has 72 bands spaced in a way that approximates how we perceive frequency bands. This processor also has a Tone slider which lets you vary the noise profile from bright to dark. What you’re trying to do with this plugin is smooth the harsh frequencies when they poke through, by using appropriate attack and release settings and low ratios that keep the process as invisible as possible.
Brainworx calls their Refinement plugin a “dynamic peak band EQ”. Its controls revolve around the big “Damping” knob. Turn the knob and decide whether you like the sound. The “soft” and “hard” options control the shape of the EQ filters. The plugin also features the all-important “solo filter” button. If sounds lack presence, turn the “Presence” knob to reintroduce some sparkle. If you want to add some saturation to make the sound warmer, use the like-named knob.
Final Words
Sometimes, you’ll need to use such aggressive settings with these de-harshing processors that they can make your song sound a bit dull. To fix this, use a plugin like the Maag Audio EQ2 to add some air really high up, at 20 or 40kHz. This will bring back some shine to the top end, between 8 and 12kHz. Alternative EQ choices are Eiosis’ AirEq, with the “Air” band engaged, and the Kush Clariphonic Parallel Equalizer. If you prefer standard EQ plugins, be sure to try using a dB or two of Baxandall-shape boost on the top end and push your frequency point up to 20kHz or higher. Often, you will find that cutting a harsh region, like 2.5kHz to 3.5kHz on a lead vocal and then slightly boosting just above that range, like 6kHz to 8kHz, will add back the shine so that the cut doesn’t result in a dull tone. Using these techniques, you’ll find satisfaction in creating bright, open but not harsh mixes!
Frequency Detective:
Some of my favorite EQs have a feature that many engineers are unaware of or simply overlook. When looking for a specific tonal issue, like say a high-frequency ring in a vocal mic, you may reach for the gain knob, crank it up and sweep around to find the frequency that jumps out. That certainly works, but it also wreaks havoc on your hearing and sounds quite ugly. A more civil alternative is to solo the high-mid band, which only lets you hear the information in that frequency range and then sweep around to highlight the offending frequency.
Not every EQ provides a solo function, but look for the ones that do and you’ll soon realize the importance of this feature. Here are some of my go-to EQs with solo functions:
Avid EQ3 7-band (stock) plugin. Press shift+ctl and sweep a frequency knob to solo that band. The band will solo with the Q that is currently set.
Izotope Ozone EQ. Hold the Option (alt) key and click the cursor in the spectrum display to solo the frequencies around the cursor. The Q of the solo band is set in the options.
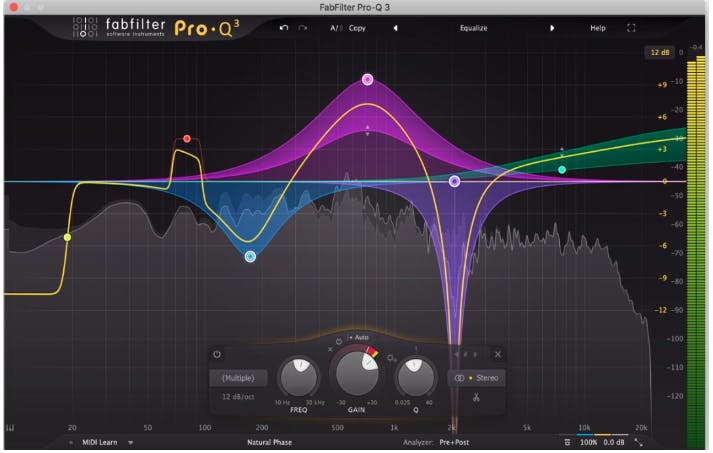
Fabfilter Pro-Q3. When you mouse over a EQ point, the parameters for that band pop up and if you click on the headphone icon, that band will solo. You can then sweep the frequency and raise or lower the gain while soloed. Band-pass filters solo the frequencies that are cut by the filter, which makes more sense when setting the EQ.
Voxengo Span. While not an EQ, this free analyzer provides a solo function where you simply hold commannd while dragging in the spectrum display to solo frequency bands.


