Compression is a key ingredient of mastering and everybody knows it. I’m gonna go out on a limb and say that dynamic control is not the key to a great master and that much of the time I try to avoid using compression when I master modern music. There are, of course, times where compression provides the missing element to a master and times where it subtly enhances a master, but often dynamic compression is not really necessary. That said, I love compressors and I almost always try one.
Compression can benefit a master in the following ways:
- Compression reduces the overall dynamic range, which can enhance the detail, density, and clarity of a mix.
- Compression changes the tone a mix both through the type of circuitry and its dynamic control processing.
- Compression can change the groove or sense of motion in a mix to make it pump, feel more relaxed, or even add some edge and excitement.
Compression can hurt a master in the following ways:
- Compression reduces the overall dynamic range, which can take away the energy, punch, and the sense of power or natural life in a song, especially drum-heavy music.
- Compression changes the tone a mix both through the type of circuitry and the dynamic control process. This can be distracting.
- Compression can change the groove or sense of motion in a mix to make it pump, feel more relaxed, or even add some edge and excitement. This can change the intent of the original mix.
If you think I made a mistake by writing the same list twice, think again. The changes that help one project will hurt another and anything that enhances a mix, if pushed too far, will ultimately hurt the same mix. It’s up to you to decide if your master needs compression, but let’s look at some typical mastering compressors and see how they may be used to enhance your masters. In this article, I’m going to stick to single-band compression and in a future article, I’ll tackle multiband compression and more advanced techniques like mid-side compression.
Tone
During my first listen to a song that I’m going to master, I listen for the overall power or density of the song. Some songs should push hard and create a solid wall of sound. Other songs need space to breathe and let elements float in and out of focus. In both cases, I may feel that adding some harmonic saturation may bring out the size, power, focus of the song. Compressors tend to be some of my favorite harmonic enhancers. I’m not talking about dynamic control here, but actually changing the tone or saturation of the mix.
Many beloved mastering compressors, like the Manley Variable Mu®, Fairchild 670, Shadow Hills Mastering Compressor, and even the LA2 (as modified for Doug Sax at The Mastering Lab) provide harmonic coloration via their transformer and tube circuitry. Anyone who has used the Manley compressor knows that the tone comes from the interplay between the input and output gains, even when the compression meter is moving less than 1dB. The Shadow Hills compressor provides specific colors through its selectable output transformers and the Fairchild also utilizes several tubes and transformers which color the sound. We’ll come back around to this idea of adding tone after we’ve covered some compressor basics ahead.
Dynamics
Let’s say the track we are mastering needs some dynamic control. Maybe the vocal and snare drum occasionally pop out of the mix and the overall track needs to feel more powerful and solid. A mastering compressor will provide the glue needed for the mix to feel finished and homogenous. The general idea is that we want to squish the mix a bit to “glue” it together, but we don’t want to take power away from the bass or drum hits, which may make the song feel weak.
There is a danger to using a compressor for this purpose, and that danger is changing the tone in an unpredictable way. For instance, if a compressor works hard during the loud parts and doesn’t really touch the soft parts, the tone may be noticeably “choked” or just different during the loud parts as compared to the soft parts. How do we fix this? We fix this by properly setting the attack, release, ratio, and threshold.
A Fresh Approach
Forget what you know about compressing a vocal or snare drum and open your mind to what be a new way of thinking about compression for mastering. The goal is to set a compressor so that during the song there is always at least a little gain reduction and never too much gain reduction. Too much gain reduction is up to you, but we typically use less than 4dB and often less than 1dB. This is easily achieved and can provide the transparent glue that you always hoped for from stereo bus compression. This technique will not make your master pump more or add a hard edge, but it will increase the focus, depth, and detail of the mix in a transparent way—most importantly without the distraction of tonal artifacts.
For this type of transparent compression, first set your attack and release so that they don’t get in the way. I find that attacks longer than 50 milliseconds and shorter than 200 milliseconds almost always remain invisible and effective. Start with your attack between 80 – 150ms. The same goes for release, start with 100 – 150ms. Next, set your ratio very low, something between 1.2:1 and 1.5:1. Finally, play the loudest section of a song and lower the threshold to achieve 2 – 3 dB of compression. Now check the soft parts and hopefully you will still have a slight amount of compression happening. If not, see if you can get away with a dB more compression during the loud parts and wind up with a tiny bit of compression during the softer parts. In the quietest parts, you may not have any compression, which is fine.
Boost your makeup gain a couple of dB and compare the compressed signal to the bypassed signal. Hopefully, you find the compressed signal to have a bit more of what you hoped for— more clarity, power, density, and depth. If not, you may not need compression or you may wish to try another compressor. If your drums feel weak, you may want to lengthen the attack time and if your drums feel too aggressive, you may want to shorten the attack time to 30ms or so.
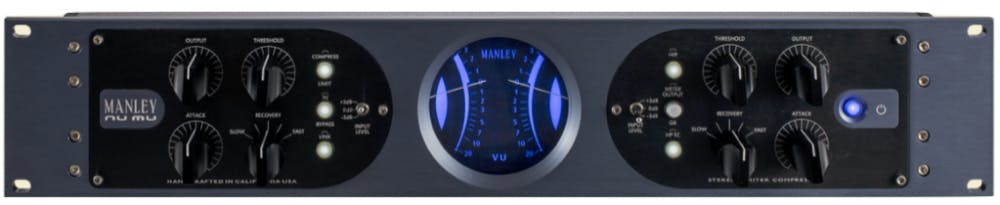
Let’s look at the Manley Nu Mu for a second. The ratio for the compress mode is set to 1.2:1. This ratio will increase automatically as the amount of gain reduction increases, but only up to about 3:1. This low ratio is very forgiving and allows you to utilize the circuitry of the compressor to impart a tonal change that is complementary and consistent between soft and loud sections of the song. The Nu Mu also provides appropriate attack and release times to work as previously described.
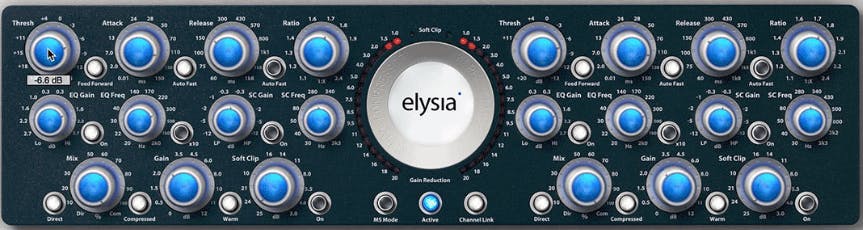
Compressors from Manley, SPL, Shadow Hills, Neve, and Fairchild excel at adding slight harmonic content to your master, which often sounds like 3-dimensional depth or enhanced low-mid clarity. They can also provide transparent dynamic control or a more heavy-handed smackdown type of compression. Truly transparent compression comes from (hardware and software) companies like Elysia, Pendulum Audio, and Weiss. Often these transparent compressors provide some tonal options, like soft-clipping or harmonic saturation.
Break the Rules
You might ask about compressors like the Fairchild 670, SSL Bus Compressor, and Universal 1176 which seem to go against my suggestions for attack times and ratios. I am by no means telling you not to try these compressors. Many successful masters have been processed with these units, but they tend to do a specific thing. Let’s take a look at each of them to see where and why they might be effective for mastering.
The Fairchild is an easy one. It has instant attack times and long release times which are simply presets that you can choose from. Fortunately, the ratio on the 670 starts very low, under 2:1, and gradually increases to limiting as more gain reduction happens. The Fairchild will tame instant peaks and gently glue the track together with very low distortion while providing color from multiple tubes and transformers in the signal path. The Fairchild works well on music that is not bass- or drum-heavy. Its fast attack can kill the power of kick drums and powerful basses and 808s. I’m usually happy with the 670 providing 0.5 – 1 dB of compression on a full mix. Be aware that some of the release times can be well over 10 seconds, so read the manual to learn about its unique time-constants.
The SSL compressor is a little harder to explain. I’ll simply say that it is not the most effective modern mastering compressor. This VCA-based bus compressor works well on the mix bus for top-down rock and country mixing and also as a parallel bus compressor for drums and vocals. The attack times lean fast, which can take the power away from drums and bass, though they work well on guitar and vocal-heavy music. Further, the SSL ratios typically start at 4:1, which is a bit aggressive for transparent mastering. The Alan Smart C2 and Serpent Audio versions of the SSL compressor both provide a low ratio of 1.5:1 and a wider range of attack and release times, making them be more flexible for mastering duties. That said, some people do swear by the SSL and its VCA sheen on stereo masters. Use your ears and listen carefully to make sure you don’t make your drums sound weaker and more distant.
The 1176 is a dangerous beast for mastering duties. The sub-1ms attack times and high ratios can easily kill the transients and power of a full track. Some EDM and dubstep producers like its edgy tone on mix bus and some rock mixers strap a pair of 1176 across a mix bus and put them in bypass. On some units, this bypass trick is accomplished by turning the attack knob completely counter-clockwise until it clicks and on some models, the ratio can be set to 1:1. This setting avoids any compression but still runs the audio through the transformers and amplifier circuits. As with any compressor, the numbers don’t tell the whole story, so be sure to try a bunch of settings to find one that may suit your purpose.
Side-Chain
The bane of stereo bus compressors for mastering has to be the overcompression and pumping caused by loud bass content. Without resorting to multi-band or more complicated processors, many mastering compressors solve this problem by providing a high-pass filter in the sidechain of the compressor. This filter does not directly filter the audio that we hear but forces the compressor’s brain (the sidechain) to ignore the low frequencies. The result is smoother compression for bass-heavy music, like dance and club genres.
Knee Settings
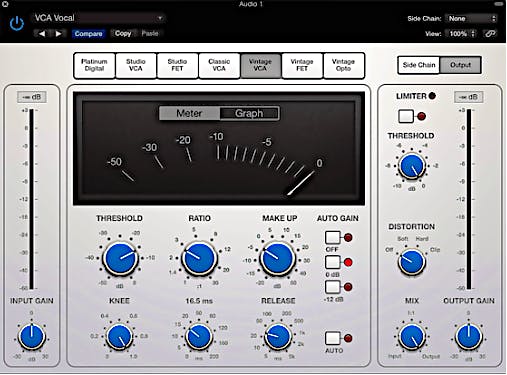
Since you asked, the knee control provides for more or less transparent gain reduction. A soft-knee compressor begins gently compressing a signal several dB below the threshold at a lower ratio than will be reached as the signal crosses the threshold. The knee provides a transition area between the uncompressed signal and the compressed signal. This transition area helps hide the tonal artifacts that compression can impart to a signal. A hard-knee setting does nothing at low levels and then applies full compression when the signal reaches the threshold, which can cause distracting tonal changes. For mastering, I would strongly recommend a soft-knee setting, but feel free to try harder knees if you require a more obvious compression effect.
Where Does it Go?
In a typical mastering chain, the compressor would follow the EQ. Fix your EQ problems, then compress for tone and control. After compressing the mix, you may feel that you’ve lost a bit of the highs or lows, so you may want to add another EQ after the compressor. The hard work of stereo bus compression should have been done during the mix, so be gentle! To create an exaggerated pumping compression effect, you might try adding bass with an EQ before the compressor, which can cause the compressor to pump a bit, and then remove the extra bass with a second EQ after the compressor.
Mastering Compression
With just a stereo bus compressor you can learn the benefits and detriments of compression during mastering. As I said previously, I love compression, but I’m certainly not averse to leaving the compressor out of my mastering chain. I’ll apply dynamic control as needed, but mainly I choose my mastering compressor based on the tonal color I’m trying to impart—the gooey smoothness of a Fairchild or the harmonic depth of the Manley or the edge and control of the API 2500. Often I’ll try more than one compressor until I find the combination of transparent dynamic control and tonal color that I’m after. Pick a few models and master the compressor. Next time we’ll cover multiband and mid-side compression techniques.


