| Note from the editor: In the past, we have published in-depth blogs about specific types of room treatment. In this article, Tiki Horea sums up the basics of optimizing treatment that will keep your bass frequencies clean and tight. – Adam Kagan |
Generally, a poor monitoring setup is the culprit behind you failing to produce goosebumps-inducing mixes. Sometimes it’s your skills, but we won’t be covering that in this article.
Once you properly set up your monitors, you’ll find your work will improve by leaps and bounds. But wait, there’s more!
- You’ll spend a lot less time checking your mixes on other systems
- You’ll trust what comes out of the speakers and stop second-guessing your creative decisions
Before we move on, I want to let you in on a little secret: you can’t get your room to be perfectly “flat”. This is only possible in extreme laboratory conditions like this crazy room at the Microsoft Audio Labs. What’s important for us is to minimize the acoustic peaks and valleys our rooms naturally exhibit.
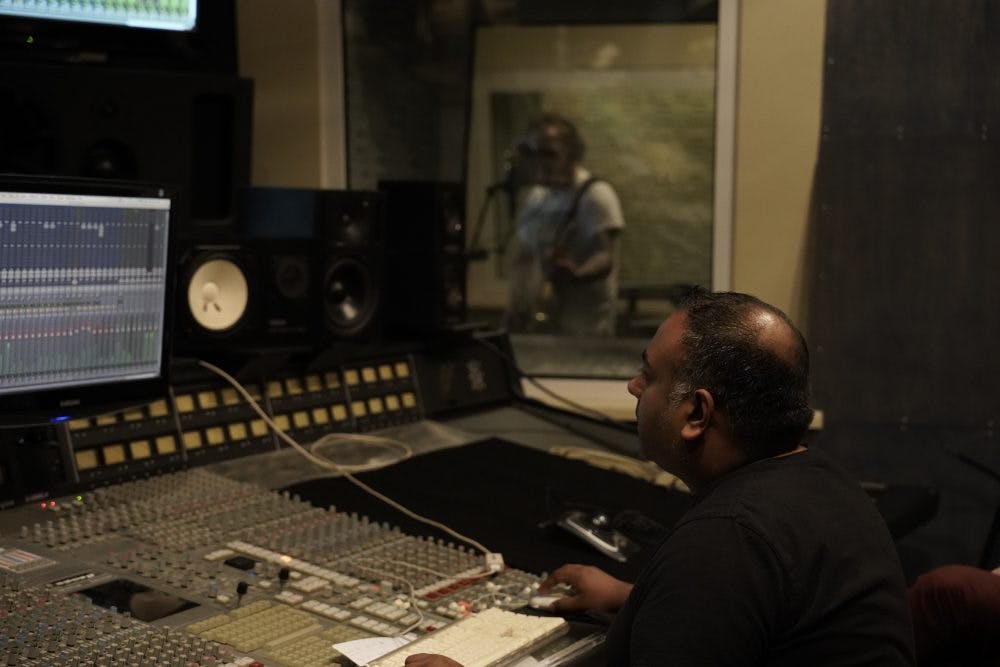
Once you’ve discovered (or admitted) that your listening environment needs improving, the first thing you think of is buying new speakers, right? Or maybe you think about acoustic treatment? However, the first step in your journey to improving your room should be correctly positioning your speakers for your listening position. Acoustic treatment comes later.
Speakers are similar to microphones in that moving your speakers even a couple of inches can drastically change what’s coming out of them.
Here are a few ideas for how to best position your speakers. Make sure you have a tape measure at hand.
1. Have the speakers fire along the length of the room.
This gives the low frequencies more space to develop, which usually leads to a flatter frequency response and less destructive reflections from the rear wall.
2. Place your speakers at an equal distance from the side walls. The same applies to your listening position. Symmetry is important for stereo imaging.
3. Your head and speakers should form an equilateral triangle.
The distance between (just behind) your head and each speaker, and the distance between the speakers themselves should all have to be the same—around 67 inches (108cm) is a good starting point.
4. Some speakers are made to be placed flat, while others are designed to stand up.
You can find the recommended alignment for your monitors in the manual. Be sure to check out our blog post on horizontal vs. vertical speaker placement.
5. Set your speaker height so that the tweeters are at ear level.
High frequencies are directional. This means that if the speakers are lower, higher or at a less-than-ideal angle than your ears, what you’ll hear won’t be accurate. You can use foam wedges to tilt your speakers so the tweeters fire directly at your ears.
6. Place your monitors on stands.
Wedges, isolation pads, and other doodads (including Genelec’s rubbery support) rarely fully decouple the speakers and the desk. This can lead to the desk vibrating at certain frequencies, muddying up what you hear. Stands also allow for easily experimenting with monitor placement.
7. The 38% Rule
In a rectangular room, the ideal place for the listening position is 38% of the distance from the front wall to the back wall. In an ideal world, this location would provide the flattest low-frequency response.
Please bear in mind that points a and g apply to rectangular rooms. If your room is of a different shape, attempt to set up your room as symmetrical as possible. If you have a sofa, make sure it’s centered in the room. If you have a bookcase, try placing it behind the sofa, so it will act as a diffuser. If a window is on the long wall, cover it up with an acoustic panel supported by a stand or hook above the window. Place an identical panel on the wall opposite the window to make the room symmetrical. Don’t forget that the back of a door may be a good spot for an absorber, too. You get the idea.
The distance between the front wall and the speakers also needs to be taken into consideration. Speakers are more omnidirectional at low frequencies, meaning that bass sound waves radiate in all directions. The low-frequency sound waves radiate from your speakers and bounce off the front wall back towards you. When these reflections combine with the direct sound from the speaker, they create acoustic interference, causing nulls or dip in the frequency response. This phenomenon is called speaker-boundary interference response (SBIR).
Place your speakers as close as possible to the front wall.
Flush mounting, or mounting the speaker in soffits inside the front wall, is usually done in higher budget commercial studios. For typical home studios, the next best option is placing your speakers close to the front wall.
As the speakers are placed closer to the wall, the cancellation notch in your frequency response moves higher in the frequency spectrum. This is fantastic news because higher frequencies are more directional, meaning they radiate less energy backward. Also, they are much more easily managed with standard acoustic treatment.
In most cases, a gap of 8 inches (around 20cm) or less between your speakers and the wall is a good starting point to reduce the coloration caused by SBIR. However, it’s best to check your speakers’ specifications for what the manufacturer recommends as the minimum distance. Rear-firing ports may require you to leave a few centimeters of space behind your monitors.
At these close distances, 4-inch thick broadband acoustic panels will help control the cancellation problems. Bear in mind that as the distance between the speaker and the wall increases, the problem frequencies become lower and bass treatment becomes more complicated.
One caveat to placing your speakers close to the front wall is that there will be a bass boost. However, this can easily be fixed by using the Boundary EQ (half-space position) provided by many speakers.
SUBWOOFERS
When it comes to the placement of the subwoofers, there are a few guidelines you should follow. These apply to you if you’re using 1 subwoofer:
- Most subwoofers are designed to sit close to a wall, so you can place it about 1.5 feet (45-46 cm) from the wall. Avoid distances greater than 23.5 inches (60 cm) from the front wall.
- Try placing the sub along an imaginary arc that traces a circle through the front speakers and the sub.
- Due to standing wave issues, move the sub slightly away from the middle axis of the room (slightly off-center).
- Try out “The Crawl” method of placing the subwoofer (explained in the sidebar).
A subwoofer is not for making low frequencies louder, but for extending the low-frequency range of your monitor system. Therefore you want a smooth transition between your subwoofer and your main speakers. Most nearfield monitors start rolling off between 45 and 70 Hz and a sub can extend the bass to 30 Hz or lower.
If you are only mixing music or stereo program material, you can find the proper crossover point by ear or with the aid of an SPL meter. Simply play a scale of bass notes with a clean bass synth patch from C1 (33 Hz) up to A2 (110 Hz) and adjust your crossover point to create most even representation of all the notes. If you find a considerable dip or boost around the crossover point, you can adjust the crossover frequency and try flipping the polarity of the subwoofer to see if the response becomes smoother.
For those who regularly mix or produce surround sound content, like 5.1, 7.1 or ATMOS, the LFE channel subwoofer setup requires very specific consideration and calibration. That setup is beyond the scope of this article, but a good starting point would be the EBU Tech 3343 guidelines, among many other post-production resources.
If you only have one sub, follow these steps:
- Set the volume of the sub to fill out the lowest octaves.
- Adjust the crossover on the sub for a smooth transition between the sub and main.
- Experiment with the phase adjustment on the sub.
If all the steps above fail, re-adjust the sub position and repeat them.
With two subs you have the advantage of placing the subs in an arrangement that excites more room modes and creates a more even bass response than one sub. Setting up two subs, however, increases the complexity of the entire system. Follow the instructions for one sub, but set the two subs symmetrically in the room and be sure to adjust their crossovers, levels, and phase identically to maintain an even response.
The Crawl. One common method for finding an ideal position for a subwoofer in a music or home theater setup is to place the subwoofer in your normal listening position and then crawl around the room to find the location where the sub feels smooth in well-integrated with the main speakers. Now move the sub to this location and you should have an excellent starting point.
BASS TRAPS
Some people seem to be afraid of acoustics. I mean, it is a complex subject, but so is almost everything we deal with. Fortunately, you don’t have to go super deep into acoustics to drastically improve the sound of your studio.
I want to warn you against buying 2 commercially available types of acoustic treatment:
- Triangular foam wedges
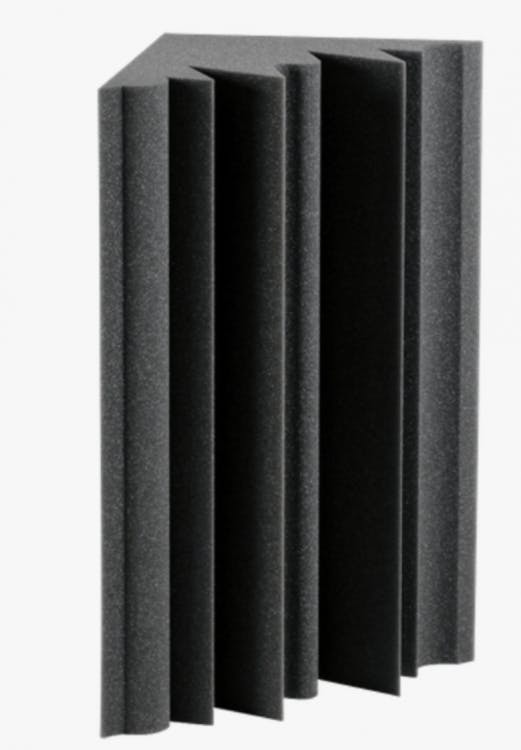
These are not bass traps. They are too shallow to affect low frequencies below about 200 Hz. They do absorb mids and highs, but you’d be using porous absorbers for that anyway.
They don’t offer very good diffusion, either, since diffusion requires solid surfaces to effectively reflect sound waves and these surfaces are porous.
- Eggcrate-shaped foam panels
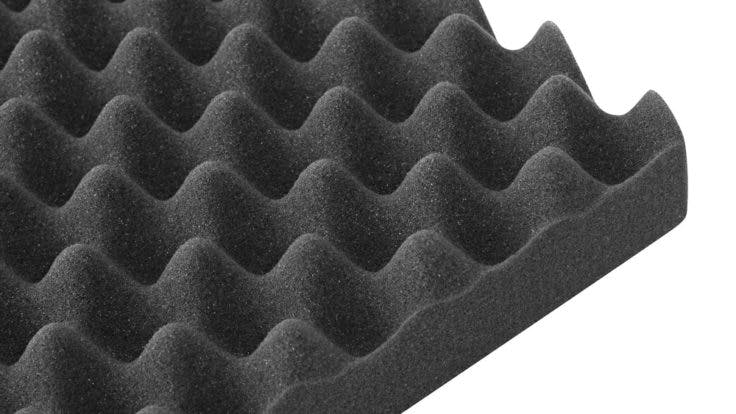
These only absorb high frequencies. They’re not dense enough, nor are they thick enough to be able to absorb low-mid or low frequencies. This means you’ll get rid of some/most of the flutter echo in your room and that’s the extent of what they’ll help you with.
Your best bet is thick broadband absorbers, which start absorbing bass only if they’re at least 6 inches (16cm) thick. For frequencies below 125 Hz, 8 inches or more is required.
There are 4 locations in your room where you want to place broadband absorbers.
Yes, you’re right, the 4 corners. Low frequencies tend to ‘pool’ in the corners of your room, so traps placed in the corners are very efficient and space-saving.
Place the panels 45° diagonally across corners. This will create a deeper trap because air adds to the effectiveness of your treatment.
You should start with the corners closest to your speakers. Following that, add identical panels on the opposite 2 corners.
Important: make sure the air gap is no larger than the depth of the core material. So, if you have 10 inches (25.5cm) of Rockwool in your acoustic panel, the gap between the wall and the panel shouldn’t be larger than 10 inches.
So! You’ve placed your speakers properly, set your sub(s) to work optimally with your speakers, you’ve treated your room (then you played with your monitors’ positions a bit more)…what’s next?
Get Sonarworks’ Reference. Seriously. It’s been one of the best investments I’ve made in my life. Period.
Get the Studio version and you’ll improve the frequency response of your speakers and headphones. You also get Systemwide, which lets you apply the same correction across your whole system, so you can listen to music or watch movies with the same correction as when you mix. This is extremely important because your ears learn how your environment sounds even when you’re relaxing. That’s true multitasking!


