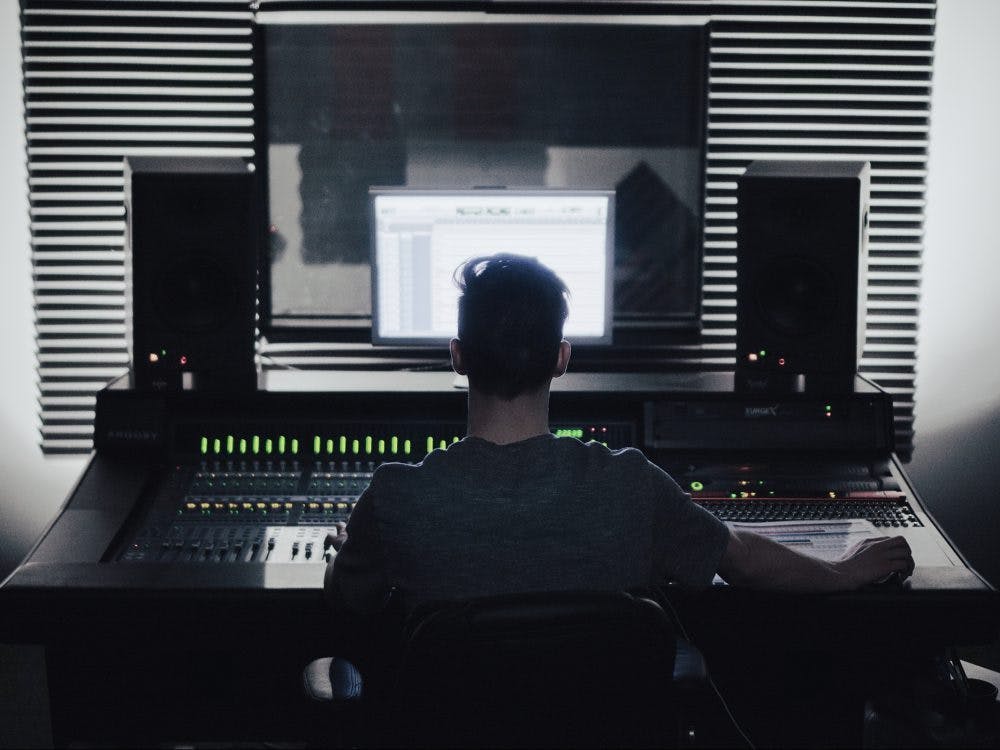
I still remember the first time I mixed a track that I was proud of – it was terrible, but I had no idea at the time.
I was so excited.
I loaded the song onto my iPod and drove over to my friend’s house. I could hardly wait to show them my new song. We piled into my tiny car and I cranked the stereo and pressed play.
I was so embarrassed.
The mix didn’t sound anything like it did in my studio! The guitars were flat, the vocals were buried and the drums sounded like someone was hitting a cardboard box with a wet sock. What happened?
I had created a mix that was the inverse of my mixing environment. It may have sounded good in my studio, but it sounded like garbage everywhere else. Every time I played my mix on a different system I would hear obvious, glaring mistakes.
I started to doubt my abilities. How could I have missed this? Why would I have done that? How could I have ever thought this mix was actually good in the first place?
Thankfully, I had some great mentors to teach me about translation. Translation means your mixes sound good on every system, not just your system. In order to create mixes with good translation, you need to mix on a system with an accurate frequency response curve.
Frequency Response Curves
In a perfect world, professional monitoring systems would be totally flat and identically recreate the signal coming from your DAW. In reality, every set of studio monitors put in a room has a unique frequency response curve, which colors the sound.
Think of it like this – for the most part, we can all agree on what the color red looks like, but no two brands of crayons make the exact same shade of red. Studio monitors are the same way – no two sound exactly the same.
Mixing in an untreated room makes matters even worse. Frequencies from your studio monitors reflect off of your walls and bounce around the room creating room modes. As you move around the room, certain frequencies will sound louder or quieter than they actually are – which can make it nearly impossible to create an accurate mix.
For instance – let’s say the reflections in your room are creating a 3 dB boost at 120 Hz. While mixing, you’ll be tempted to cut 120 Hz to compensate. As soon as you reference your mix on another system, you’ll notice the track feels weak at 120 Hz. But, when you go back to your studio and boost 120 Hz, it just makes the track sound worse to your ears.
So, you start to doubt your abilities. You start to wonder why you did this, or how you could have missed that. You ask yourself if the mix was ever actually good in the first place.
And the cycle repeats.
You’ll never be able to create mixes you’re happy with if you can’t trust what’s coming out of your speakers. You’ll just keep making tracks that sound good in your studio and nowhere else. You’ll keep going in circles, trying to fix the acoustics in your room by EQing your mix.
In order to actually fix these problems once and for all, you’ll need to install some basic acoustic treatment in your studio. Unfortunately, that can be an expensive process, so many engineers choose to start by addressing the biggest problem first and slowly adding more treatment over time. But how do you know which frequencies are causing the biggest problems?
That’s where Sonarworks comes in.
Digital Room Calibration
Digital room calibration software can help you identify and correct frequency response problems in your mixing environment, so you can mix with confidence. While digital room calibration is a very complicated process, your role is rather simple. Digital room calibration software allows you to accurately measure the frequency response of your mixing position within the room, then creates a calibration profile based on detected flaws in your listening environment.
Digital room calibration software uses a hyper-accurate reference mic with a neutral frequency response to measure test signals played from your studio monitors. The software then records the test tones via the reference mic and compares the frequency response of the recording to the frequency response of the test tones to identify any discrepancies.
This process is repeated several times at different positions throughout the room to create an average frequency response curve. This “correction” frequency response curve is applied to any audio played through the system in order to fix the coloration added by early reflections within the room and the frequency performance of the speakers themselves.
Digital room calibration can also be used to identify frequency response problems within your room and pinpoint the specific areas that need acoustic treatment. By re-measuring your room with the calibration applied, any peaks or dips in the frequency response graph will tell you exactly what kind of acoustic treatment your room needs – if you know what you’re looking for…
Reading Frequency Response Graphs
At first glance, frequency response graphs just look like a bunch of squiggles, but upon closer inspection, they can tell you a lot about the acoustic problems in your room. Let’s look at the frequency response curve of this room as an example.
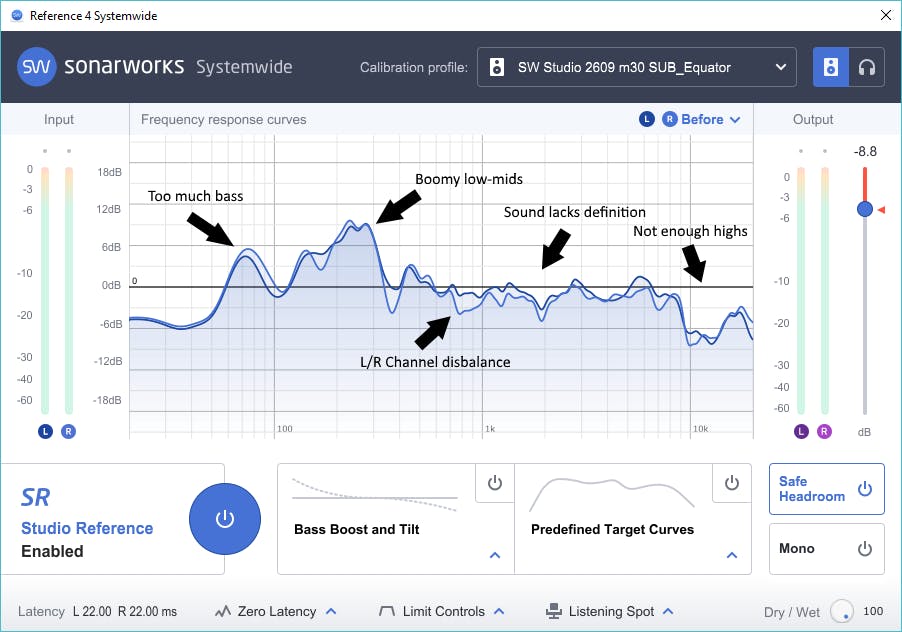
The horizontal axis represents frequencies from 20 Hz – 20 kHz, while the vertical axis represents amplitude. Anything above the black 0 dB line in the center means you’re hearing more of that frequency than there really is, while anything below the line means you’re not hearing enough.
Ideally, you want a flat, neutral frequency response – anything above or below the center line is a problem. As you can see, this room has some pretty serious issues:
- 6 dB boost in the lows around 60 Hz – 100 Hz
- 9 dB boost in the low-mids around 120 Hz – 400 Hz
- Various boosts and cuts throughout the midrange
- 6 dB cut around 1 kHz
- 9 dB cuts above 10 kHZ
Based on these results, you can see biggest problems are in the low-end, particularly below ~250 Hz. Those 9 dB boosts would make it almost impossible to mix. Mixing in this room would most likely tempt you to cut WAY too much low-end to compensate, causing the mix to sound weak and thin. To correct this issue with acoustic treatment, you’ll need to place bass traps in the corners of your room. Placing bass traps in the ceiling corners behind the monitors typically provides the most dramatic improvement, but for best results you’ll need to cover all eight corners on the ceiling and the floor.
Next, there seem to be a few problems in the midrange, specifically between 400 Hz and 2 kHz Hz. The worst part is, the left and right speakers are both presenting different frequency responses, meaning one speaker can sound noticeably different from the other. This problem becomes exaggerated as you move around the room—one moment the midrange feels thin, so you add a few dB, then as you lean to the left a bit the mix feels honky, forcing you to remove the boost you just made. And the cycle repeats…
This issue is typically caused by “early reflections” from the walls to the left and right of the mix position, as well as the ceiling above it. Sound from your monitors travels directly to your ears, but reflections from the walls arrive a few milliseconds later causing a time smearing effect, which results in poor clarity and stereo imaging problems. You can identify these points using “the mirror method,” which requires a handheld mirror and a little help from a friend. Sit in the listening position and have your friend hold the mirror flat against the wall. As they move the mirror back and forth, make note of where you see reflections of either monitor – these are the early reflection points and should be covered with absorption panels.
Finally, the biggest issue comes from the high-end, specifically above 10 kHz. This total lack of high-end would tempt you to create super-shrill mixes that hurt your ears when played on a cell phone. The problem is likely caused by excessive use of improper treatment. A few well-placed diffusion panels are far more helpful than covering your walls in cheap foam, carpet or god forbid egg cartons that absorb all of the high frequencies in your room without taming anything else. To solve this issue, start by removing any excessive absorption from your room. If you’re experiencing a lack of clarity, try placing diffusion panels at the early reflection points instead of absorption panels. Diffusion panels will disperse the early reflections safely throughout your room, instead of absorbing them.
It may feel like a slow process at times, but each additional piece of acoustic treatment makes your digital room calibration software more accurate, further improving the frequency response of your mixing environment. Just remember to re-measure your room with the calibration applied after installing additional treatment, as the response of your room can change drastically!
You can try out to calibrate your room and speakers with SoundID Reference – it offers a 21-day free trial.
Learn more about mixing with proper frequency response and house curve in this article. We also recommend reading this article to discover how properly tuning your monitors saves money while providing a better experience for the clients.


