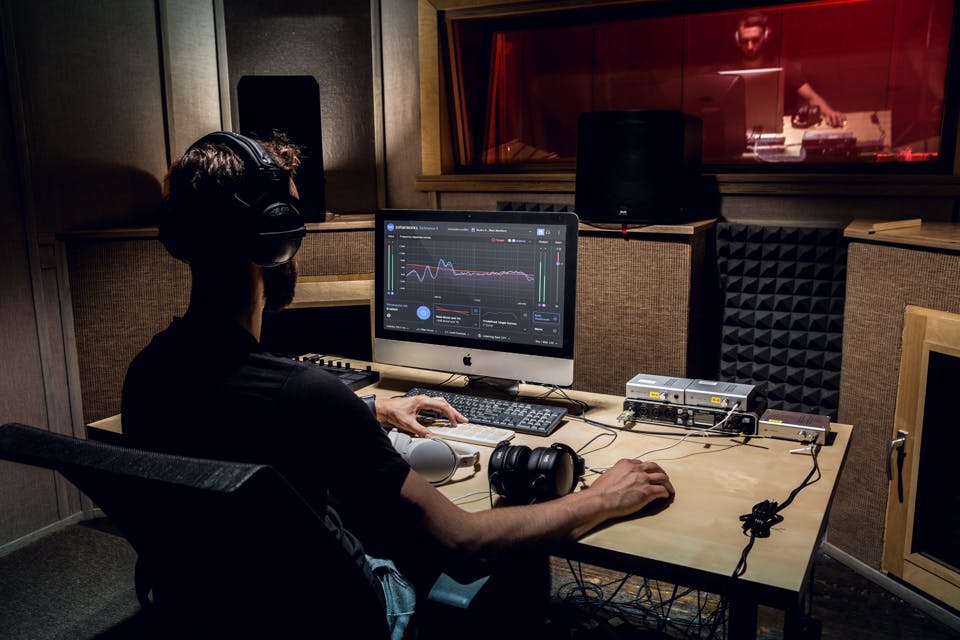
Congratulations! You’ve completed the calibration routine with the Reference 4 Measure App and saved your newly created speaker profile. Now what? Let’s go through setting up and experimenting with the parameters in Reference 4 plugin. Sonarworks Systemwide software works similarly, but also provides a sidebar to build presets of profiles for various monitor paths, like built-in headphones, computer audio line-output, or audio interface output. Keep your eye out for some videos from Sonarworks that explain the features of Systemwide.
The first step is to be aware of where your new profile lives on your hard drive. You may need to locate it manually outside of the Sonarwarks plug-in and you’ll probably want to back it up.
Here is the default location:
For Mac user: User Folder → Library → Sonarworks → Reference 4 → Sonarworks Projects.
For Windows 8 and 10: From Windows Explorer: This PC → Sonarworks Projects
For Windows 7: Manually navigate to C:\Users\SonarworksProjects
This folder will likely already be populated with factory profiles for various models of headphones, along with your own measured speaker profile. Buried in there, you will find your new best friend, and with this profile loaded, you can mix with confidence! To easily find the profile, headphone profiles names contain the .swhp extension, while speaker profiles use the .swproj extension.
Load Your Profile
The next step is to load your custom profile into the Reference 4 plug-in at the top right of the window.
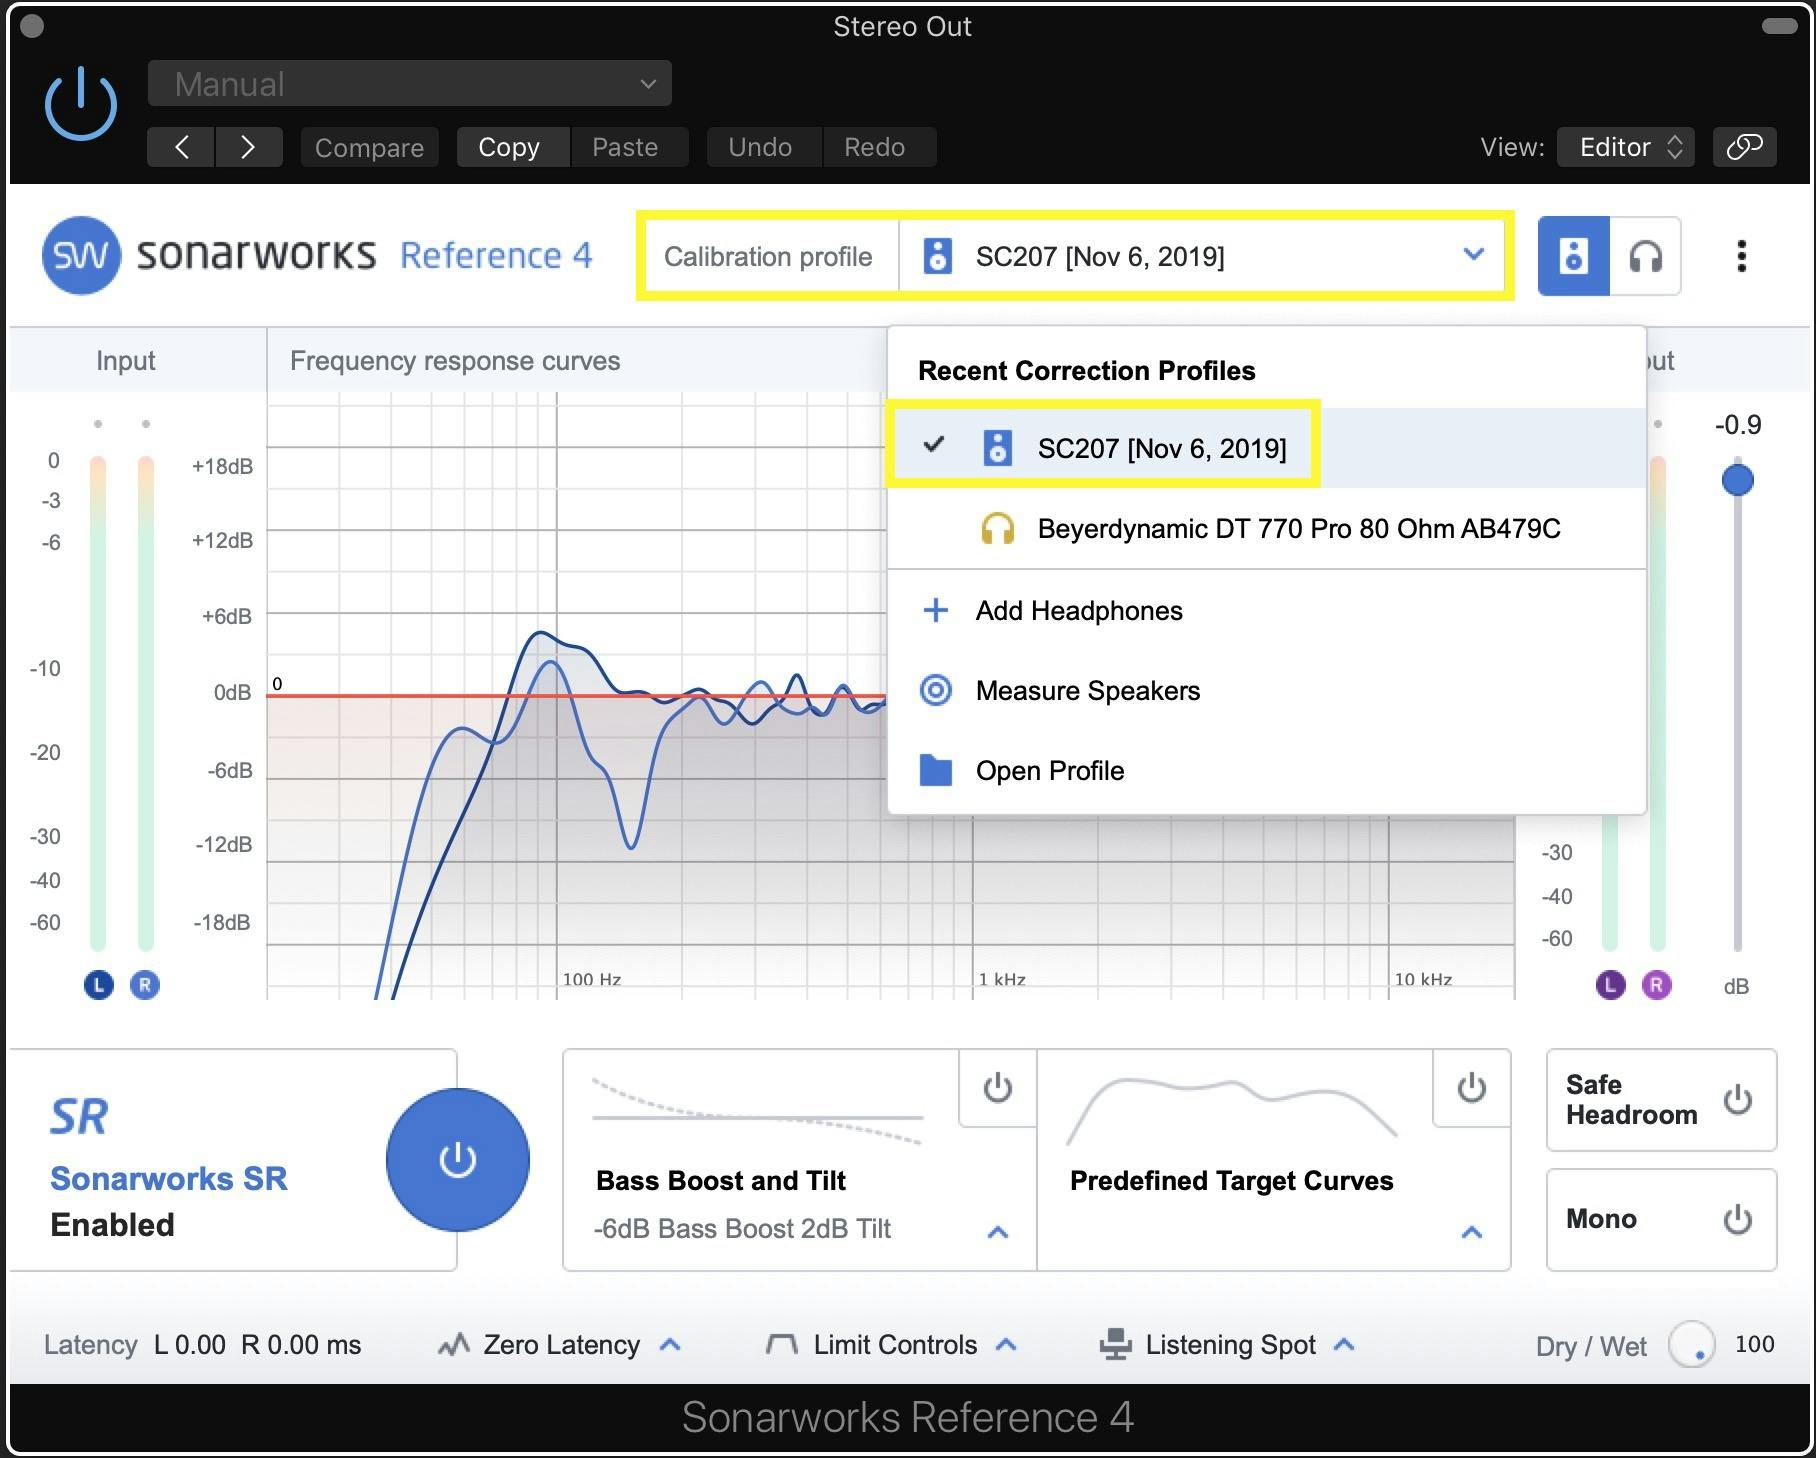
There are two golden rules to ALWAYS follow when working with Reference 4 as a DAW plug-in. First, it has to go in the last effects processing slot (insert) on your master output track/channel strip in your mixer. Reference must be last so that all audio processing runs through it before you hear the output. The second golden rule is to make sure you don’t print your mix through the Reference 4 plugin. If you print your mix through the reference plugin, your mix will be printed with EQ that sounds good in your room, but only your room! Different DAWS may have different bussing/routing strategies for applying plugins to the monitor path, but not your mix bus. Cubase, for example, provides a “Control Room” signal path that controls your monitor but does not affect bounced mixes. You will have to research the best way to use Reference 4 as a DAW plugin in your setup. Alternately, the Sonarworks Systemwide plugin allows you to monitor any audio from your computer with Sonarworks room correction active, but does not affect the workings of your DAW.
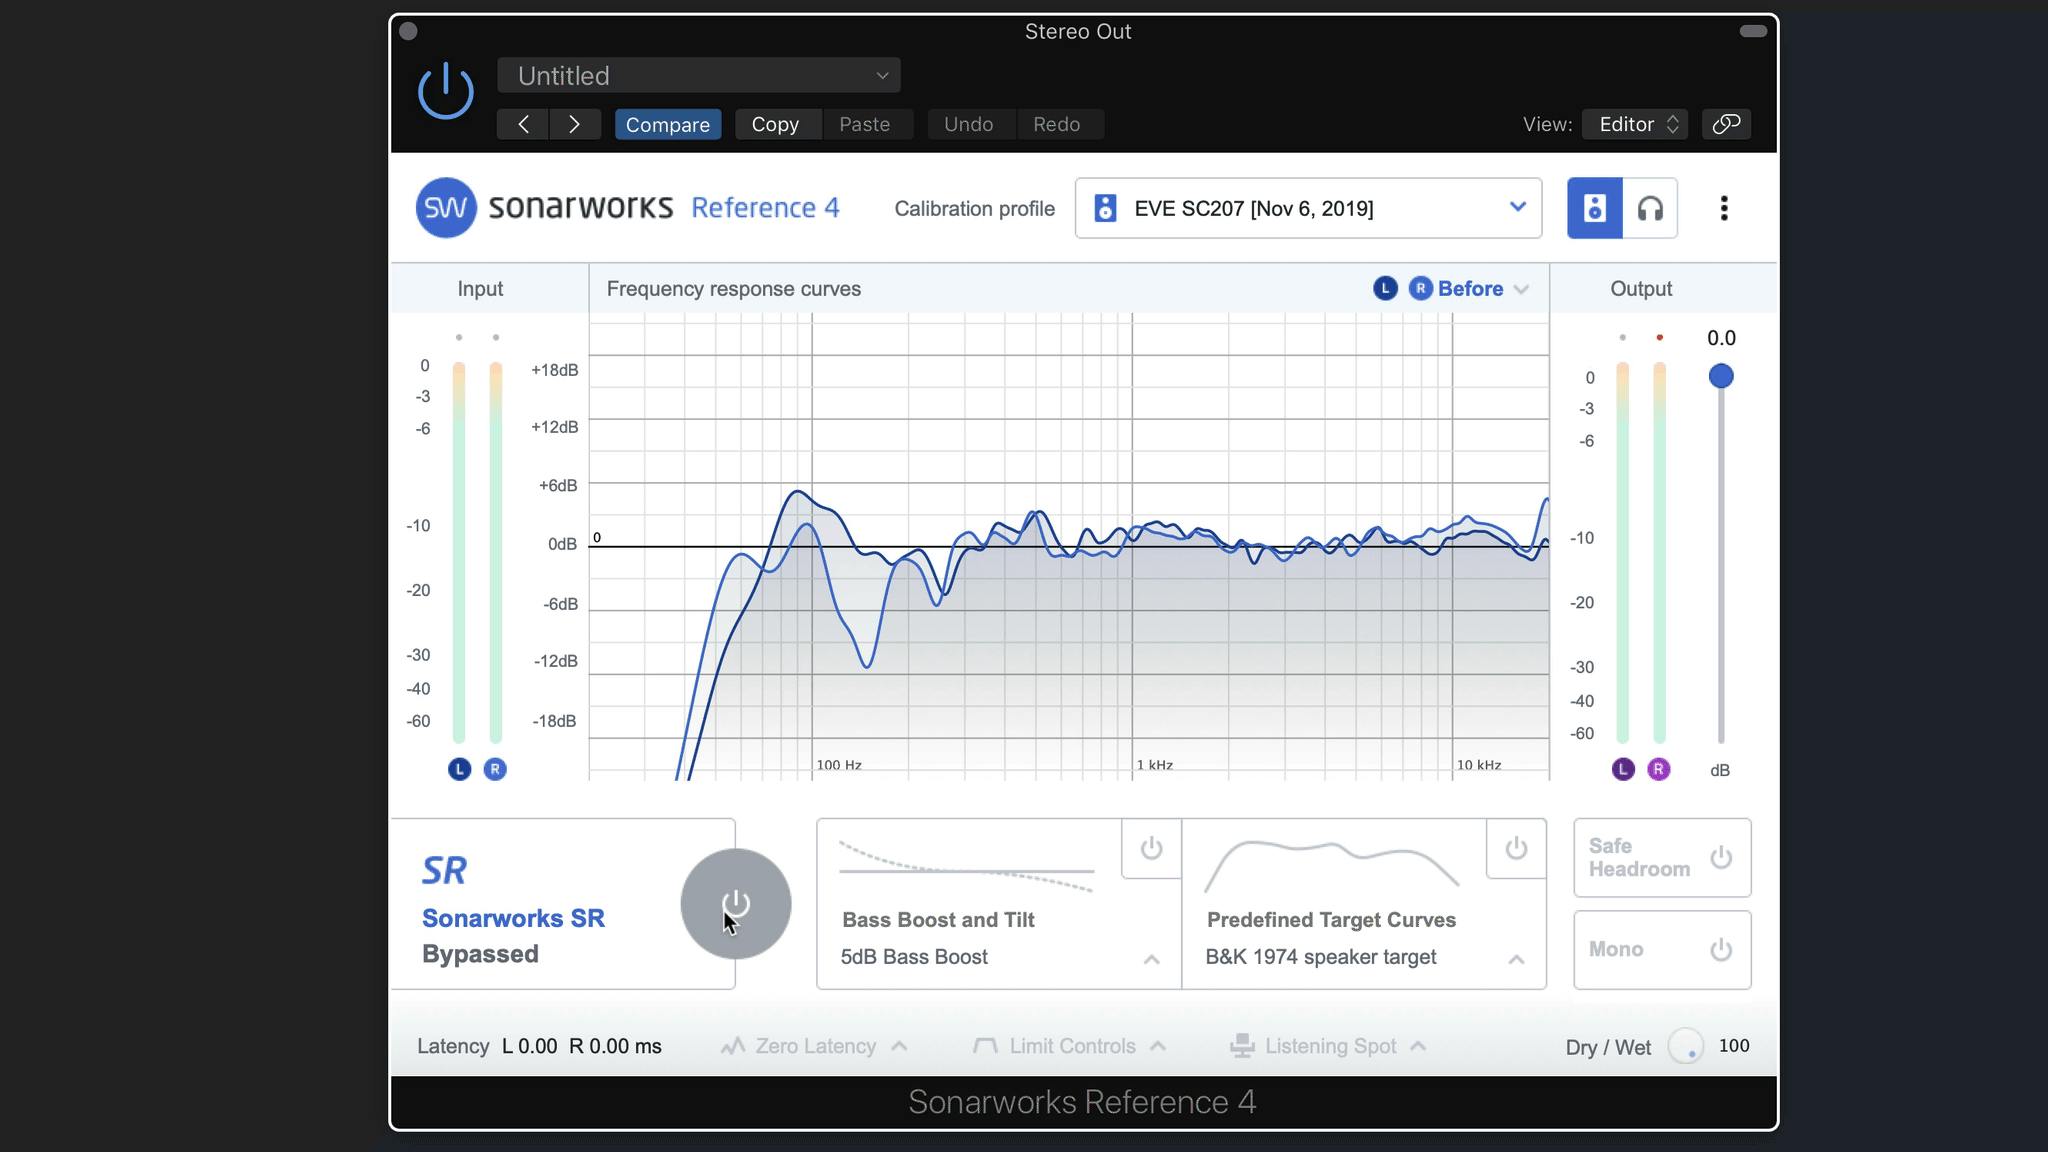
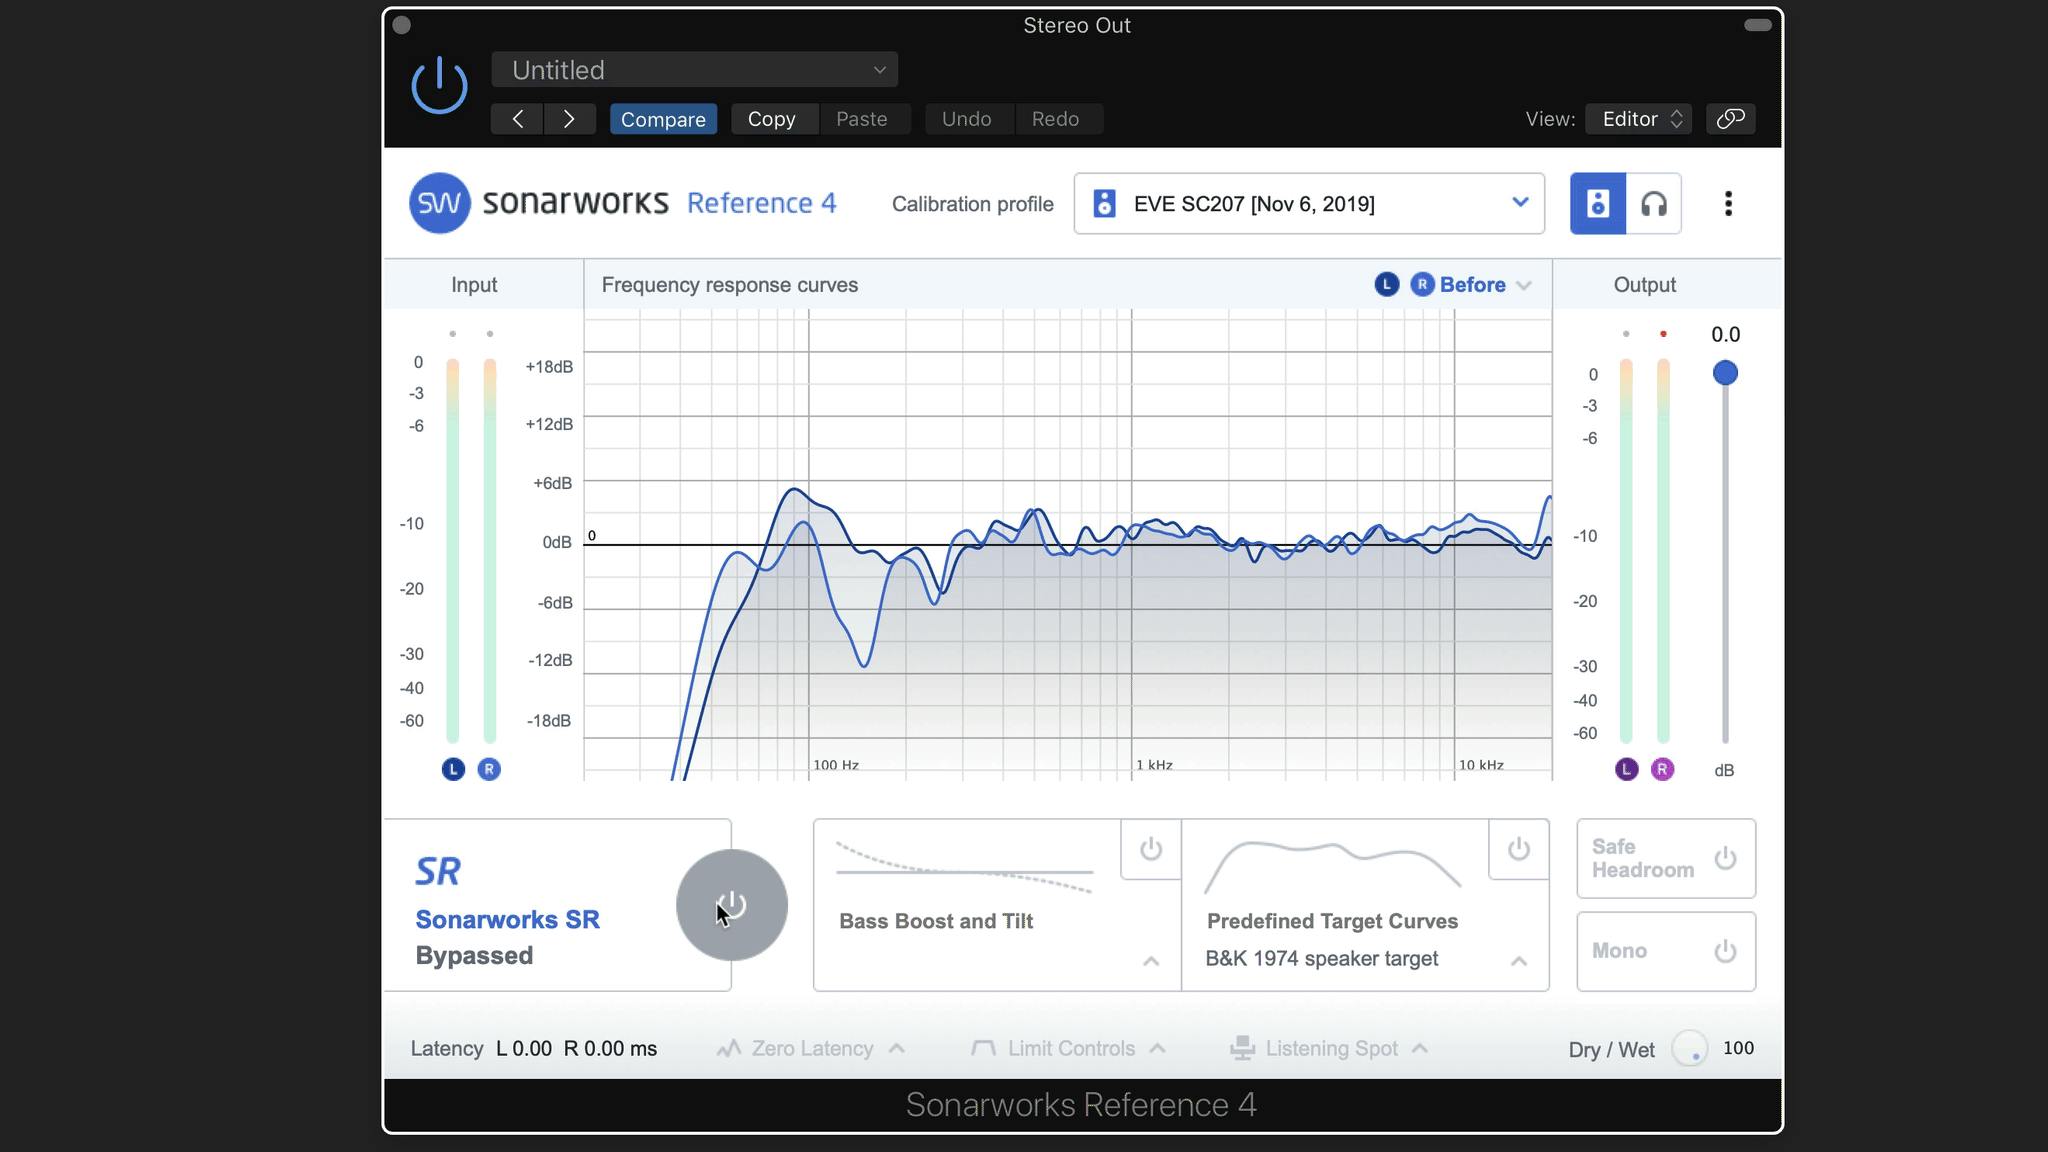
While working, make sure to enable the Studio Reference EQ curve by clicking the blue button at the bottom left. This button enables/disables calibration, along with any changes you make to the Bass Boost and Tilt settings or Custom Target Curves settings.
Bass Boost and Tilt
The frequency curve applied by Reference 4 is designed to calibrate your monitors/headphones to deliver a smooth, neutral, even response across the frequency spectrum. Some producers, especially those who work on club, urban or EDM, may prefer their monitor system to have a hyped bass response and create a custom “house curve” to slightly exaggerate the bass in their flat room. The Bass Boost slider provides a smooth and gradual 6db boost or dip in the low end of the spectrum. The Bass Boost, (along with the Tilt function,) customize the flat target curve, while still preserving an even overall frequency response spectrum. In other words, you can maintain the benefits of the frequency calibration, while fine-tuning the warmth or brightness of your monitors.
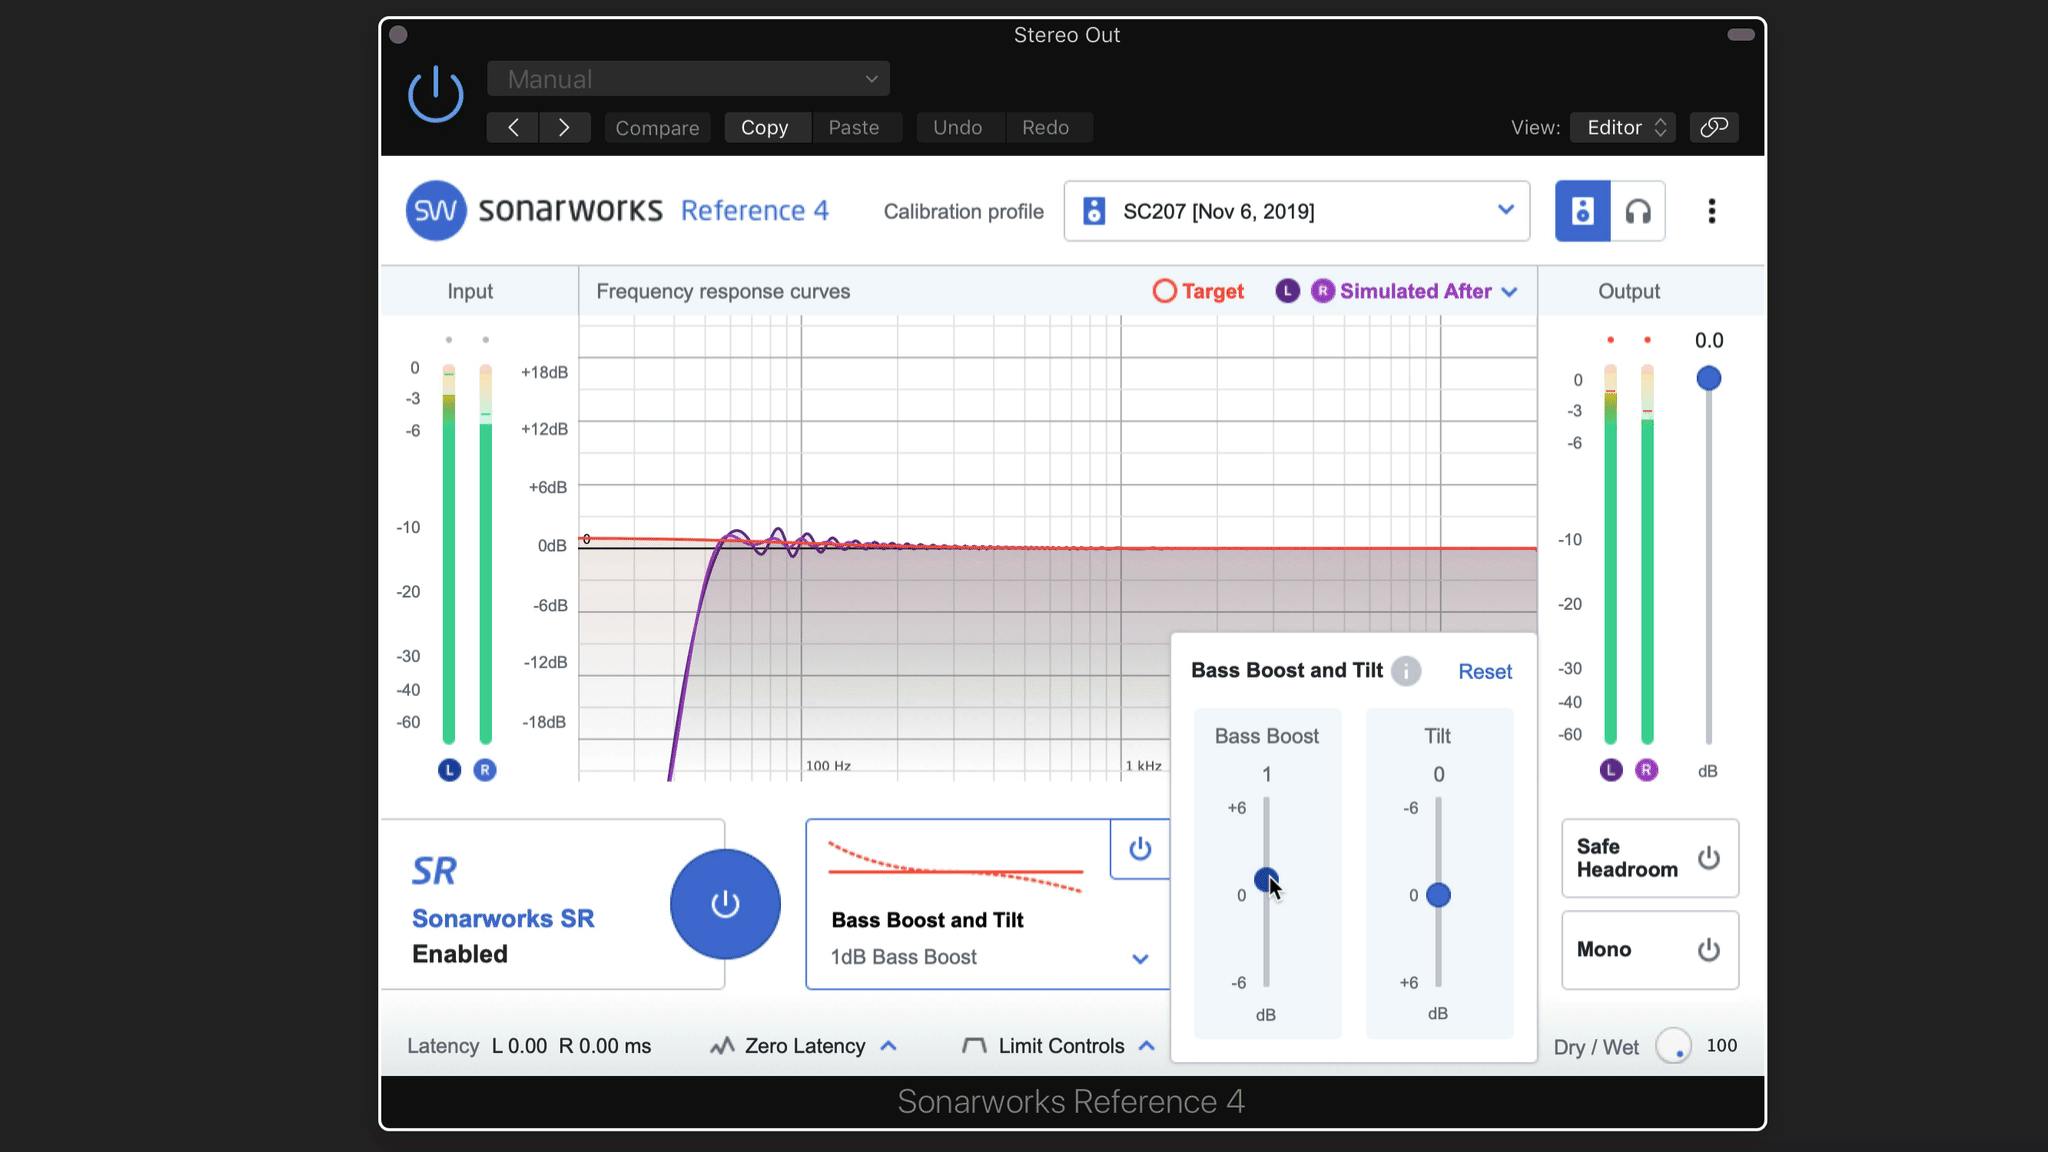
Bass Boost lets you custom-tailor the warmth vs brightness of your calibrated monitors.
The Tilt curve simultaneously boosts and cuts highs and lows up to 6dB above and below a 1kHz fulcrum point. Dialing up the tilt boosts above the 1kHz point and attenuates below. Negative tilt settings achieve the opposite effect, boosting everything below 1kHz, and attenuating above. The Tilt curve, like the Bass Boost, preserves the flat Reference correction while superimposing another type of warm vs. bright balance.
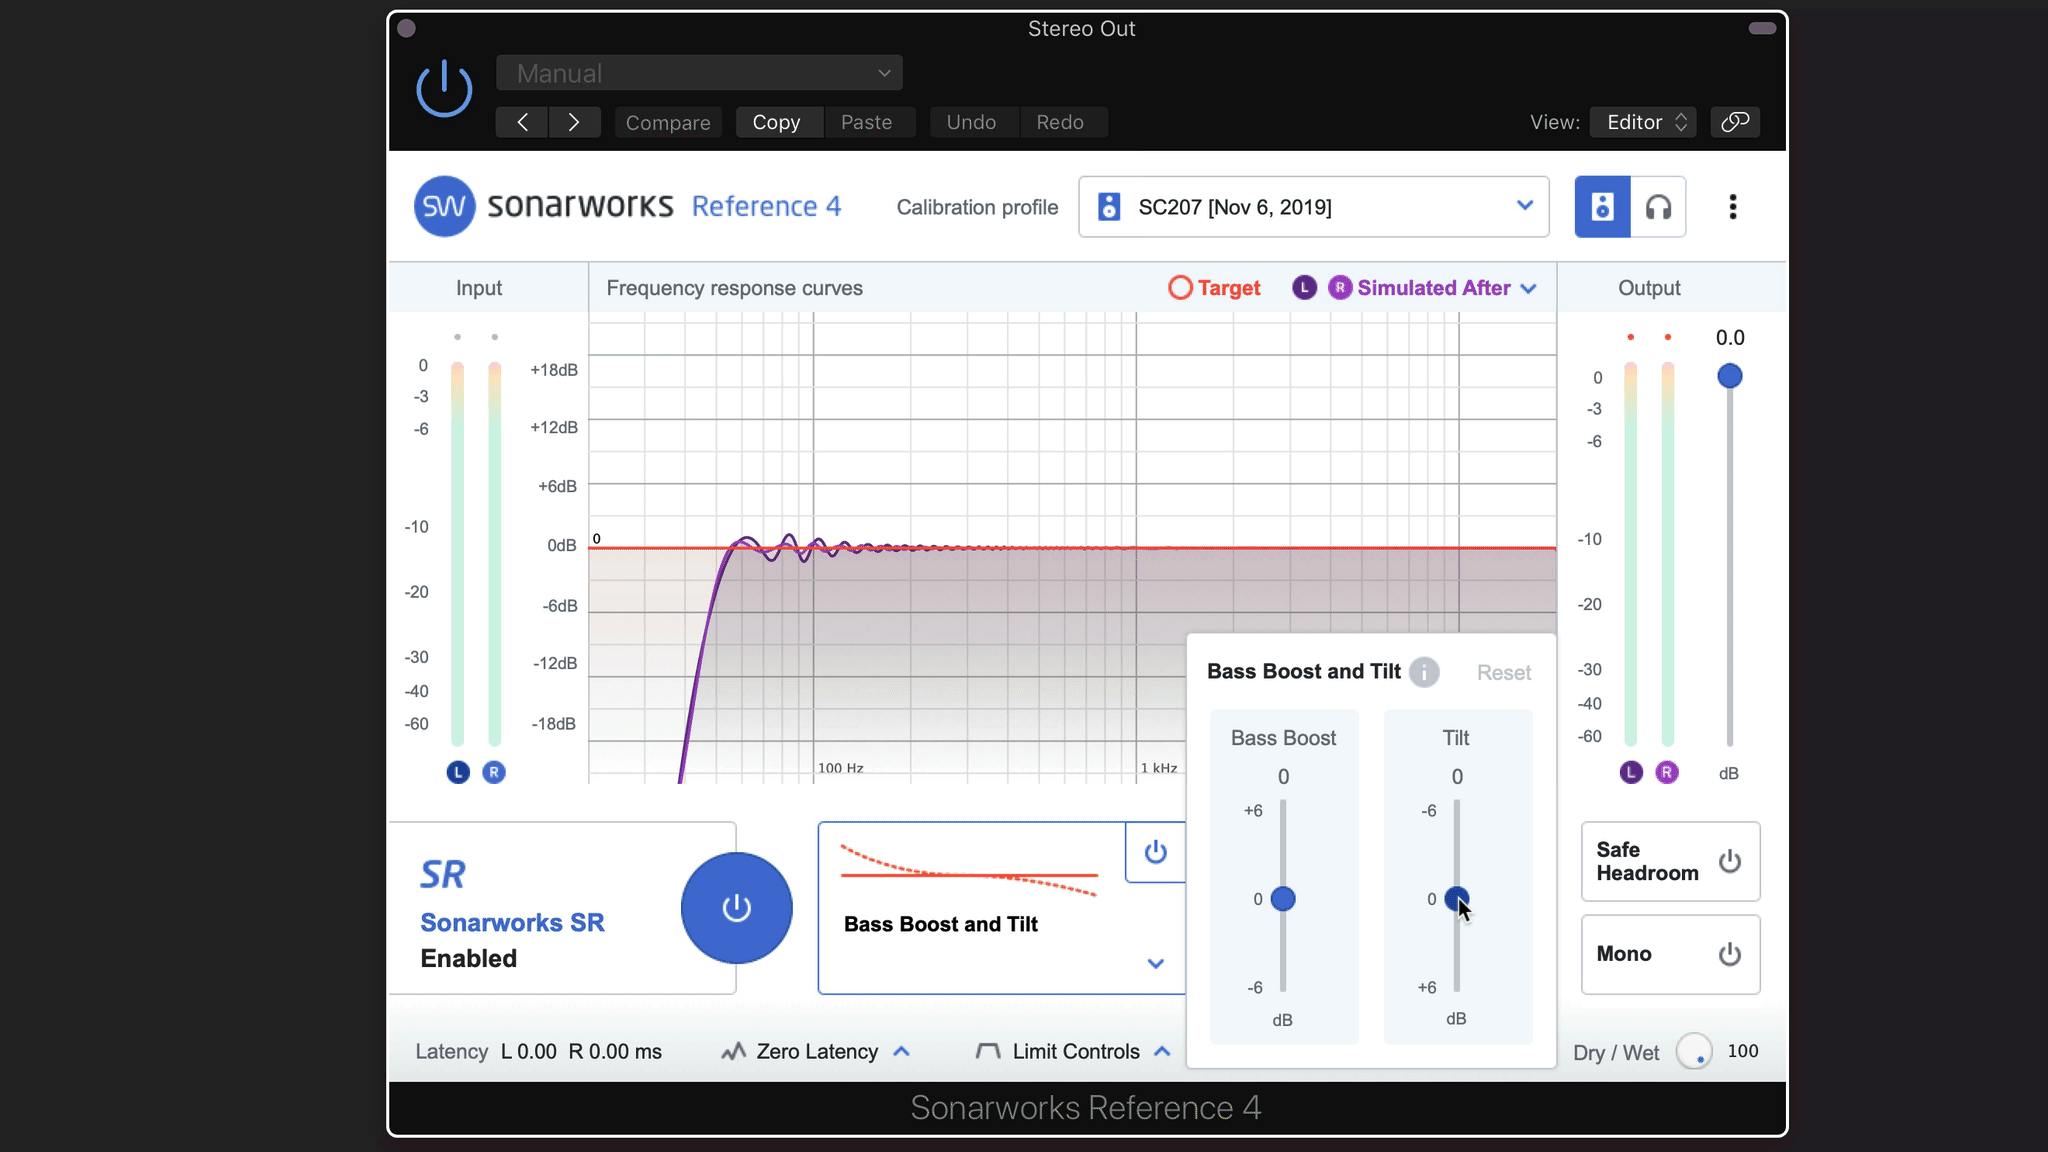
The Tilt slider, like the Bass Boost, provides a way to customize your preferred house curve.
So, what’s the point of altering the Studio Reference curve, if it has been precisely calculated to be as accurate as possible? The answer is simple.
If you prefer listening with slightly hyped bass, dial up the bass boost, and adjust the bass to sound right for you. If you like a lot of highs, dial up the Tilt. Remember, The Tilt or Bass Boost will (correctly) be bypassed when you turn off the Reference 4 plugin and print your final mix.
The Dry/Wet knob allows you to dial in as much of the corrected calibration curve as you like. In effect, this is a strength control that provides between 0% and 100% correction. As you dial the knob down from 100%, the calibration curve will visibly morph from the Simulated After curve towards the Before curve. Normally, this should be at 100% wet, but if you are not used to flat sound from your monitors, you may feel comfortable setting the strength slightly lower. Try starting around 75% wet and after you get used to this sound, try raising the percent a bit more.
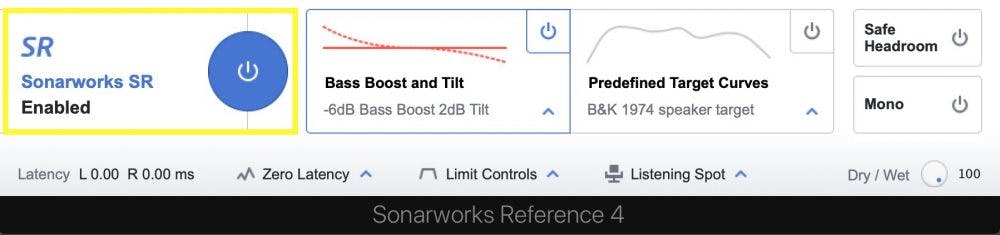
Predefined Target Curve
The main goal of Reference’s profile curve is to optimize the frequency response of your mixing environment. Sometimes, however, it can be useful to A/B this flat response with other curves for comparison and analysis. Two predefined target curves are available in the Target Curve section. These curves modify the output of your monitors or headphones to mimic the sound of some popular speaker systems.
The B&K 1974 target option is a slightly more rounded version of the negative Tilt EQ curve, emulating the traditional high-frequency roll-off and bass boost found in many home stereo speakers. The X-Curve setting is for mixes targeted for large movie theatre systems, featuring a subtle low-end dip, and a relatively pronounced and steep high-end roll-off starting at about 2 kHz.
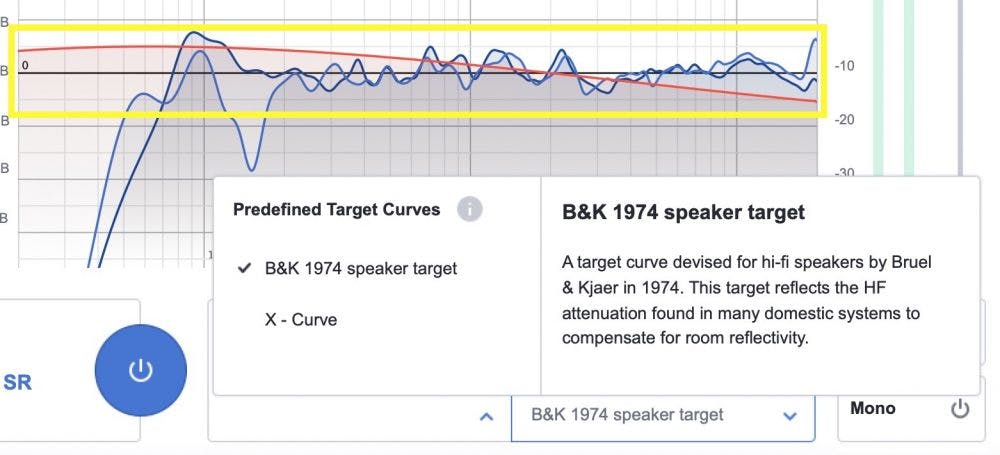
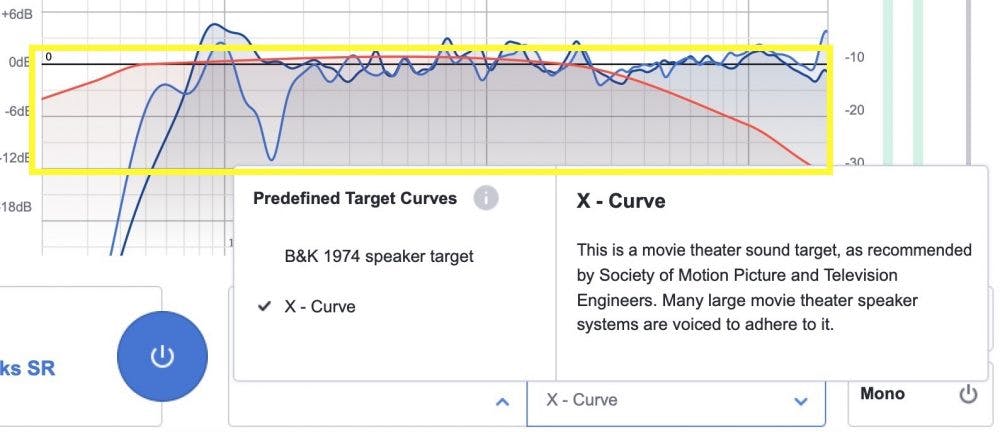
These Predefined Target Curves and Bass Boost/ Tilt options are mutually exclusive. That is, only one can be active at a time. The Predefined Target Curve and Bass Boost/Tilt sections each have their own power button to activate or deactivate them.
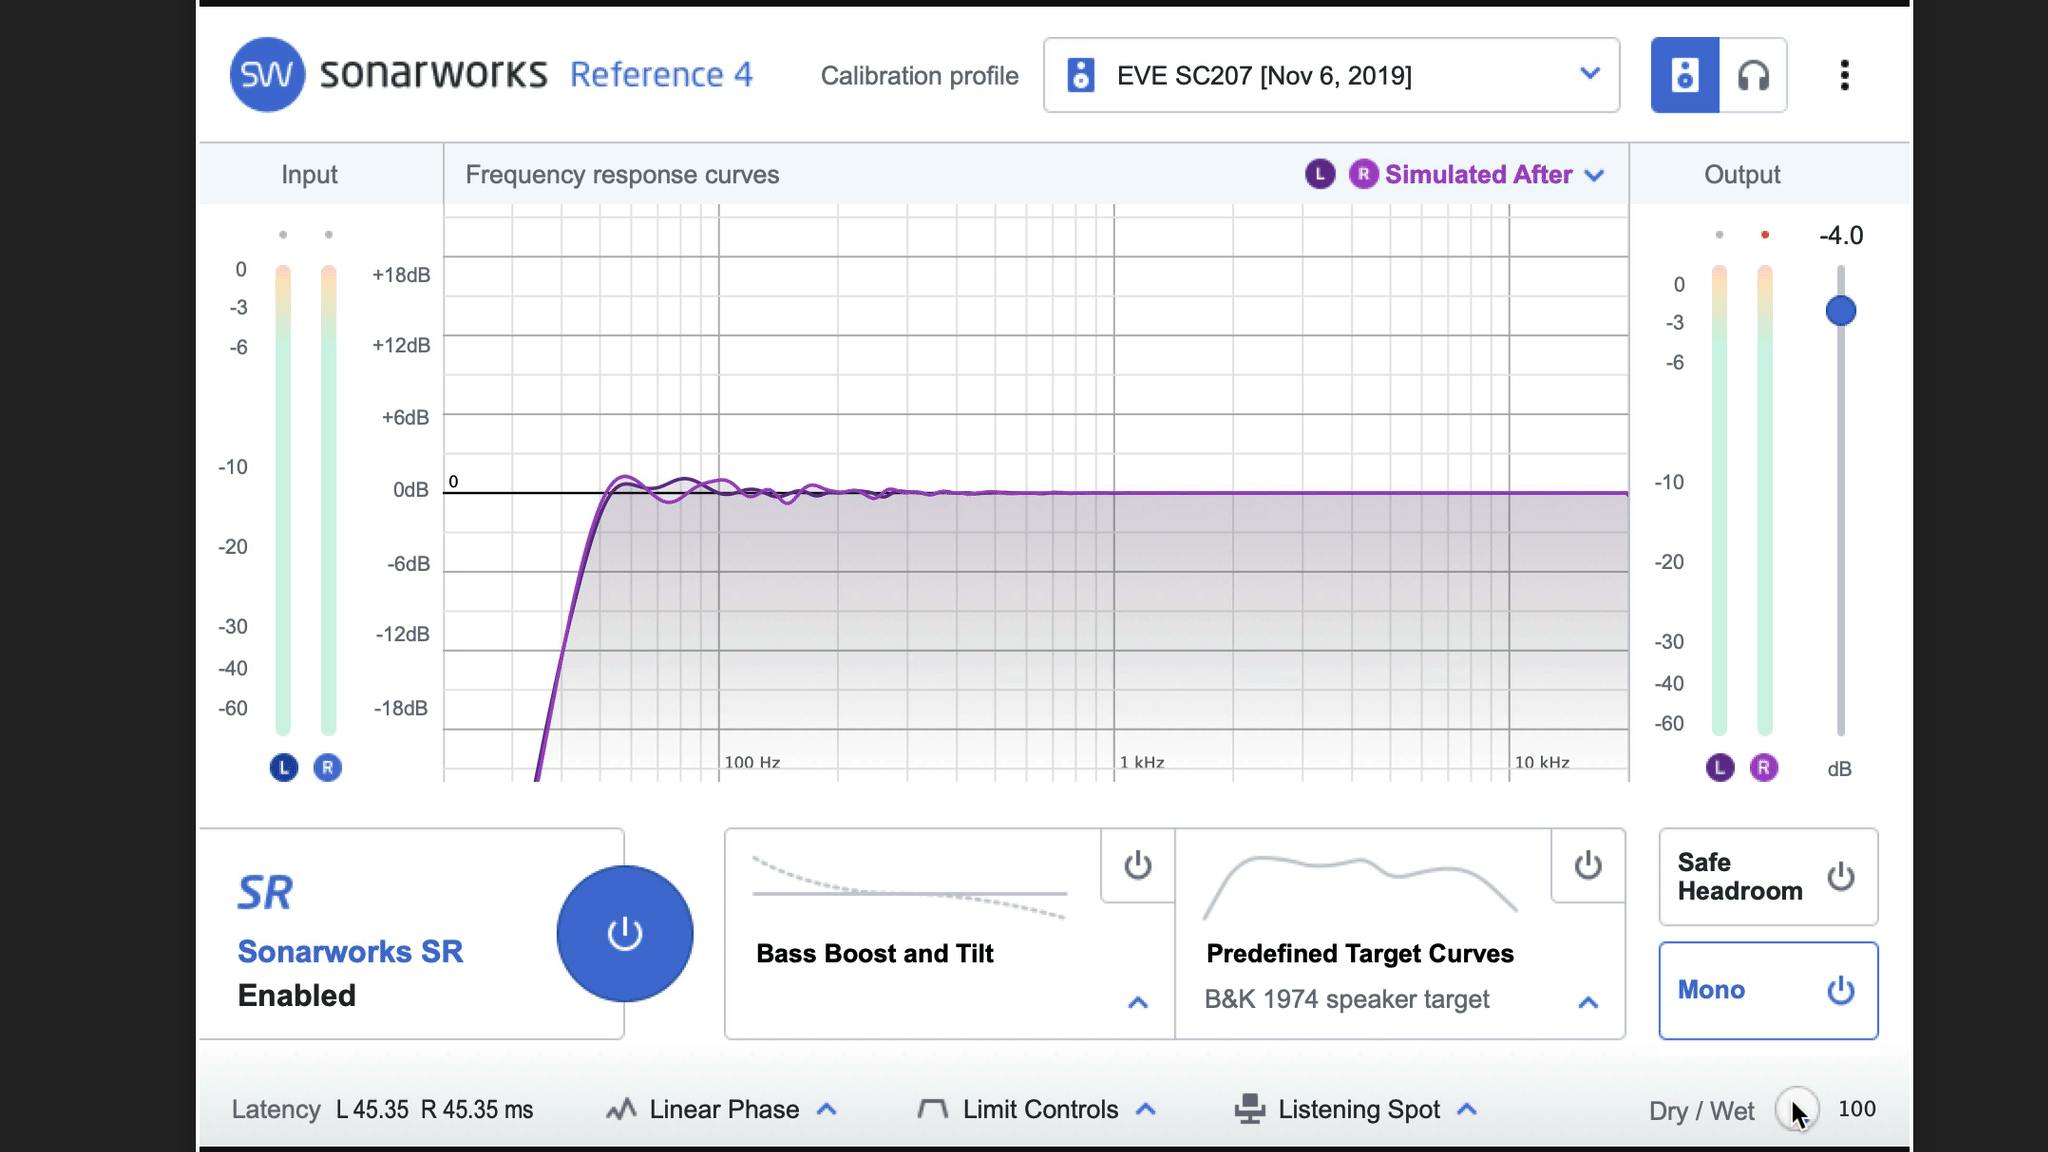
Frequency Response Curves
The large display graph in the center of the Reference 4 interface, is meant to display various frequency response curves. The left and right channels are always shown independently. You can choose which frequency response curve(s) to display from the dropdown menu.
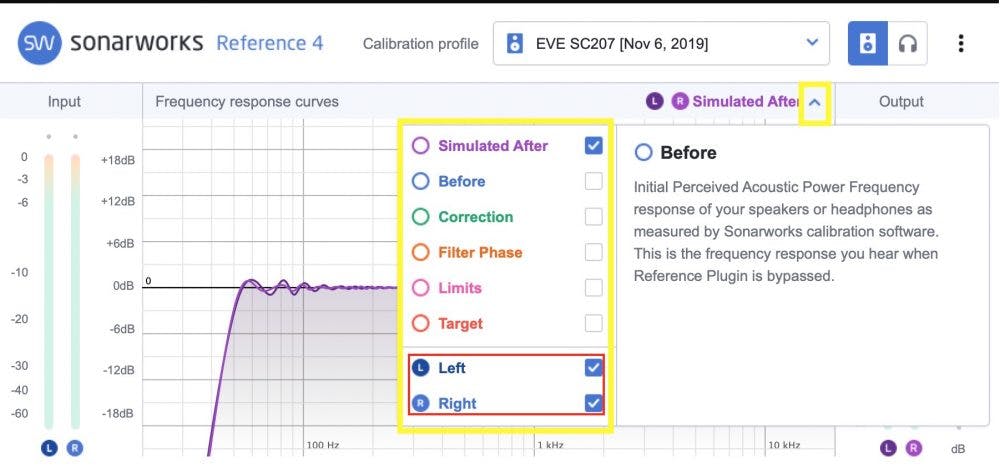
When the Studio Reference curve is bypassed, we are only shown the “Before” curve in the graph. The Before curve is the measurement of your speakers or headphones before any correction is applied. The fact that it calibrates frequency, volume and timing separately for left and right is fantastic. The volume and timing settings are located under the Listening Spot section, and we will get section in a bit.
With the plugin active, the “Simulated After” display shows us the predicted result of correction after Sonarworks has processed the signal. Toggling between the Before and After curves is quite striking visually. We get to visualize the discrepancy between the corrected response and the “before” reality of our listening environment.
The Before curve transitions into the Simulated After curve
The Target curve is an orange line that is, by default, flat. This curve is the idealized elusive Holy Grail – a completely flat line. The Target curve does not necessarily always need to remain flat, however. When we apply a Bass Boost or Tilt or use one of the alternate Predefined target Curves, the Target curve display will reflect the resultant curve.
Choosing the green “Correction” curve display shows us the exact frequency adjustments Reference 4 will apply to our monitors or headphones. The correction curve is usually a series of boosts and cuts more or less inverse to the Before curve. When superimposed with the Before curve, the result should produce the Simulated After curve.
The Before curve paired with its inverse Correction curve.
Phase and Latency
The Filter Phase frequency display reflects the Filter Type chosen from the menu at the bottom of the plug-in window. When set to Zero Latency mode, plugin latency is minimized at the expense of the phase distortion, which can slightly blur the low-end clarity. During tracking or beat-making, a bit of phase distortion generally isn’t as much of a problem as latency. Zero Latency mode is the best option if you are tracking with the Reference 4 plug-in in place.
The Mixed Phase setting generates minimal latency and minimal phase distortion. Linear Phase is the best choice for the final mixing or mastering stages, providing a flat frequency response with no phase distortion. The latency in Linear Phase mode may be noticeable, but this shouldn’t be an issue when mixing or mastering. The amount of latency associated with each mode is displayed in the latency readout at the bottom left of the plug-in interface.
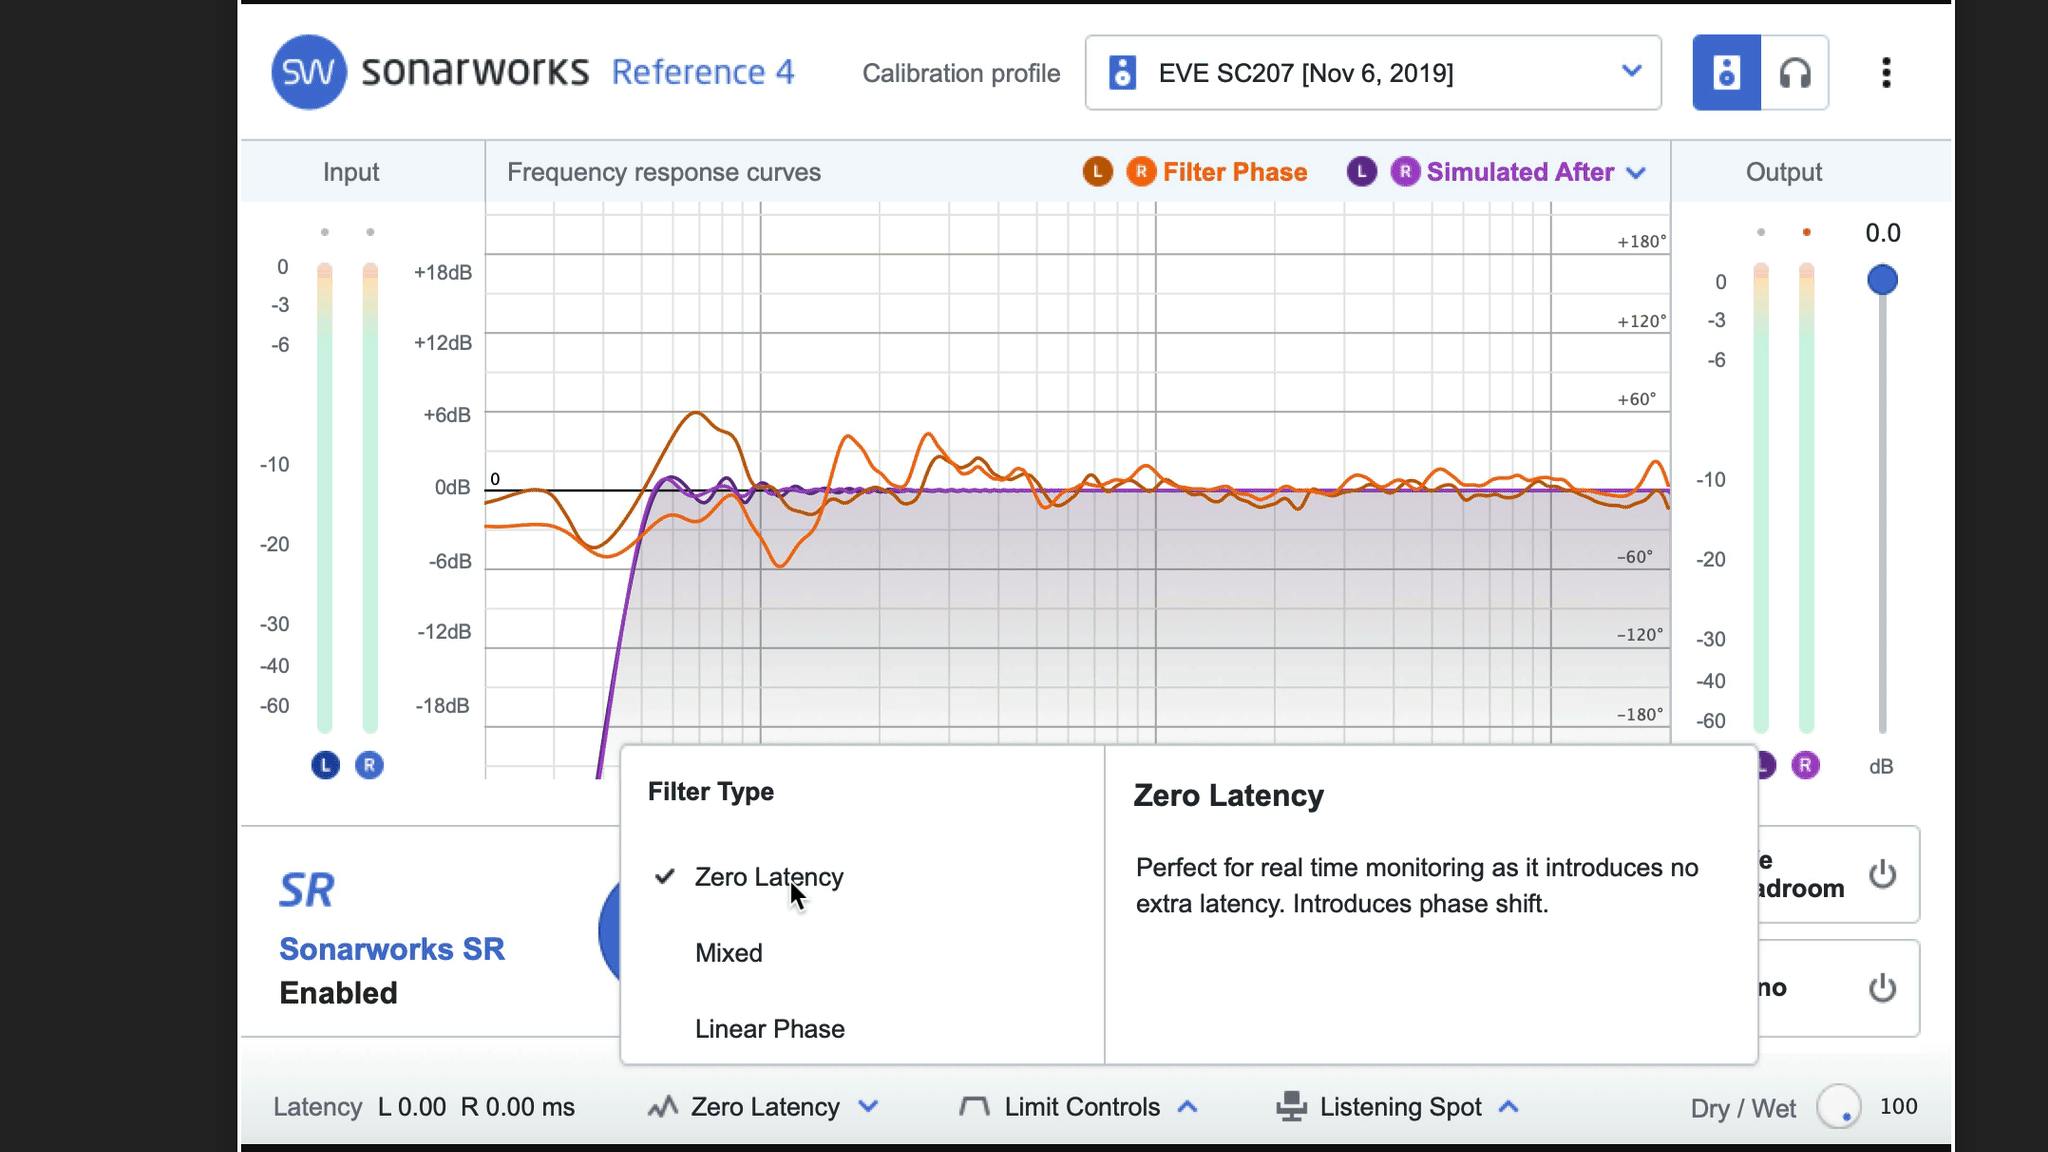
Notice how changing the Filter Type affects both the phase response graph and the amount of latency.
Limit Controls
The Limit Controls at the bottom of the window are used to control the amount of boost Reference software will apply when correcting your speakers. The Limit settings may be adjusted in the Limit Controls menu at the bottom of the window. The Correction field lets you set a ceiling for the maximum amount of boost, in DBs, that the calibration will apply.
The Max Low Frequencies and Max High Frequencies fields are used to set the frequency ranges beyond which calibration will not take place. Think of them as kind of like hi pass and low pass filters, but instead of affecting the whole mix, they set the range within which correction will take place.
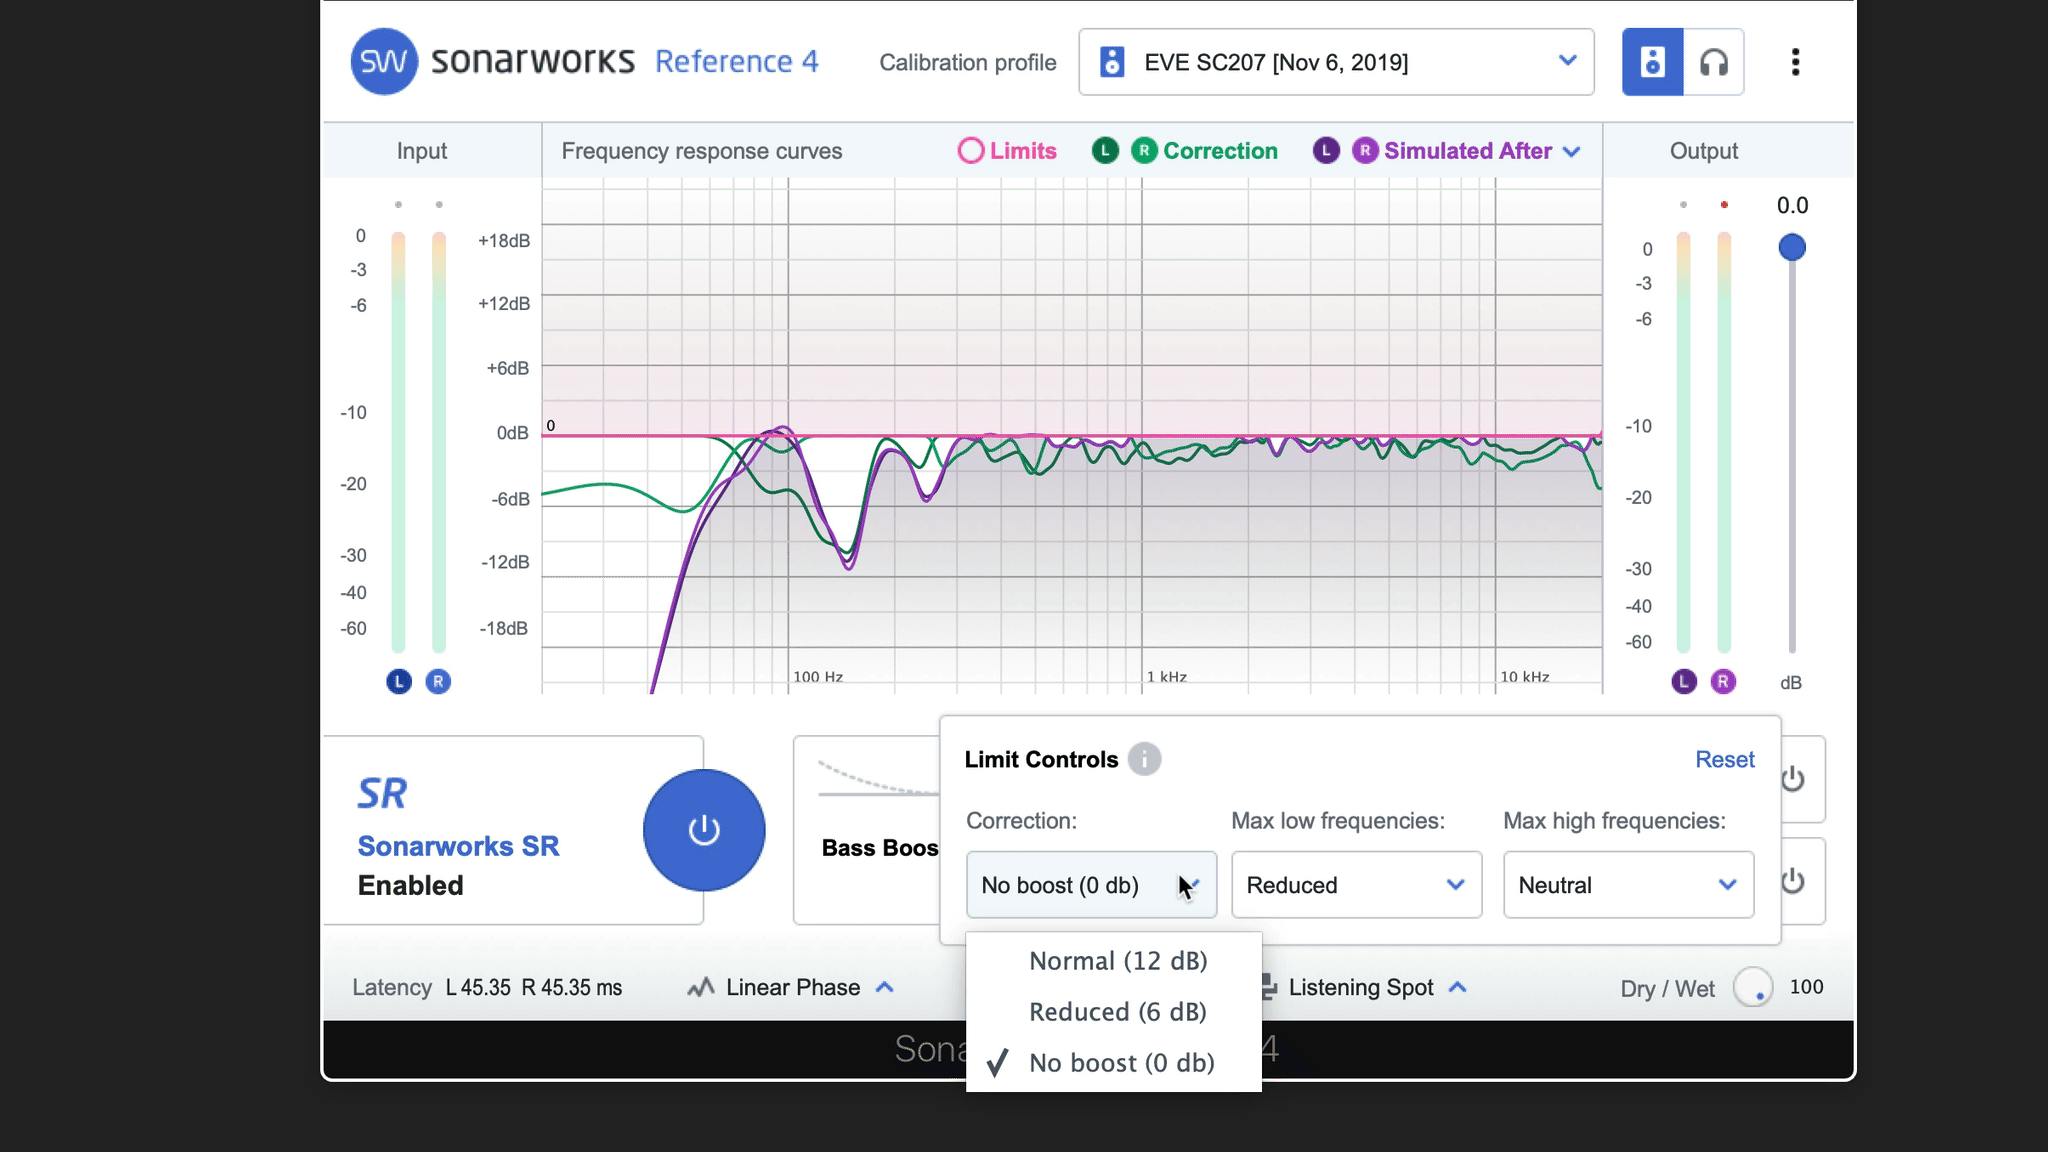
The Limit Controls allow you to set the maximum EQ boost available and also the frequency range that may be corrected.
Other Parameters
The Safe Headroom slider sets the output level from the plug-in and works in conjunction with the Limit Controls. If, for example, you set the Correction field for up to 12db of boost and Safe Headroom is enabled, the output gain fader will max out at -12db to avoid overloading the plugin’s output.
Many people like to check their mix and master for mono compatibility and the Mono switch can be used for just this purpose. When enabled, your mix will play in mono and you can check for any phase problems.
The Listening Spot parameter is a simple on/off switch that enables or disables correction for any inter-channel volume and/or timing differences between your speakers. This correction displays the volume and time differences between the speakers and appears only if you have used Sonarworks Measurement software to generate your own speaker correction profile.
Now you can set up Sonarworks Reference 4 with your desired profile and custom tweaks and enjoy worry-free mixing. Get your mixes sounding great in your room, and they will sound great everywhere.


