
You’ve heard of the Neve 1073, API 312, and the REDD.47 preamps and how they make your signal sound warm, thick, fuzzy, crispy, airy… These legendary preamps add measurable character to any source they process. Does your interface’s preamp give you the best sound you can get?
Many popular audio interfaces contain at least one mic preamp and manufacturers claim that these built-in preamps are all you need to capture perfect audio. In this article, you’ll learn why an outboard mic preamp could be a good addition to your setup. Additionally, you’ll learn how to choose the ideal preamp, what a preamp does, the limitations of the preamps inside your audio interface, and the pros and cons of plugin emulations of preamps.
What’s a preamp and what does it do?
Mic preamps can be part of interfaces and mixers or they can be outboard rack units. The purpose of a preamp is to amplify a microphone’s low-level output up to what we refer to as “line level.” Line level is the signal level that devices like compressors, EQs, and A-D converters want to see—often shown as “zero” on a VU meter. Generally, microphone signal levels are only a few millivolts, so they need a lot of gain to be brought up to line level, which is around 1 Volt. This increase requires somewhere between 30-60dB of preamp gain, or sometimes even a bit more. Passive instruments, such as guitars, and unbalanced equipment like synths and drum machines need to be conditioned with a direct box before they go through a preamp. Many preamps and interfaces provide an instrument, or Hi-Z, input for this very reason.
Preamp Gain Facts:
A microphone produces a signal that is between .001 and .1 Volts. A microphone preamp takes this signal and boosts it up to line level, which is about 1.3 Volts. That increase requires 30 to 60 dB of gain, and 60dB of gain means we are increasing the signal level by a factor of 1000*!
Microphone signals are quiet, delicate signals and mic preamps do a lot of work to increase their level up to line level, which is why mic preamps can impart so much color to the sound.
* Voltage Gain in dB = 20log(output voltage/input voltage)

Benefits of outboard preamps
For this discussion, we will consider any preamp that is not part of an interface to be an outboard preamp. This includes the preamps in professional recording consoles and rackmount or table-top preamps or channel strips.
- Preamps create a specific sonic character (creamy, airy, round, etc): These colorations are precisely why people choose outboard preamps. The built-in preamps in most audio interfaces generally sound clean and transparent, especially at reasonable gain settings. External preamps let you spice up your signal with their unique flavor, such as a 60’s tube sound, 70’s transistor sound, etc. Some outboard preamps simply provide pure, uncolored sound at any gain level, useful for purist recordings.
- Design Quality: Since preamps do so much heavy lifting, each component, from the amplifying components to the power supply design and shielding affects the audio quality. Inexpensive interface preamps necessitate inexpensive components, while external preamps can employ higher quality parts and complex designs—at a considerable increase in price.
- Better sound quality: The higher you turn that gain knob, the more apparent the limitations of your preamp become. Interface preamps sound okay if you boost only by 35-50dB, but often become noisier or even distorted at extreme settings. External preamps continue to sound great—or even more interesting—as you increase their gain.
- Gain!: Your interface’s preamps usually offer less than 60dB of gain. Ribbon mics and other low output microphones sometimes require 70dB or more, especially when recording very quiet sources, like an acoustic guitar. Outboard preamps offer as much as 80dB of gain.
- More features: besides gain, professional outboard preamps often provide features like a high-pass filter, input PAD, phase/polarity invert, and some even provide options for adjusting input impedance and other tonal controls.
- Additional processing: An often overlooked feature of an external preamp, is the ability to route the preamp’s output into an analog compressor and/or an EQ before hitting the A-D converter in the interface. This processing can optimize the signal’s dynamics and add tonal color and saturation in the analog domain before you capture it as a digital signal. Only a few interfaces provide a analog insert points for patching in analog processors while recording, notably the affordable Audient iD22.
Cost considerations
A typical external mic preamp contains high-quality components—a well-built power supply, a durable enclosure, and quality switches and connectors. Parts cost for a decent single-channel preamp might range from $100 to $300, so their retail price is $400 to $1200 per channel.
Inexpensive interfaces include built-in preamps as part of a total package, designed to meet a retail price point of perhaps $200 to $600. That price includes preamps, instrument inputs, a headphone amp, monitor control, A-D and D-A conversion, and packaging. That means the preamp itself probably uses only a few dollars in parts and runs on power derived from its USB connection to a computer.
Preamps built into interfaces, therefore, are designed to provide acceptably clean and quiet gain for not-so-difficult recording applications. While those preamps function pretty well, it should be easy to recognize the quality improvements provided by an external preamp.
Features of preamps
- A preamp has to have input connections—XLR connectors for microphones and ¼” jacks for instruments such as guitars and basses. It’s important to bear in mind that the input dedicated to guitars/basses is usually labeled “Hi-Z” or “Inst.” A passive guitar or bass plugged directly into a mic input would sound thin and distorted.
- The output of a microphone preamp is at line level via either a balanced or unbalanced connection. If your interface has combination line/mic inputs, check the manual to see how to switch between line and mic input settings. If you use an outboard mic preamp, you will connect its output to your interface’s line input, not its mic input. Connecting a line-level signal into a mic preamp will overload the preamp circuit
- The most important function of a preamp is to bring a very quiet audio signal up to the full operating level. The quality of the mic preamp is most obvious at high gain settings. Once you go above 40-50dB of gain, cheap preamps can become noisy and tonally anemic or even distorted.
- 48V Phantom power (P48) is required by condenser mics. USB-powered interfaces need to generate 48V phantom power from 5V of USB bus power. Outboard preamps use 120-240V wall power to power the preamp and generate phantom power.
- The phase reverse switch is used to reverse the polarity of the signal. If a source is recorded with more than one microphone or a mic and a DI, you’ll want to verify that both signals are in phase with each other.
An example: when recording a snare drum with 2 mics, one from the top and one from the bottom, the mics are basically facing each other. When the snare drum is hit, the bottom microphone sees the drum head moving towards it, whilst the top microphone sees it moving away from it. When these two opposite signals combine, they’ll cancel each other, resulting in a weak sound which no amount of EQ boosting will fix. If you flip the phase of the bottom mic, the signal from both microphones will combine correctly, giving you a full, natural sound. - Some preamps provide a high pass (low cut) filter. This circuit removes low-frequency rumbles and p-pops from the mic signal. Removing thumps and plosives at this stage allows better processing and headroom down the line.
- The PAD switch is used to reduce a loud microphone signal before it has a chance to overload the mic preamp circuit. Beware that pads may slightly affect the tone of some microphones.
Types of preamp circuits
An important difference between various preamps is their tone. A colorful preamp can add body, weight, or sparkle to a thin-sounding voice, whereas a transparent preamp will reproduce the source as accurately as possible. Do you prefer a preamp designed to color the sound or do you simply need clean transparent gain?
Engineers use different preamps to achieve the appropriate color (or lack thereof) during the recording stage. Outboard preamps color the sound before it is digitized. Some interfaces, like UAD’s Apollo, provide software-based preamp emulations, which emulate the characteristics of analog devices via a combination of analog circuitry and digital processing. Preamp coloration can also be emulated by plugins during mixing.
Outboard preamp colorations occur due to the circuit design— vacuum tubes (valves), transformers, transistors, and various combinations and implementations of each. Preamps in interfaces almost always use integrated circuit chips to keep costs down. These built-in preamps provide clean, uncolored gain with few options for tone control or artistic coloration.
Some external preamps let you select between different circuitry to provide wide variations in tone. Examples of these preamps are the Warm Audio TB12 Tone Beast, the Audient ASP880, the Slate Fox Quadtone preamp, and the Retro 500Pre, among others. Preamps like those from Chandler Limited and the Coil Audio let you further affect the tone by changing input impedance, transformer settings, and even amplifier bias settings.
Tube preamps
Tube preamps are known for their high headroom and three-dimensional sound. Tube coloration can range from super clean to larger-than-life to creamy to gritty and distorted. As the level of the signal increases, tubes start producing even harmonic distortion, adding more and more depth, body, and weight. “Fat” and “beefy” are two words used by engineers to describe this sound. Tubes can also smooth out transients, taking the edge off of harsh high-frequency content.
Tube preamps can be very colored like the Universal 610 preamp, or extremely transparent like the Avalon 737 preamp. Some tube preamps gain even more tone from their input and output transformers, like the Chandler Limited REDD.47 preamp. Tubes wear out, so these preamps require routine servicing every few years to maintain their original tone.
Solid-state preamps
These preamps use transistors or opamps to amplify a signal and the specific sound of a solid-state preamp comes from its components and design. Neve preamps sound warm and thick, while API preamps sound more mid-focused, due to their different transformer and amplifier designs. Designs from GML, Millennia, and Avalon utilize sophisticated circuit designs that provide rich and lifelike audio, free of many types of distortions and colorations common to other preamp designs. Other solid-state preamps, like the Grace Designs M101, provide what some consider the most neutral “straight wire with gain” sound possible.
Hybrid preamps
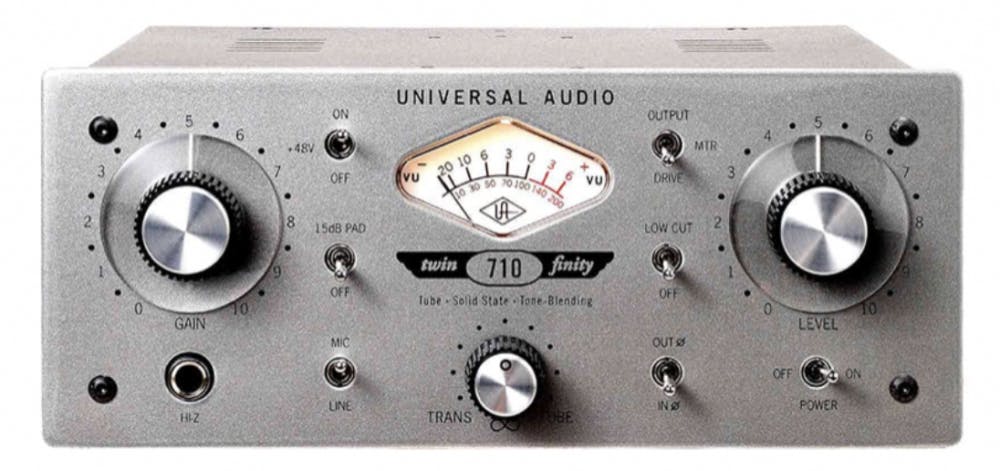
…combine the best of tube and solid-state circuitry in one device. Examples of hybrid mic preamps are Summit’s Everest and TPA models, Universal Audio’s 710, and Millennia’s STT-1 channel strip. With these preamps, the user can mix and match the tonal qualities of tube and solid-state circuitry.
Which type of preamp should I use for my recordings?
Now that we know the basics of the different preamp types and their colorations, we can formulate a choice that is best for us. Keep in mind that the colorful character of a preamp becomes more intense as the gain is increased, so many preamps offer a wide range of coloration.
- Classical music recording engineers tend to favor clean solid-state preamps for a pure and transparent sound. GML, John Hardy, Millenia, Grace.
- Vocals are flattered with tube preamps and colorful, transformer-based solid-state preamps. Neve, API, Manley, D.W. Fearn.
- For punchy and beefy drums, go for a solid-state preamp to capture as much of the transient as possible. API, Neve, Sphere, Spectra1964 (SpectraSonics).
- For a creamy vintage tone, go for a vintage-style tube mic preamp with some beneficial harmonic distortion. Retro Instruments, Coil Audio, Universal Audio.
- Versatile and affordable preamps from Warm Audio, Focusrite, Cranborne, and Lindell provide colorful tone options that will most likely outperform any interface’s built-in preamps.
Getting the most from built-in preamps
The good news is that we don’t always need an external preamp. Some interfaces include preamps that are really good, especially if you only need to record one or two mics on moderate volume vocals or instruments. Keep in mind that more expensive interfaces usually offer better preamps than entry-level interfaces.
I have seen many top artists record successful records using the built-in preamp on their interface. To be fair, they have a lot of experience recording, use very good microphones, record in well-treated rooms, and use the preamp at modest gain settings.
Most inexpensive interfaces’ preamps don’t provide a pad, a low-cut filter, and a phase switch, but the better interfaces do provide these useful options. Some preamps provide tonal modeling based on famous analog preamps and some actually contain excellent-sounding preamp circuits—notably the Focusrite Red and Apollo interfaces.
If you are mainly concerned with the ability to record quiet sources or low-output microphones (like the Shure SM7 or ribbon mics) a quick, inexpensive upgrade is adding an in-line microphone booster such as the Cloudlifter or a similar product. These devices provide clean gain so the preamp doesn’t have to work so hard. These devices cost $50-$200 per channel, but will stretch the usability of weaker mic preamps.
I’m going to assume you’re recording straight to your computer and not to analog tape. Our goal is to record in the analog electronic’s sweet spot, where the level is near optimum, but not overloading. Since interface preamps often don’t have level meters, you have to monitor your record level in your DAW. Keep your average level around -18 dBFS with the peak levels at or below -10 dBFS. This level may look low in your DAW, but your preamp and recorded audio will sound best in this range.
Understanding how your preamp level relates to your DAW meter.
Preamps are analog devices and they sound best when they create a signal around 0VU, which is referred to as +4dBu. This is 0 on an analog VU meter and equals the same level as -18dBFS on your DAW meter.
If you try to push your mic preamp louder, be it an interface’s preamp or an external preamp, you will start to overload the analog electronics.
Analog overload may happen before your digital meters overload and you may not even notice this tiny bit of distortion on one track, but it adds up quickly!
A good rule of thumb is to watch the peak meter in your DAW and make sure it never goes much above -10dBFS during recording.
Plugin emulations of preamps: Are they worth it?
Yes, they are. If you’d be buying an external preamp mainly to add some color to your recording path, emulation plugins can save you some money, while offering you enough coloration options to last a lifetime.
During Tracking
Plugins, like the UAD Unison preamps, digitally emulate the characteristics of the analog gear they model. Used during recording, this type of preamp modeling can help you commit to a specific type of coloration that enhances the recording.
Veteran engineers know that every microphone sounds different through each different preamp. A preamp interacts with and loads a microphone in a way that changes its frequency response, distortions, and overall tone, so it’s common studio practice to pair specific mics with specific preamps. Modeling preamps may or may not accurately emulate this type of interaction, so they only partially recreate the sound of an analog circuit.
What should I buy?
Mic preamps built into interfaces will generally get the job done, but it is generally a worthwhile improvement to upgrade to an outboard mic preamp. If you’re mainly programming instrumental tracks in your DAW and only record mics occasionally, an interface with built-in preamps should be suitable. If you plan on recording final vocals and other live instruments, focus on buying a high-end interface with good built-in preamps and extensive features. Outboard preamps can drastically improve the sound of dynamic mics but have less of an impact on condenser mics, which might influence your choice of microphone.
For the budget-conscious, I strongly recommend the Audient iD line of interfaces, such as the iD22, which features excellent preamps and converters. They’re inexpensive and they easily outperform more expensive interfaces. The next level of quality and features includes the UAD Apollo and the Focusrite X2P interfaces, which have great sound and feature-rich preamps.
Consider purchasing an outboard preamp if you would like to upgrade your audio quality and perhaps add an outboard compressor or EQ to your tracking setup. Great recordings make great mixes, so capture the best audio you can!
Do your research and read reviews in respectable magazines and websites and research your favorite artists to see what preamps they use for songs you are familiar with. Rent some time in a big studio with lots of preamp choices (and an assistant to guide you) and try out some high-end gear. The money you invest in that studio time will reward you with invaluable knowledge!


