Part I of this article focused on repairing continuous type noises and this second part addresses how to repair intermittent type noises, like clicks, pops, digital clipping and dropouts. Remember to keep in mind that while this article discusses noises present in musical productions, many of the same problems and solutions apply to producing podcasts, audiobooks, movies and multimedia content. Keep in mind that you may wish to review some of the tips discussed in Part I after reading this section. Let’s let Tiki continue… Adam Kagan – Ed.
Clicks
Clicks in your audio may be the result of lip smacks at the end of a gorgeous, soaring vocal phrase. Or maybe they’re vinyl surface noise ticks and pops—the irritating kind. Or maybe it’s the drummer accidentally clicking his sticks together while the cymbals are still ringing out at the end of the track.
RX7 has three tools dedicated to dealing with clicks: Mouth De-click, De-click, and Interpolate. Clicks are defined as very short impulses, perhaps 1 to 10 ms in length, and De-click will handle single or multiple clicks. Interpolate is best for single clicks that less than 4,000 samples long. To put that in perspective, at a sample rate of 44.1kHz and a tempo of 120BPM, 4,000 samples is less than 1/10th of a second, or about the length of one sixteenth note.
It’s important to use the Mouth De-click module on vocals, since it’s trained to remove clicks, but not consonants such as “T.” An example of a song that could have benefitted from Mouth De-click is Lana Del Rey’s “Young And Beautiful”. The first minute of the track is full of lip smacks and other mouth noises that detract from the performance, especially when listening on headphones.
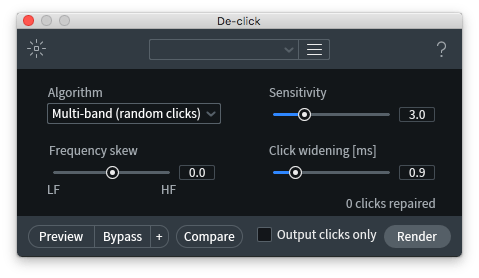
The frequency skew parameter is meant to inform the module whether the clicks are occurring towards the lower or higher frequency range.
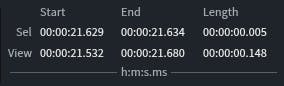
You want to set the click widening control as wide as the click is. To measure how wide the click is, select it and look at the bottom right corner of the window under “Length.” The top row shows statistics about your selection as hr:min:sec.ms.
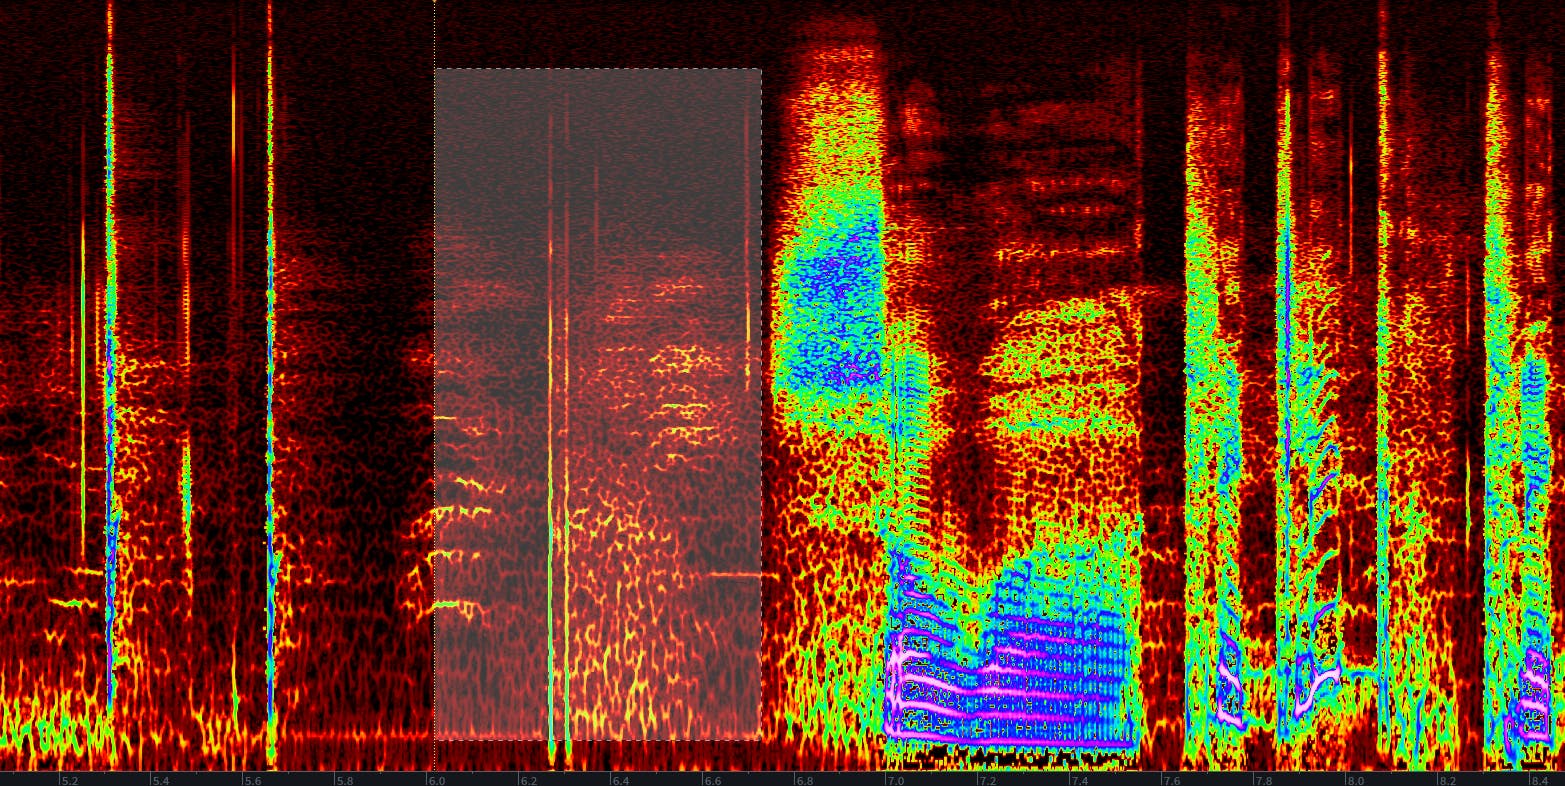
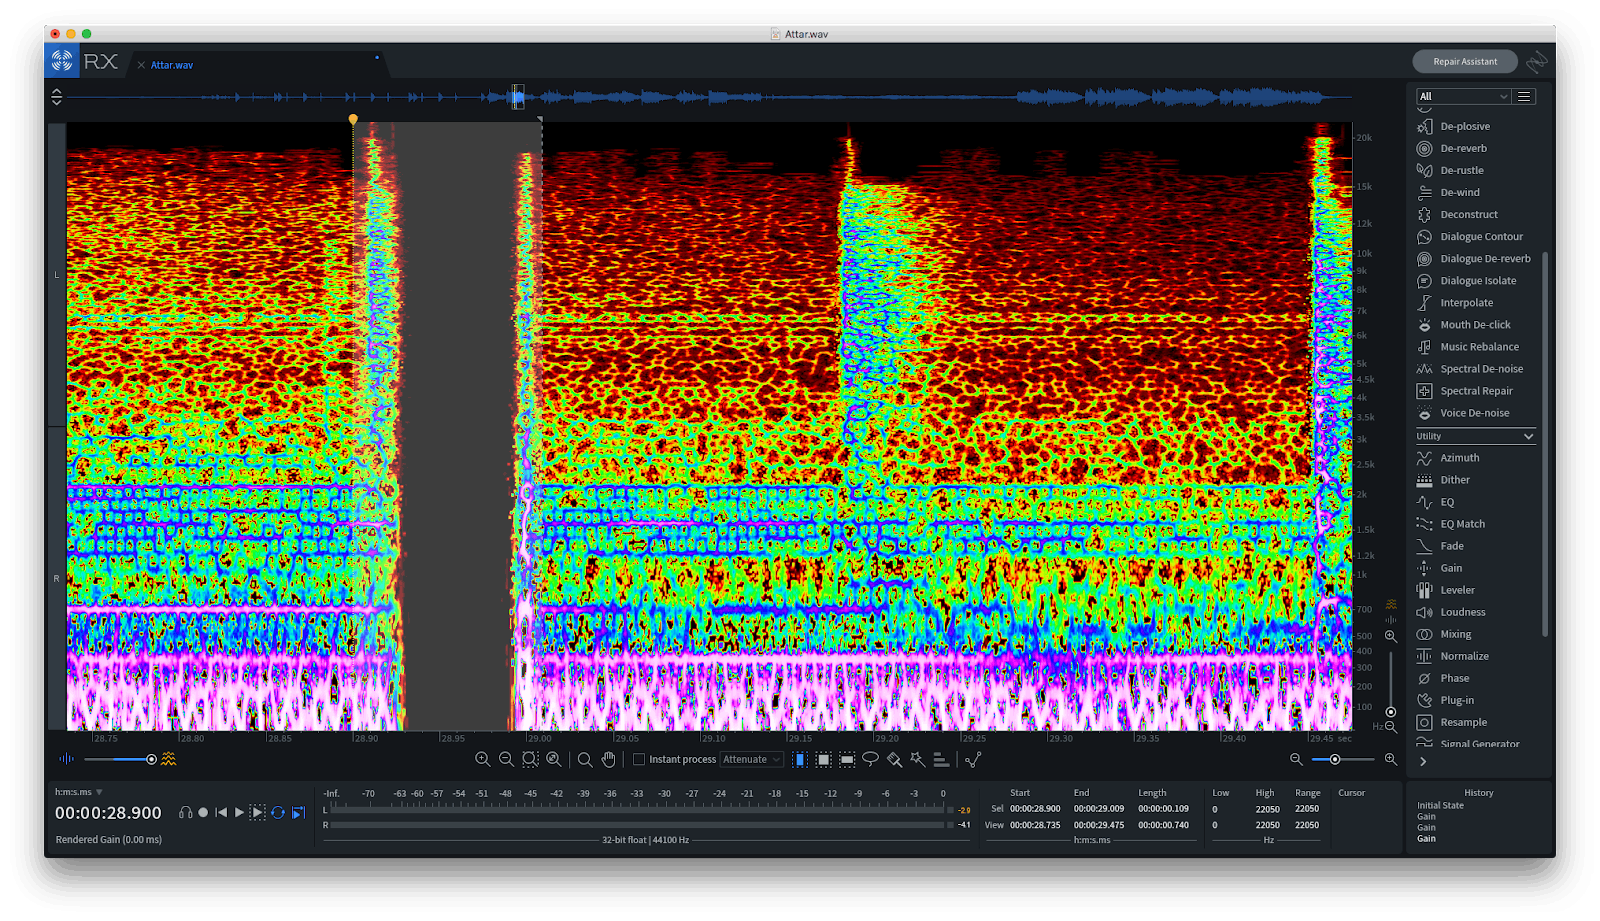
In case the various De-click modules don’t solve your issue, try the Spectral Repair module’s Attenuate mode. Yes, the rumors are true—Spectral Repair can give you higher quality results than De-click for noises longer than 10ms.
To use Spectral Repair to remove clicks, set the direction to horizontal so that material on the left and right of your selection will be used to repair the audio. Then switch to the Select Time&Frequency (shortcut R) tool to select and process the offending clicks one at a time.
Plosives
The plosive appears as a big blue spike at the bottom of the spectrogram. In order to better see what’s going on in the bass frequencies, right-click the numbers to the right of the spectrogram and, in the “frequency scale” menu, choose “extended log.”

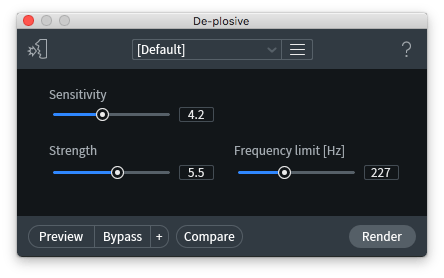
The traditional way of dealing with plosives requires a dynamic EQ that targets the low frequency region or an automated low cut filter. Some people elect to select the individual plosives in RX and turn down their level, and I’m sure there are other methods of removing plosives that I’m not thinking of. Thankfully, RX7’s De-plosive module can reduce plosives without affecting the low frequencies of a vocal.
The key control in the De-plosive module is the Frequency limit [Hz] slider. This slider lets you set how high up the frequency spectrum the module will work. Set it just above the frequency where the plosives are occuring so it doesn’t affect any desirable audio. Keep in mind that plosives, like p-pops, usually occur between 20hz and 300hz.
According to the RX manual, it’s best to use the De-plosive module BEFORE applying a high pass filter, because the module detects plosives by looking at the area between 20hz and 80hz. Removing too much low frequency content could throw off the De-plosive detector, giving you less-than-ideal results.
Clipping
If you have a file that’s clipping either digitally or in the analog realm, there’s a good chance you can fix it with De-clip.
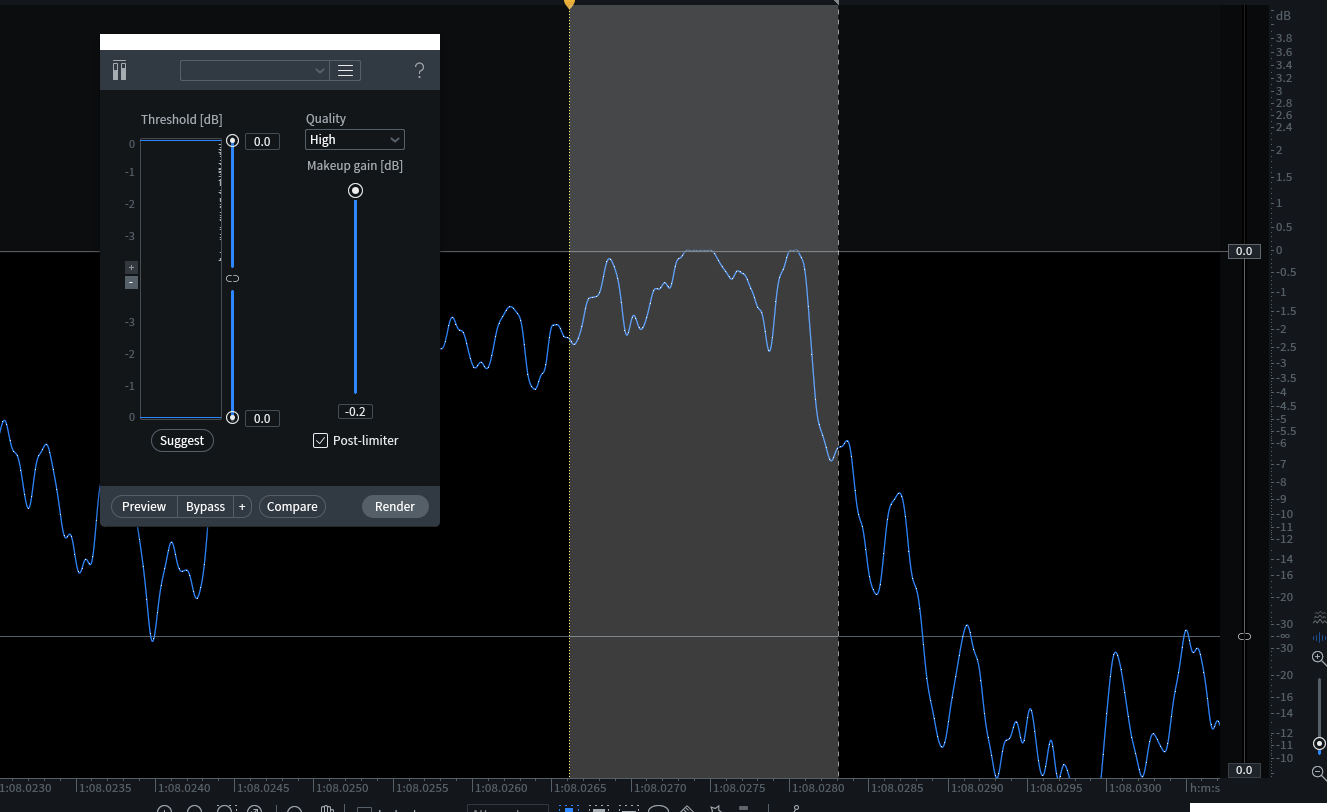
Select the portion of audio that’s clipping, click “suggest,” then tick the “post-limiter” box. The “post-limiter” option ensures the resulting waveform does not exceed digital 0.
If clicking “suggest” results in the signal clipping, manually bring the Makeup Gain down by 1dB or so. Then click “process.”
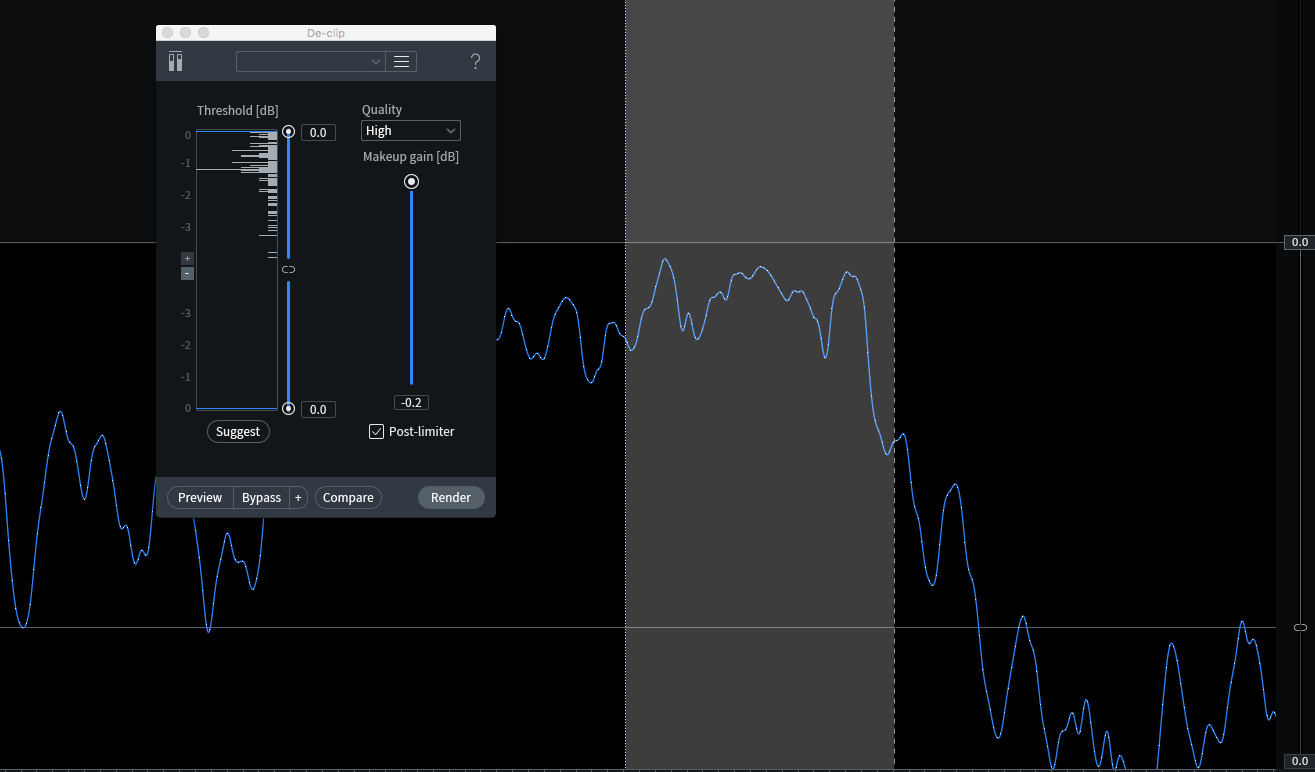
You can clearly see that the flat-top portion of the wave in the top image became a rounded waveform in the bottom image.
Along with De-clip, other modules such as De-crackle may be effective as distortion may resemble crackling. In more disastrous cases, try using the Deconstruct module and reduce the “noise gain” slider by a few dB to see if that helps. Lastly, if the distortion is visible on the spectrogram, try Spectral Repair’s Attenuate or Replace modes.
Dropouts
These are discontinuities in the audio.
Usually, you’ll find there are spikes, or clicks, at the left and right edges of the dropout. If the dropout is very short, simply deleting the region from the audio file may fix the problem. If, on the other hand, the dropout is on the longer side and deleting the section throws the whole region out of time, a different solution is needed.
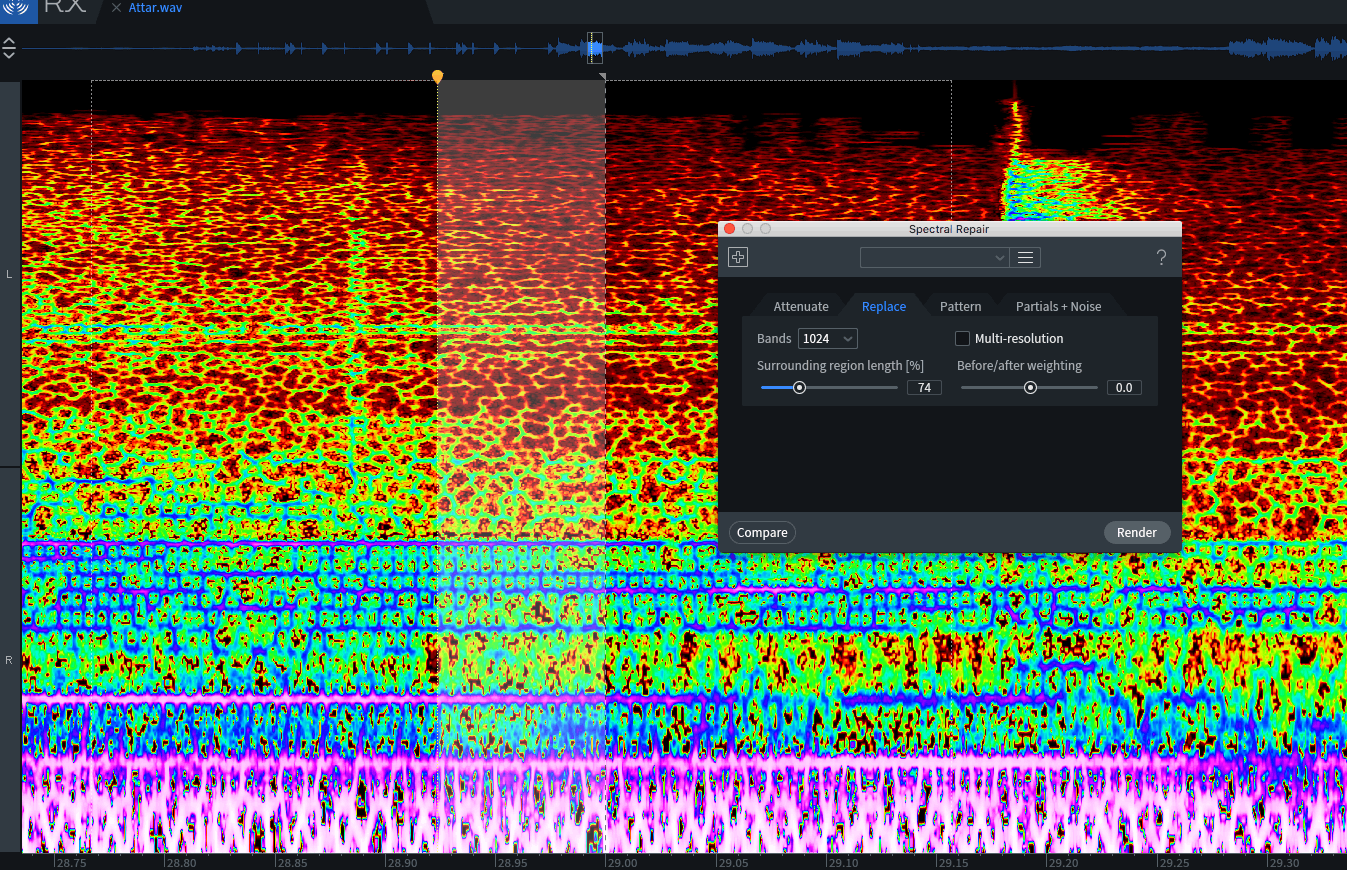
This is the case for the Spectral Repair module. If the dropout is short enough, using the Replace mode is the way to go. Replace mode tells RX to “take audio from point A to point B and redraw the waveform, please.”
The Before/after weighting slider directs the module to sample data from before or after the dropout, and the Surrounding region length % control chooses how much surrounding data is used to interpolate and recreate the missing information. Be aware of any sustained notes before or after the dropout. Also be sure to remove any clicks that occur from the edges of the region before or after the dropout.
Modern technology, like noise reduction software, is lovely and I thank God almost every time I can use products like Izotope’s RX7 to fix problems like the ones described in this article. RX7 often saves me (and my clients) the time and expense of having to re-record or re-render and may save an otherwise perfect live performance! Invest the time to become familiar with a noise reduction software bundle and you will have the skills and confidence to solve many types of problems that regularly come up during editing, mixing and mastering.
Be sure to listen for problems early on in your production and check your repair work on headphones that you trust, as monitoring on speakers may not always reveal the tiny clicks, pops and other artifacts that become more noticeable and annoying during mixing and mastering. As always, remember that monitoring with Sonarworks Reference will clear up the sound of your monitors and headphones and allow you to more easily hear the details in your mix.


