One of our main goals while mixing and mastering is to create a certain amount of musical impact, which we call loudness. As simple as it sounds, monitor volume during mixing and mastering is one of the main variables that we can control to help us achieve consistency in our mixes, especially when we are trying to create the appropriate amount of impact.
Volume describes the actual sound pressure level (dB SPL) in a room, while loudness can be thought of as how intense, dense, powerful, or “loud” the sound feels to you. For example, when we listen to a recording of an explosion played back at a low volume, the explosion sounds like a loud sound to our brain. A recording of a whisper played back at a high volume will always be recognized as a quiet sound. We sense the original energy of the sound (its loudness) independent of its volume at the moment.
Our job during mixing and mastering is to create the impression of the appropriate intensity, or loudness, of the music. A well-mixed and well-mastered song should sound balanced at any reasonable volume level. In order to consistently create songs that sound as you intend, you should work in a consistent, calibrated listening environment. A big part of nailing every mix or master or production is simply creating productions that have a uniform frequency balance and perceived loudness.
Is Monitor Volume Important While We Mix or Master?
Monitoring at levels that are too soft or too loud can fool us into making poor decisions because we don’t perceive frequency balances equally at different monitor levels. At low monitor volumes, we are sensitive to midrange frequencies while the lower and higher frequencies seem weak. At higher listening volumes, the low and high frequencies become more prominent and the midrange falls back into place. The actual frequency balance of the mix doesn’t change at different volume levels, but our brain’s interpretation of the frequency content changes. If that all seems confusing, simply keep in mind that at soft listening levels, music sounds thinner and midrange-y, while at loud volumes the bass and treble feel powerful and the mid-range feels softer.
In the 1930s, acoustic researchers Harvey Fletcher and Wilden Munson studied this phenomenon of human perception of frequencies vs. loudness. They developed a loudness contour, called the Fletcher-Munson curve (fig. 1), which indicates the volume (dB SPL) levels necessary for a listener to perceive a constant loudness level across the frequency spectrum. These curves were refined in 1956 and have become the ISO 226 standard for equal-loudness-level contours.

So How Loud Should We Mix?
Given that we perceive frequency balances differently at various volume levels, how loud should we monitor when we are mixing or mastering? From the Fletcher-Munson curve graph, we see that a monitoring level of 85 dB SPL (in a large room) provides the flattest hearing curve. If you are working in a small space, like a typical bedroom studio, the flattest response is probably at around 79 dB SPL. Now that we are aware that our sensitivity to bass and treble frequencies changes as volume changes, we can imagine that monitoring too softly will cause us to want to increase the bass and treble content of our mixes, and if we monitor too loudly, we will want to increase the mid-range levels.
To reiterate, creating consistent mixes and masters relies, in large part, on a consistent monitoring environment. We judge the power of music by how it fills the room or punches us in the gut, etc. and we need to maintain a consistent monitor volume in order to fairly judge each project. You should check your mixes at various volumes, but for the majority of the mix process, and especially for mastering, you will more easily be able to make decisions if you work mostly at a calibrated monitor volume.
Calibration
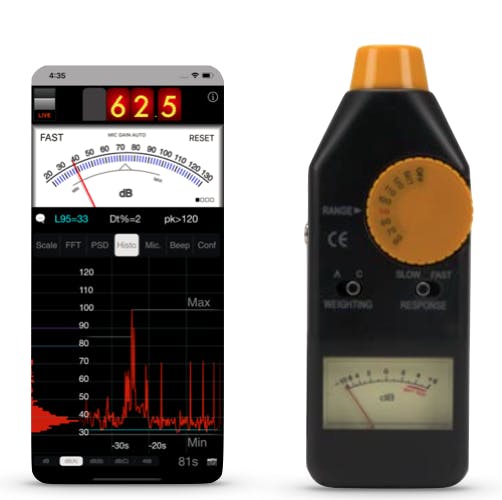
Our goal is to find a reliable and repeatable monitoring level that sounds balanced in your listening environment. This is called the calibrated monitor level. To calibrate your monitoring level, you will need some sort of SPL meter. I use an iPhone app called SPLnFFT Noise Meter, but you could also use an inexpensive dedicated SPL meter, like the Velleman analog meter or the Extech digital meter. [NOTE: If you decide to use a phone app as your SPL meter, you should verify its accuracy at least the first time against a reference SPL meter. If your phone is off, simply note the offset and keep it in mind when taking your measurements. Professionals even calibrate SPL meters that are used for important measurements against a reference source known as a pistophone calibrator.]
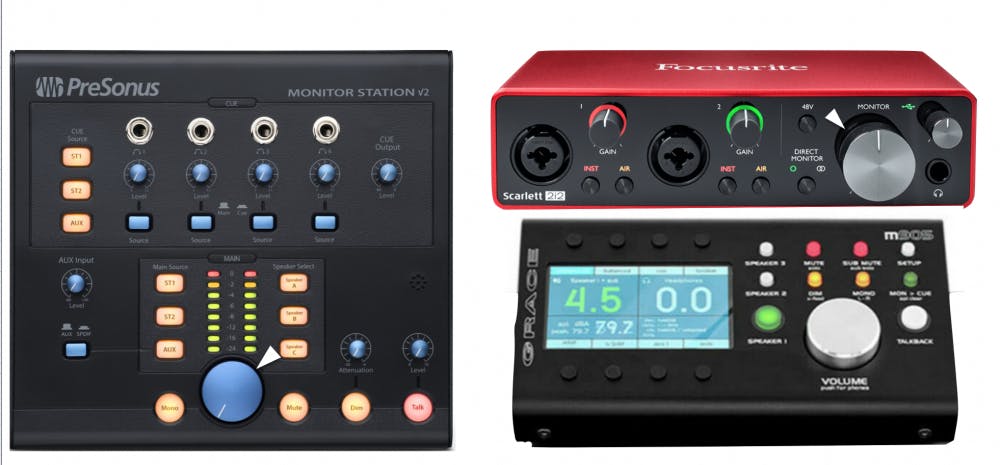
Start the speaker calibration process by turning your monitor levels down from your interface or monitor controller. We will use a signal generator in our DAW to calibrate the monitors. Every DAW has a plugin that can generate test tones. For instance, Signal Generator in Pro Tools or TestOsc in Logic, the test tone generator in Ableton, or the Test Tone Generator in Cubase. Set up a signal generator plugin in your DAW to output pink noise at -20 dBFS and verify it’s at -20 on the master fader output meter. If you use a stereo plugin, hard-pan the left and right channels, but if you use a mono track and plugin, make sure to center the pan knob. If your interface has an output meter or if you use UAD’s Console app, you can verify that the output is indeed -20 dBFS.
Why -20 dBFS? -20 dBFS on your DAW meter means that the level is 20 dB below full scale, where full scale is the top of the digital meter. -20 dBFS equates to 0 on an analog VU meter, also is also called +4dBu. Most DAWs for music use the standard of -18 dBFS = 0VU, but post-production studios use -20 = 0VU. Your DAW or interface’s manual will define whether it uses -18 or -20 as its reference standard.
Grab your SPL meter or launch your SPL app and position the meter/phone in your listening position, where your head would usually be, with the microphone pointing straight up. If the meter gives you the option, select the C weighting scale and slow response time, as these are the most accurate settings for this type of measurement. Play the pink noise to one speaker (pan it to one side or mute one channel in your DAW) and slowly bring up your monitor volume until the SPL meter registers 76 dB SPL. Now mute that speaker and send the signal to the other speaker. The SPL meter might vary slightly but aim for less than ± 0.5 dB between the left and right speakers. If the second speaker is more than 0.5 dB louder or softer than the first speaker, you may have to adjust the gain knob on one of the speakers or the power amplifier if you are using passive monitors.
Now play the pink noise through both speakers and your meter should read 79dB, which is a 3 dB increase because both speakers are playing. You should also notice a solid center image, which will confirm that your speakers are in polarity with each other. We have now calibrated your speakers assuming that you have a typical small-sized home or project studio. If you are in a large mix room (more than 35 cubic meters in volume), you may want to increase the level of each speaker by 6dB. This level of 79dB for small rooms or 85 dB for large rooms is now your calibrated monitor level. You should note where your monitor volume knob is set for the calibrated volume. On monitor controllers with a digital readout, it is easy to store and recall this precise setting, otherwise, you may want to place a mark on your monitor controller to indicate this playback level.
With your newly calibrated monitor setup, you can now mix with the confidence that you are working at an optimal and consistent level. Because of the equal-loudness phenomenon, it is vital to keep your monitoring level consistent when mixing. Do occasionally check your mix at a very low volume to make sure the lead elements are still audible and do play your mix loud to see if any elements become painful but do the bulk of your work at the calibrated monitor level.
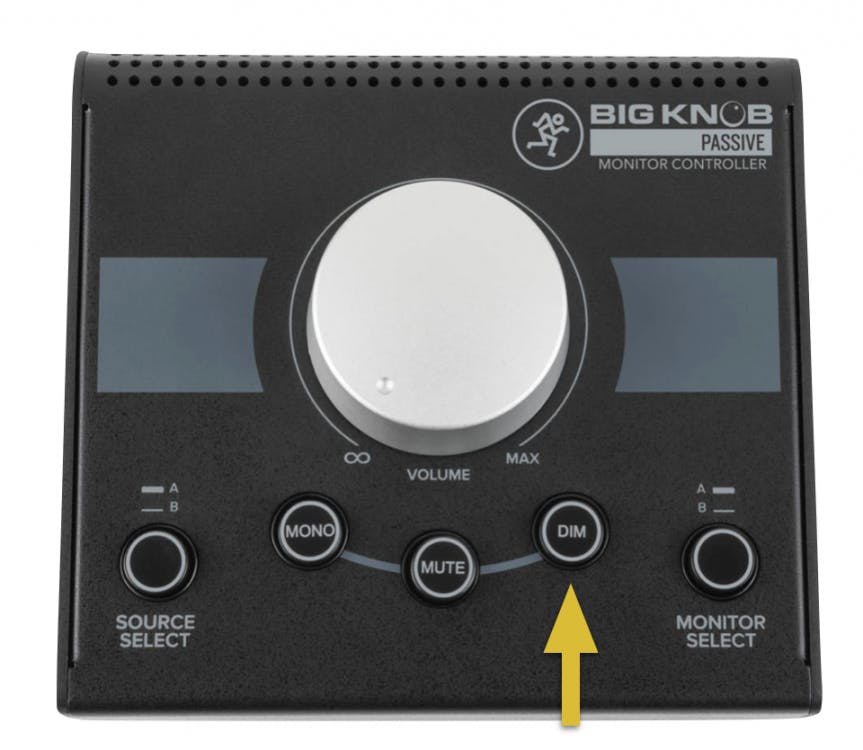
Many audio interfaces and monitor controllers have an adjustable DIM function, which allows you to press a button and drop the monitor volume by a preset amount. DIM is useful for checking balances at a lower listening level and also simply to allow you to have a quiet conversation while the music is playing. Switching off DIM will instantly reset your monitors back to your calibrated monitoring level.
Calibrated Monitoring on Headphones
If you regularly mix or master on headphones, we can’t easily measure the SPL level of our headphones, so level calibration is not as straightforward. We must simply rely on our musical sensibilities. For headphone calibration, I suggest you listen to well-mastered reference songs at various levels until you feel that you have found a level that provides the proper feeling of impact, intensity, and a full-range frequency response. Then, mark your headphone monitor level control at this calibrated level. As with monitor speakers, the more consistent you are with your listening level, the more consistent your mixes and masters will turn out.
Mixing tip: To set the optimum level for reference tracks during mixing, import some reference tracks that have already been mastered and lower their playback fader or clip gain level in your DAW by 6 to 8 dB and listen to them at your calibrated level. By lowering the level of mastered tracks by 6 or 8 dB you can more fairly compare your unmastered mix-in-progress to mastered reference songs.
Mastering tip: To use reference tracks during mastering, simply import some reference tracks that have been mastered and listen to them at your calibrated level. Now you can confidently compare your masters to commercial reference masters for their loudness, impact, and feeling without relying on level meters. If you are importing mp3 versions of commercial mixes, you may want to reduce their level by 0.5 to 1 dB, since a lossy version of a master will sound a bit louder than the original master.
Get to Work
Calibrating your room for loudness is an essential step towards consistent mixing and mastering. Calibrating your monitors for an ideal frequency response is equally important and tools like Sonarworks SoundID Reference create the optimum EQ curve for your monitors in your listening environment. Tuning up your monitor system like this puts you well on your way to creating professional sounding, competitive mixes and masters.
For more reading:
Mixing and Mastering With Reference Tracks


