Reverb on live and triggered drum tracks provides punch to close-miked drums along with a sense of space around the kit that blends the drums together. We don’t necessarily want to notice the reverb, but we want to create a sense of a real space for the drums and to fill the cracks in the mix with the tonality of the drums. This reverb technique is the foundation for drums in many top pop, rock, and metal records. Follow this simple recipe and you can create this effect with almost any reverb plugins you own.
Stock DAW reverb plugins will certainly work for this technique, but as you progress, you may come to find certain plugins that shine for this application. Two individual stereo reverbs create this effect. One reverb creates a feeling of the drums filling a small space with sound. The second reverb creates sustain and a tail for the drums.
Verb 1. Send the snare first to a short reverb. Start with a stereo ambience or nonlinear preset and set the reverb time between 200 and 500 milliseconds. Send a lot of snare to this reverb and listen to what it sounds like. Then turn down the reverb until you barely notice it. Too much of this and your drums will sound like the ’90s! Send any combination of the snare top, snare bottom, toms, overheads and maybe even a touch of the hat and kick to this reverb. This reverb also works well for programmed drums, percussion, and even electric guitars.
Verb 2. Mute the first reverb and send the snare to the second reverb. This reverb could be a stereo room, hall, plate or chamber set to a decay time between 1.5 and 4 seconds with 10ms to 20ms of predelay. Send enough snare to make this reverb loud and then turn the effect return down until you feel a long decay, but the reverb is softer than the snare. You’ll find that the softer this reverb plays in the mix, the longer the decay time should be so that you hear more of the tail. Try sending different combinations of snare, toms and overheads to this reverb. Some mixers send the overheads but not the snare to this verb, while some prefer the opposite.
Viola! Play the drums along with both reverbs in the context of the mix. The long reverb should disappear in time with the beat—usually an eighth- or quarter-note in length. You shouldn’t even notice the short reverb until you mute it, and then the snare will lose its body.
Extra Credit: Insert a high-pass filter from 200 to 400 Hz after the long reverb. Also try compressing the output of the long reverb by 4 dB with a 20ms attack and 50ms release to enhance the character and density of the reverb. Some mixers only send layered snare samples to the reverb and keep the original snare dry for extra clarity.
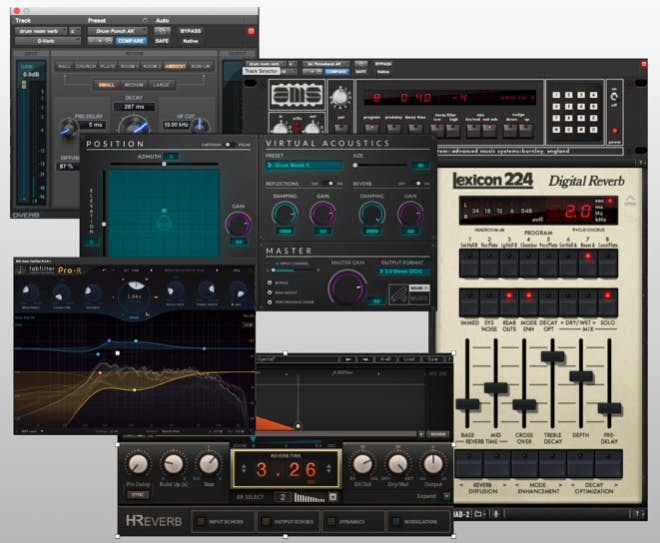
Below are some useful starting points for a few common plugins, but try whatever reverbs you own. Any parameter not mentioned here should default settings that works well, but feel free to experiment with your own settings!
Short Reverbs
In general, try any preset called nonlinear, ambient or small room.
Avid D-Verb: Ambient + Small setting, Decay 280ms, HF Cut 10 kHz, LP Filter 10 kHz. Adjust Decay up to 500ms as desired.
AMS rmx16 (UAD): Use program 8 “Nonlin 2,” decay time 4, predelay 0, decay filter -4. Adjust decay time as desired.
Dear VR (Stereo): Use preset “Drum Room 1,” Size 50, Output Format 2.0 Stereo (2CH). Adjust Size as desired.
Long Reverbs
In general, try any preset called medium room, large room, drum room, or studio.
Waves H-Verb: Use preset “Blue Plate Special,” Output Echoes OFF, Adjust Reverb Time as desired, from 1.5 to 3.5 seconds.
fabfilter Pro-R: Use preset “Mellow Narrow Hall for Snare,” Adjust Space between 1.5 and 2.8 seconds and adjust Stereo Width as desired. Set Predelay to 15ms.
Lexicon 224 (UAD): Use a drum room preset that uses Program 7 (Room A). Adjust Mid Reverb Time to 1.8 to 3 seconds and Low Reverb Time to below 2 seconds.