
Can you really call yourself an audio engineer if you haven’t gone from being proud of a mix to ashamed of it in less than 24 hours?
One of my first mixing gigs was for a radio station that hired me to remix their live concert recordings for broadcast. After working on my first mix for a week straight I brought it to my boss for revisions. It was terrible, but he let me down easy. “It’s alright kid, we’ve all been there,” he said. “I listened to a mix in my car last week and got so mad I threw the damn CD out the window.” John was a good audio engineer and a great mentor. He taught me that the problem wasn’t with my ears—it was my room. Specifically, the acoustics of my room was the problem.
This article will get you on the road to properly setting up your control so you don’t follow my path of producing sub-par mixes due to bad room setup and acoustic problems. Sonarworks’ blog contains a lot of information about setting up your room and acoustics, but this article will teach you the basics. At the end of this article, you’ll find useful links to learn more.
Setting Up the Guest Room as Control Room
Many engineers dream about working in facilities like Abbey Road, Record Plant, and Blackbird—but the reality is most of us (including pros) work in bedrooms, attics, and basements, which typically provide less-than-ideal acoustics. Square rooms with surfaces like drywall and concrete can cause sound to bounce around the room and smear your perception of the sound.
Thankfully, there’s quite a bit you can do to improve the acoustics of an existing room without having to hire an acoustician or a construction crew. We’ll cover some simple room setup tips that will help ensure that you can produce mixes that sound good on any system.
Listening Position
Good mixes start at the source. It goes without saying that high-quality studio monitors are a must for achieving pro-quality mixes, and their setup and placement within a room can have a big impact on their sound. In fact, the acoustic treatment of your room will make a larger impact on the accuracy of your monitoring than the monitors themselves. Great monitors in a poorly treated room will sound awful. Conversely, modestly-priced monitors can sound fantastic when properly set up in a well-treated room.
When setting up your mix position, it’s best to aim the speakers so they’re firing down the long dimension of the room. The more distance between the speakers and the far wall, the less chance they have of creating unwanted reflections. Additionally, your listening position shouldn’t be too close to the rear wall.
The ideal listening position is 38% into the length of the room, centered between the left and right walls. However, this distance will vary from room to room, depending on the layout. For most home studios, it’s best to find your listening position before you determine where to place your monitors. Use the technique at the end of this article to help locate your ideal listening position. Once you’ve identified the ideal listening position for your room, it’s time to place the monitors.
Locate Your Listening Position
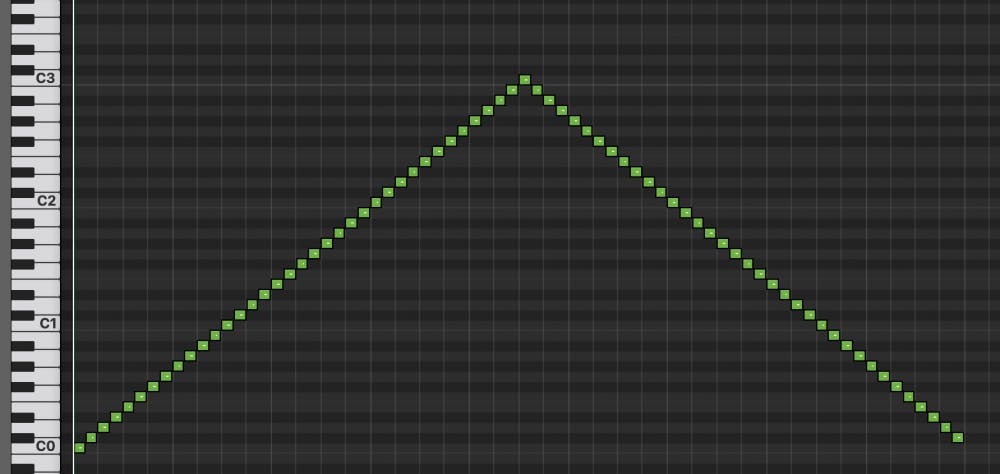
You can easily find the best listening position in your room with no measurement tools except your ears. For this exercise, it’s best to program a midi pattern playing a stepped bassline with a smooth sine bass sound. (The default patch on Logic’s EXS 24 is a sine wave) Program a bassline that starts at low C (three octaves below middle C), which is about 31 Hz. Then program a half-step increase for every eighth note up to middle C. Then reverse the pattern to descend one half-step for each 8th note. Set the tempo to 100 and loop the pattern. Or download and loop this audio or midi file
Place a speaker on the floor in a corner of the room and face it into the room. Unplug the other speaker and play the bassline out of the speaker at a comfortable volume. Now place a chair where you would like to have your listening position. Listen to the bassline and make a note of any moments where the volume changes noticeably. Now move your chair forward or backward by 8 inches (20cm) at a time and listen in each position. Mark the floor at locations where the sound is most even for every note in the bassline. The most even-sounding position is the best listening position. Use this listening position to guide your monitor placement in the next step.
Monitor Placement
If you ever wondered when your trigonometry studies would be helpful this is the moment you’ve been waiting for. You’ll want to create an equilateral triangle between you and your two monitors—meaning the tweeters should be the same distance from the back of your head as they are from each other. For speakers with 8-inch or larger woofers, a distance of 65 inches (165 cm) provides a good starting length for each leg of the triangle.
The ideal speaker height orients the tweeters at ear-level. Your speakers should be standing straight, not tilted. If your monitors tilt forward or back the sweet spot will be extremely small and you are effectively changing the time-alignment that the manufacturer carefully designed into the speaker’s front face. Also, most speakers work best standing vertically, rather than horizontally, although some speakers are designed for horizontal placement.
Monitor stands will aid in the proper placement of your monitors and offer added isolation that can help prevent unwanted desk vibrations, Should you have to place your monitors on your desk, isolation pads can provide some benefits. Try to place your monitors so that the left and right monitor are the same distance from their closest side-walls. In most residential-sized rooms, you will also want to place your monitors only a few inches from the front wall. Now that you’ve identified your listening position and properly placed your monitors, it’s time to apply some acoustic treatment. Read up on monitor placement in this blog.
Acoustic Treatment
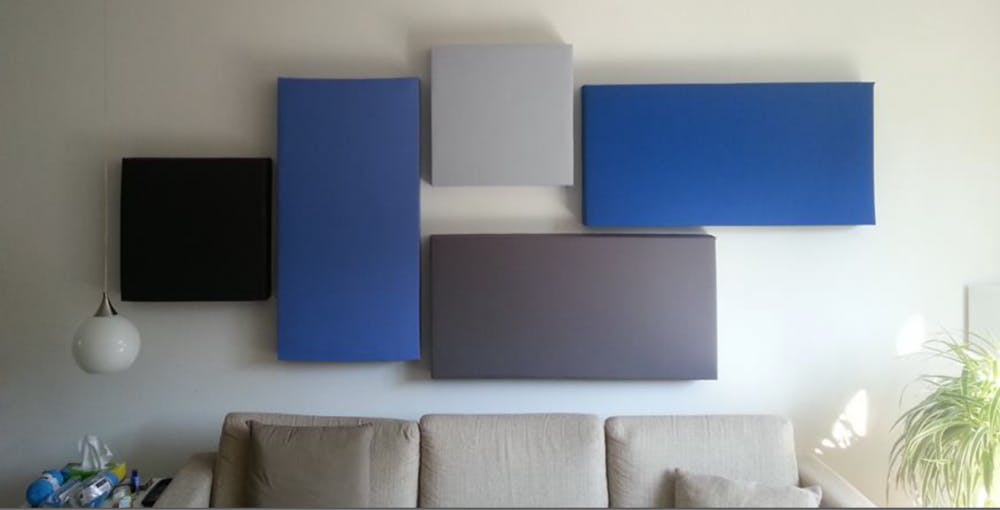
OK, let’s just rip this Band-Aid off right away—egg cartons, moving blankets and carpet are not going to improve the acoustics of your studio. These materials (at best) only absorb high frequencies. They don’t do anything for the low-end, which is the biggest problem in small studios. If you want professional results, you need to use professional materials. There are two basic types of acoustic treatment: absorption and diffusion.
Absorption panels are typically made of thick, porous material, like rigid fiberglass or mineral wool. These panels absorb sound to tame reflections and provide a more accurate sonic environment. Diffusion panels scatter sound waves in random directions to remove distinct echoes and reflections and provide a more neutral sound to a room.
Rooms for live performance require some room reflections to sound natural, while in control rooms we wish to eliminate any early reflections. Tracking rooms will usually have a mixture of absorption and diffusion, while small control rooms should skip the diffusion and try to cover at least 50% of the wall surface with broadband absorption. The most important sonic problem to tame in a small control room is the bass and we can use absorbers for this purpose.
Bass Traps
Bass frequencies are the most difficult to tame in any studio. They tend to create high-pressure areas in the corners of small rooms, causing sonic variations as large as 30 dB. That means even though the sound coming out of your monitors may be balanced, your room is working against you by creating huge EQ cuts and boosts at different spots around your room.
Bass traps provide the best defense against these problems. Bass traps can be made from 4-inch to 8-inch (10 cm to 20 cm) thick absorption panels placed across the corners of your room to trap or absorb the energy of low-end frequencies. The more low-frequency energy the traps absorb, the less energy reflects back into the room. Start by hanging bass traps in the corners behind your monitors, followed by the corners on the back wall. For a more in-depth look at the acoustic treatments for bass, check out this blog post on the subject.
Early Reflections
Another important problem to address in your studio is “early reflections” that come from the walls to the left and right of the mix position. Most of the sound from your monitors travels directly to your ears, but some of it reflects off of the side walls and arrives at your ears a few milliseconds after the direct sound. This time delay causes a smearing effect, which results in midrange frequency cancellations and poor stereo imaging.
Absorption easily solves this “first reflection” problem. Simply place absorption panels to cover these reflection points. You can identify these points using “the mirror method,” which requires a handheld mirror and a little help from a friend. Sit in the listening position and have your friend hold the mirror flat against either side wall. As they move the mirror from next to your listening position towards the front of the room, make note of where you see a reflection of the speaker. Place an absorptive panel to cover the reflection points on both side walls. For more information on first reflection problems, read this blog post.
Ceiling Clouds
Now that the corners are covered and the early reflection points are taken care of, it’s time to focus your attention a little higher. The ceiling above the listening position creates early reflections just like the walls. It’s much more difficult to put a mirror on the ceiling, so a good rule of thumb is to treat the ceiling space from over your head to just in front of the monitors.
Ceiling clouds in home studios can serve as an absorber to kill first reflections and also as a bass trap, as long as you make them thick enough and can hang them a few inches from the ceiling. Furthermore, the cloud will prevent flutter echoes between your floor and ceiling, if you have a hard floor surface. it’s also a good idea to place a rug under the listening position. Not only does it help absorb sound waves, it really ties the room together!
Back Wall Treatment
Now that you’ve got the corners and early reflection points covered it’s time to focus your attention on the back wall. Sound from your monitors reflects off of the back wall and bounces back to you and around your room, causing frequencies to sound “blurry.”
While absorption panels would kill reflections from the back wall, too much absorption can cause a studio to sound “dead,” which can skew your perspective. This is a case where diffusers can help disperse sound and prevent echoes without taking the liveliness out of your room. If your back wall is not at least 8 feet (2.4 meters) from your listening position, absorbers may be more useful than diffusors.
Don’t make the same mistakes I did and set yourself up for success by setting up your monitoring environment the right way. Spend some time reading some additional information about room acoustics and setup (links below). Remember that room treatment and proper setup are what produce a good-sounding system— even more than your choice of monitors. Budget a few hundred dollars for room treatment and you’ll be well on your way to making great-sounding mixes!
Further Reading:
Set Up Your Studio Monitors the Right Way


