Top-Down Mixing. What Is It, And How Will It Help Make My Mixes Sound Better?
Develop Your Own Mixing Strategy
If you’ve ever watched an experienced, proficient mixer at work, the first thing you will undoubtedly notice is that they work fast. If you’ve ever watched a newbie mixing on a DAW, you will undoubtedly notice that they work extremely slowly. A large part of these two scenarios is attributed to lots of experience or the lack thereof. With experience comes confidence and a strategy or system. Successful mixing strategies may involve templates, specific processing techniques and a vocabulary of tools that work for you.
Gather ten mixers in a room, and they’ll have ten different opinions on the best workflow, which particular workflow makes for a great mix, and what causes a not-so-great mix. There’s one cause of a bad mix that is undoubtedly on everyone’s list; that is second-guessing ourselves as we are working. The more time we spend on a mix, the more prone we are to this exceptionally human pitfall.
How do the pros minimize the potential of second-guessing themselves and becoming mired in minutiae that really don’t matter in the big picture? Mixing requires a certain amount of ego and self-confidence. A mix, after all, is built through a series of decisions and experienced mixers are confident in their mix decisions and can see (hear) a few steps ahead in the mix process. Through experience and the use of a mixing strategy that we develop over many mixes, we gain the confidence that our decisions are solid and we can always make adjustments along the way.
Don’t Fall Down the Rabbit Hole
Inexperienced mixers tend to spend too much time obsessing over the sound of one instrument at a time while forsaking the sound of the mix as a whole. Here are two tips to help eliminate or at least reduce the tendency to hyper-focus, second-guess ourselves, and become mired in things that really don’t matter in the big picture.
- Stay focused on the overall feel of the mix rather than starting with minor details that won’t make much of a difference. The audience reacts to the message and feel of a song, not the panning of the hi-hat.
- Work quickly. Make decisions and move forward. You will keep tweaking as you move forward, so don’t dwell on any one decision. A good strategy or template allows you to work quickly without painting yourself into a corner along the way.
Welcome to Top-Down Mixing
One mixing strategy that seems to work well for many mixers is referred to as “top-down mixing.” The central aspect of the top-down mixing strategy is to begin a mix by working with the mix bus and subgroups and stay focused on the song as a whole, rather than first treating all of the individual mix elements.
The ultimate destination of all the mix elements is the final mix bus. No matter how complex your mix routing gets, everything hits the mix bus. The doctrine of top-down mixing is that we start from the mix bus, and work backward from there. That is to say, we mix “into” a processed mix bus from the very start. The processing we apply to the mix bus and then to the subgroup busses, have the most impact on the overall sound of the mix. This way we can get the mix sounding cohesive and balanced in very little time.
After getting a solid sound on our mix bus and subgroups, we will finally work with the individual tracks, but only where necessary. Since the busses further down the signal flow already have processing on them, it is likely the majority of the individual tracks will need minimal, if any, tweaking.
This process ensures that we are working more holistically with the sound of the full mix, rather than on individual tracks. Top-down mixing also pays credence to the 80/20 rule, also known as Pareto’s Principle. For mixing, this means that 80% of the results will come from 20% of our mix moves/decisions. Top-Down mixing ensures that the critical 20% comes first.
Top-down mixing can also be thought of as mixing in “layers.” We start with the master bus as the top layer, which has an impact on every single element in the mix. Then we process the middle layer, the subgroups. Mix decisions at this stage effect every track feeding into the respective subgroups. Finally, we get to the lowest level, the individual tracks. Again, by taking care of the first two layers, there should be very little to do on the individual tracks. This workflow allows us to stay sharp and focused as the initial mix decisions provide maximal impact.
Ready, Set, Mix!
Mix Bus Processing
Start at the end—with the mix bus. There is plenty of debate as to how much processing, like compression and limiting, to use on a mix before it goes to mastering. It is conventional wisdom that, at the very least, some mix bus compression is useful to help all the tracks blend nicely. The top-down strategy tells us to set up our mix bus processing at the start so that we are always mixing “into it.” Adding compression to a mix bus later rather than earlier will change the balances and tone of the entire mix we have already worked so hard on.
Begin the mix by routing your tracks to either the mix bus or subgroups and then play the song and set the basic fader levels. The goal at this initial stage is to get a well-balanced mix with just fader levels and panning. Set up your mix bus compression to help the tracks gel, without killing the transients. You might try some subtle “glue” type bus compression (think SSL Bus compressor or Fairchild 670 tube compressor). Or you might want to hit the compressor a bit more aggressively with an API2500 or even an F.E.T. compressor.
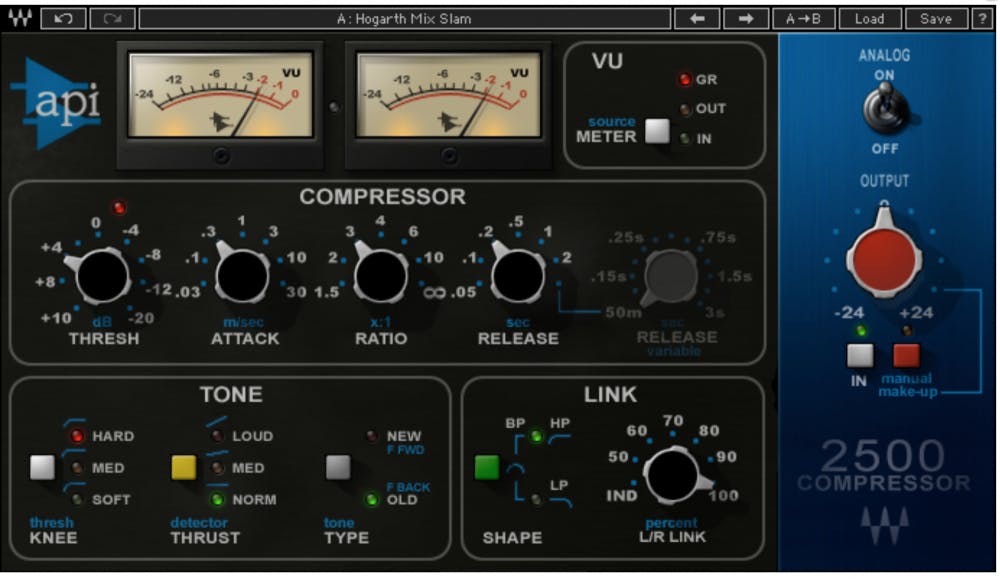
Waves API 2500 Compressor — excellent for aggressive mix bus duties
Mix Bus EQ
You may notice that the entire mix could benefit from some EQ, depending on the quality of the recording of the individual tracks and how they blend as a whole. With the full track playing, gently EQ the mix bus to get the best overall tone you can. The idea here is that everything will sound better going through this EQ. Any subsequent EQs you use on individual busses or tracks will be in the service of enhancing this “top-level” EQ.
Mix Bus Limiting
When we talk about mix bus processing, we can’t ignore the role of limiting. Clients will want to have an idea of how the mix will sound at a mastered level. Keep in mind that a mixing engineer should be gentle with limiting (often called mastering) since the mastering engineer requires some headroom to apply their mastering processing. It’s a bit of a puzzle to deal with this problem.
Grammy-winning Nashville mixer Craig Alvin (Kacey Musgraves Golden Hour, Amy Grant, Vanessa Carlton, among others) offers a practical approach to master bus processing. His master bus always includes either an SSL bus compressor or a Neve 33609 compressor set so that it is triggering about -4 dB of gain reduction at the loudest chorus. He then adds 2 dB of makeup gain to the output of the compressor. He then advocates inserting a mastering limiter (FabFilter Pro L is his current limiter of choice) after the compressor. He sets the threshold of the limiter so it is triggering about -6.5 dB of gain reduction at the loudest part of the mix.
The idea is that the limiter provides an idea of what the mix will sound like at a mastered loudness. This type of mix is referred to as the “heater” version. Then when Craig prints the final mix, he prints one mix with the limiter and one without. The mastering engineer can then hear the “heater” version to know what the artist heard and also have the non-limited version to master from. Often times the limited version will be used to master from, since the mix was created with this limiter affecting mix decisions along the way.
Mix Bus Colour
There are different strategies as to how to set up mix bus processing. Some advocate relatively clean and minimal tone-shaping (broad stroke EQs, light compression). Others look to this top layer to impart sonic character and add colour to the mix as a whole. Many would advocate the use of tape or tube saturation plug-ins at this stage.
The SubGroup Layer
Subgroup Processing
Once the basic fader levels and pan pots are set and the mix bus is set up, bus processing is the next step. You can group tracks by instrument, like drums, keys, etc. Or à la Michal Brauer, you can group instruments by tonal range, like lead instruments, bass instruments, etc… The goal of top-down mixing is to push into your processing to make mixing quicker and more cohesive without too much processing on individual tracks. By processing your subgroups, you mix into this set of effects first, which are then processed through your mix bus.
It’s often a good idea at this middle layer of the top down mixing approach to start with the drums. Craig Alvin suggests setting up a gently processed drum bus as well as a more heavily processed parallel drum bus. Begin with the kick drum since this has a lot of energy in the low end and then balance the rest of the kit.
The main drum bus may have a little compression and EQ and the parallel drum bus may have more extreme compression, EQ and even distortion. Craig suggests you set the drum bus outputs so the drums are hitting the mix bus compressor with -3 dB of gain reduction. The limiter should be triggering at -6.5 dB of gain reduction at the loudest peak. It’s a bold move, but then the drums should never get pushed louder than this. (For more details on Alvin’s mixing techniques, be sure to check out episode 232 of Lij Shaw’s Recording Studios Rockstars podcast.)
Onto the Tracks
The Ground Floor
The idea is to work quickly. Solo the busses as you mix if you need to, but not the individual tracks feeding into those busses. Once the mix bus and individual subgroup processing are in place, your mix should be sounding really good. Remember the 80/20 rule. You should be 80% of the way there pretty quickly.
Now listen for which, if any, individual tracks need specific attention. Maybe some de-essing on the lead vocal is necessary? Perhaps you want to add some additional processing on the guitar solo? The idea is that there shouldn’t be much left to do at this stage. Just the small details. You’re less likely to get mired down in minor details at this point since your whole signal flow is pretty much already in place and the mix is sounding so good.
Try This Fresh Approach
Top-down mixing is about working quickly and efficiently. It’s a great way to make sure you don’t get “stuck.” It’s about making decisions and moving on. For those of us who tend to get mired with relatively insignificant minutiae as we are mixing, this approach is worth a try.
This strategy works better in some genres than others. Not all mixes are “straight ahead,” and some songs require lots of specific individual track effects. A lot of synth-based productions, for example, depend on sound design elements and don’t lend themselves to this kind of “quick and dirty” approach to getting the mix in place. So your mileage may vary. Rock, country and jazz records certainly can benefit from this approach.
If nothing else, this workflow will get you thinking differently about how you approach a mix. Stretching our minds and trying new techniques is how we grow as mix engineers. It’s unlikely you will come away from the experience of top-down mixing without at least a few new ideas and perspectives that you can incorporate into your workflow.


