
Your acoustic space is one of your most important tools when it comes to recording, and the type of acoustic treatment you use directly affects how well-suited your room is for certain recordings. Different tasks require different tools. You wouldn’t carve a turkey with a chainsaw, right? Plastering your bedroom with egg cartons of cheap foam is an equally bad idea.
Many professional recording studios use specialized rooms for different situations; large live room for tracking live instruments, smaller iso-booths for drums, and even smaller rooms for tracking vocals and guitar amps. Narration booths require different acoustics than music rooms and a control room must be tuned for accuracy and critical listening.
In this article, we’ll explain how to set up live rooms and iso-booths to ensure you’re getting the most out of your space.
Treating a Live Room
You’ll know a good live room as soon as you step foot inside. They have the unmistakable ability to sing a performance back to you.
The best rooms for recording live instruments and ensembles complement and enhance the tonal characteristics of a performance. When music is performed in these rooms it sounds clear and full, with just enough ambience to remind you that you’re in a real room full of pleasant reflective surfaces. Vocal booths tend to be “dead” and dry while rooms for recording larger ensembles usually sound livelier and have longer reverb times. Versatile recording rooms should remain neutral, but not too dry. Some rooms are designed with different acoustic zones, each with a different tonal or reverb decay.
The frequency response of a good live room should be balanced, able to support deep lows and detailed highs. You won’t hear any muddiness or bass build-up like you typically hear in the rectangular rooms in your house. Different wall, floor, and ceiling materials provide different types of reflections, so if you’re building a room from scratch be sure to plan for the appropriate types of surfaces.
In order to achieve a tonally balanced and lively sound, you’ll need to apply acoustic treatment to 25-50% of the exposed walls in your live room. With some carefully placed absorption and diffusion panels, you can control the flutter echos and standing waves that make things sound muddy, boxy, metallic, or “boingy.” These rooms allow you to capture natural-sounding performances with the appropriate amount of ambience.
Be careful—too much acoustic coverage and you run the risk of sucking the life out of your recordings and making them sound unnatural or boxy. Inexpensive materials like moving blankets and carpet will only absorb high-frequencies and may cause your recordings to sound dull and muddy. Instead, use absorption panels made of 2-inch to 4-inch (5-10cm) thick fiberglass or Rockwool to tame early reflections—especially to treat flutter echoes between parallel walls.
Depending on the size of your space, you may also need to use diffusor panels to ensure the sound is evenly dispersed around the room. Small rooms are more difficult to effectively treat with diffusion, but breaking up large reflective surfaces will still be helpful in creating a more natural response.
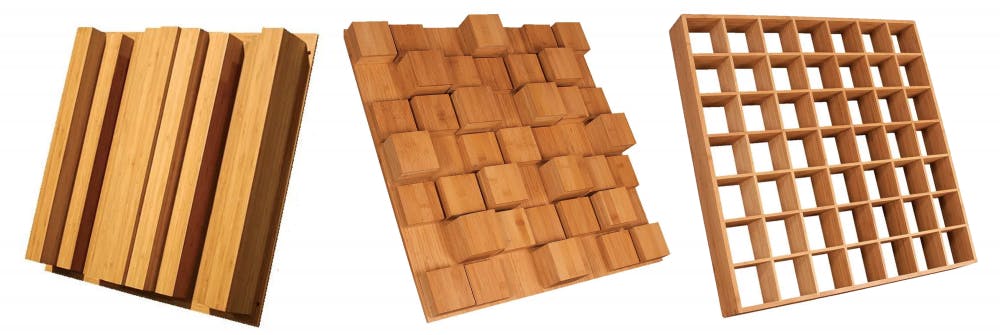
Three bamboo diffusion treatments from Auralex include (left to right) a Quadratic Residue Diffusor (QRD), a skyline-style diffusor, and a Lens™ diffusor. For small rooms, difussors may not scatter sound widely enough angle be very effective, but the Lens diffusor, especially when used as a ceiling cloud can add a natural sense of space.
Some studios also feature a dedicated drum room for those who want a specific type of drum sound. Typically, drum rooms use slightly more acoustic coverage than other live rooms for a drier sound. Many drum rooms also feature adjustable panels for dialing in the perfect drum tone. Bright, short reverbs, for instance, tend to enhance the punch of rock and pop drums.
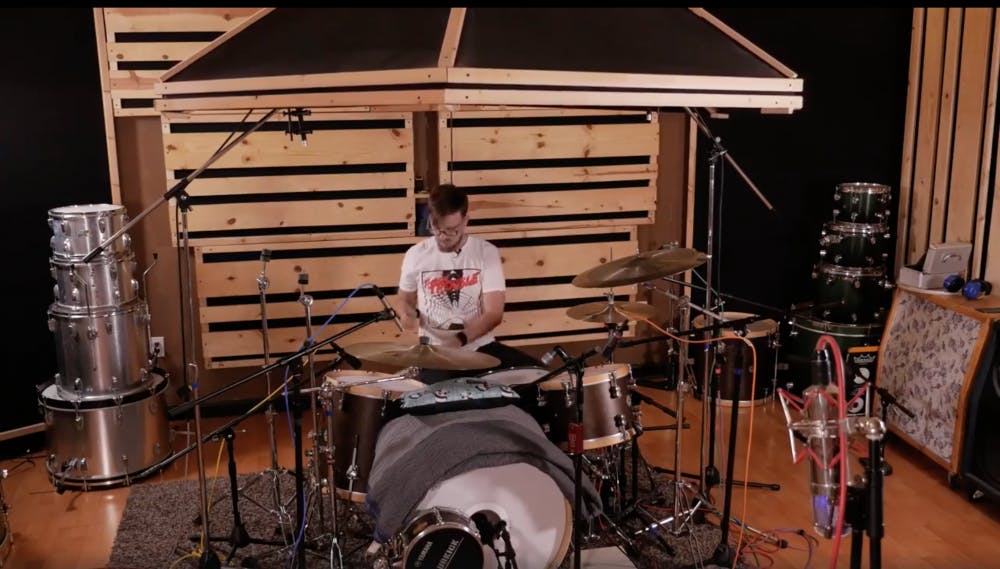
Sam Pura playing beneath his drum room’s adjustable “drumbrella,” inspired by Eric Valentine. This overhead baffle easily moves up and down on a pulley system to change the tone and ambience of the drums.
To identify where the acoustic panels should go in a live room, start by finding the sweet spot. Have someone play or sing in a room and walk around the player while covering one of your ears. Listen for a spot that sounds balanced and natural. Try adjusting the player’s position and your listening position to find the best spot for the player and the mic. After finding the sweet spot, clap your hands and listen to the reverberation. If you hear flutter or slap-back echoes, try placing absorption and/or diffusion panels on the nearest walls or ceiling, looking particularly for parallel surfaces. If you hear muddy low end or low-mid frequency build-up while singing or playing an instrument like a cello, then bass trapping may be needed. Bass traps placed in corners where two walls and the ceiling meet provide efficient trapping and don’t take up valuable space in a small room.
Depending on the size of your room, you may be able to absorb some of the reflections with carefully placed furniture. Comfy couches, bookshelves, and vinyl record collections can be a great way to soak up or scatter sound while adding to the vibe of the room. An easy way to quickly increase your absorption and also kill echoes between the floor and ceiling is with a thick rug. Aesthetically comfortable and cozy rooms tend to sound natural, while sparse, cold-feeling rooms sound untreated.
Treating a Vocal Booth
While it’s totally acceptable to record singers in a large live room, for a tight, dry vocal sound, you’ll prefer a dedicated vocal booth. This applies even more to voice-over, audiobook, and narration booths. Vocal booths require massive amounts of absorption—typically above 75% coverage. A good vocal booth will work for many instruments, as long as they can be comfortably played in the room.
Extremely small vocal booths can sound boxy no matter how you treat them. Vocals, and even spoken word, have a lot of energy between 200Hz and 2kHz. Try to avoid room dimensions that accentuate those frequencies and choose room treatments to absorb those frequencies. For instance, a room dimension of 3 to 5 feet will create resonances between 200 and 400Hz, while slightly larger room dimensions lower those resonant frequencies below the critical vocal range, making low-frequency treatment less necessary.
Remember also, that typical 2” foam only controls frequencies above 400Hz, so find acoustic material designed to treat at least down to 200Hz, like 3” Primacoustic Broadway panels. Thinner panels can control flutter echoes, but not the boomy room resonances that hurt the clarity of vocals. Depending on the size of the booth, you may want to employ bass traps in the corners, but for small spaces, you can typically get away with a few large absorption panels. Spacing a panel away from the wall or straddling a corner can lower the effective frequency, so if you decide to buy only 2” panels, try spacing some of them an inch or two away from the wall. The idea is to treat as many frequencies as possible.
Too much acoustic treatment can also cause the artist to feel isolated or disconnected while recording. For instance, covering a booth with acoustic foam from floor to ceiling will dampen high frequencies and will cause your recordings to sound dull or muffled. Vocal booths should be dry, but not uncomfortable. Narration booths need to be extremely free of ambience, but also benefit from a neutral frequency response. Sizes for narration and voice-over booths can vary from large enough for one to several actors. The larger the room, the better the isolation between the actors’ microphones.
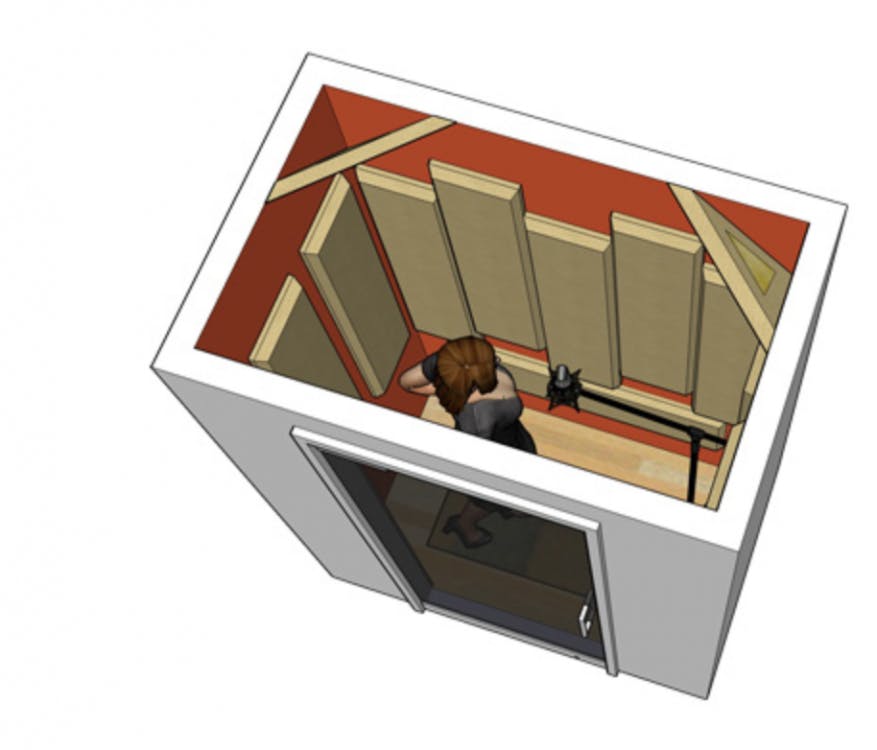
In this vocal booth image from Primacoustic’s website, you can see that panels cover most of the wall surfaces, while the wall/ceiling corners are straddled with Tri-corner Trap™ panels that absorb the low vocal frequencies. Note that about 75% of the wall surfaces have been treated in a semi-random pattern. To further minimize reflections, the microphone is placed as far as possible from any reflective surface, especially the window.
Booths for Guitars
Guitar and bass amps are a common problem for home-based studios, and especially for apartments. Since guitar amps can be small, many people think that a booth only slightly larger than the amp will work to isolate the amp. In reality, these small booths sound boxy and unnatural. They load the amp with acoustic resistance so the speakers become inefficient at moving air and a booth that measures 3 to 4 feet in any dimension will accentuate frequencies between 250 and 400Hz, muddying up your amp’s tone. Loud guitar amps do best in vocal booths or spaces that have at least 4 times the cubic volume of the cabinet itself. Vocalbooth.com produces pre-made guitar isolation booths, but nothing beats an amp in a decent-sounding live room.
Acoustic guitars sound great and record well in almost any decent room, as mics are often placed close to the guitar and a little ambience often helps enhance the tone of the instrument. For specific types of classical or flamenco guitar, more reverberant rooms may be required, but for pop and rock, a vocal booth, or even the control room will suffice.
Treating a Control Room
Control room treatment has been covered in depth in a few of our other blog posts, like this one by Barry Rudolph, but here are a few tips to keep in mind.
A good sounding control room offers even and balanced sound, especially in the listening position. In order to make critical mix decisions, you need to be able to trust that what you’re hearing is accurate, which is why it’s so important that your room not color your recordings.
Control rooms require slightly more treatment than live rooms, so most control rooms feature 50-75% coverage, with more absorption than diffusion.
In order to achieve a neutral sound, you need to eliminate reflections that cause frequency build-ups. The most difficult part of constructing a transparent listening environment is equally reducing these build-ups across all frequencies. Like with vocal booths, simple acoustic foam or thin absorption panels only treats mid and high-frequency reflections, enabling low frequencies to bounce around the room unaffected. In most mixing rooms, the biggest problems come from frequencies under 300 Hz.
To eliminate low-frequency issues, you’ll need to use proper bass traps in all of the corners. Start by hanging bass traps in the top corners behind your monitors, followed by the top corners on the back wall. If you’re still experiencing bass build-ups, try using bass traps in the bottom corners as well.
Next, place acoustic absorption panels at the first reflection to can help reduce unwanted echos. Just be careful not to use too much absorption, as it can suck the life out of your room causing you to add too much reverb to every mix. A great sounding mix room should sound comfortable, but not to live.
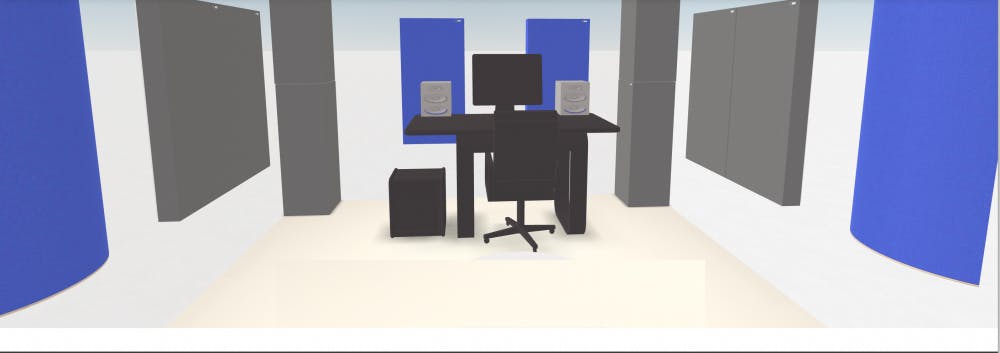
This room sketch, made with GIK Acoustics’ Roomle tool, shows a typical home studio with absorbers and bass traps (grey), and diffusors (blue). Not shown are absorber clouds above the mix position and additional diffusion on the rear wall. Note that only about 50% of the wall surfaces are treated.
A little planning and thoughtful considerations of your existing spaces and future needs can go a long way in planning and treating your existing spaces for recording all types of instruments. Many commercial treatment products are available, along with expert advice from the manufacturers. There are also many online resources for those who wish to go the DIY route to design and build their own treatment.


