
As a producer, beatmaker, or songwriter, it can be intimidating to send a song to a mixing engineer—especially if you’ve never done it before. You may be nervous that you’ll mess something up or come off as an amateur. Or you may be nervous that the mixer will change something that you love about your mix! That’s why we put together this handy checklist for preparing your track for a mixing engineer.
Get Organized
The first step in preparing your session is to organize your files. Find out if the mixer can accept your session in the format that you have been working. For example, most mixers will accept Logic or Pro Tools sessions and many will accept Ableton or Cubase projects. The safest way to transfer files to a mixer is to consolidate every track in your session into one, solid .wav file that starts at bar 1 and ends after the last note on the track. That way, every audio file will line up at the top of the song in any DAW.
Project File Handoff
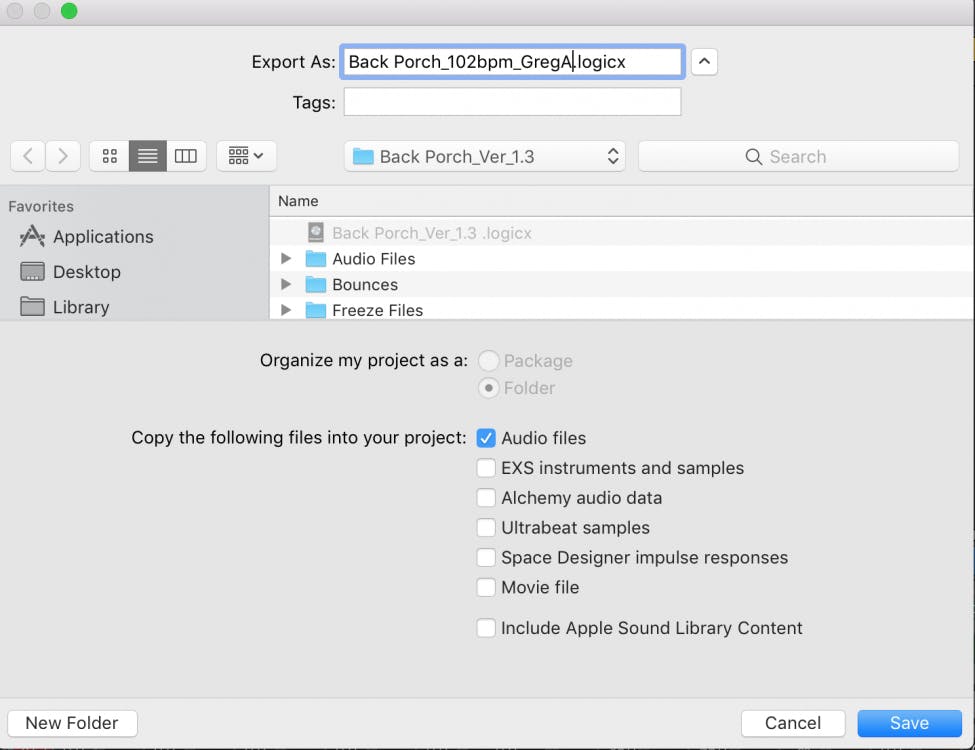
If your mixer can accept your DAW session format, save a copy of your session and make sure it includes all the audio files that belong in your session. In Pro Tools, for example, you would choose Save Session Copy… then also check the box that says to include all audio files. This procedure will create a new folder with the session file and the audio files folder. Zip this file and send it off. Similar methods apply for every other DAW so do your research or ask the mixer how to complete this step.
If your mixer can accept your DAW format, you should also ask about consolidating track vs leaving regions in place and also ask about any plugins you may be using. In Pro Tools, you can export a list of plugins that you are using in your song by using the Export Session as Text command including only the list of plugins. This creates a text file of all the plugins used in your session.
Many mixers prefer to have your plugins running live vs. you printing your plugins. Some mixers prefer consolidated tracks with plugins applied to the audio files. If this is the case, you may also include an unprocessed version of certain tracks, like a tuned vocal, so that the mixer has the option of recreating your processing in a more effective way.
Project Naming
Your session file name should have the song name, tempo, and client or artist name. I project titles like SongName_110bpm_JohnSmith. Most DAWs automatically name tracks with conventions like Audio_01, while most engineers rename tracks something like snrtopsm57—neither of which are particularly helpful for a mixing engineer trying to navigate a session. Instead, clearly label your tracks with something that makes sense like Kick, Sn_verse_, Ld Vocal, Harm Voc_1, etc… You also don’t need to put the name of the song in the track name. It’s awkward to deal with filenames like “MySong_Drms_kick01_wildkick.wav” Instead, just name the file “Kick_01.” All your audio files are in the same project folder already, right?

I often send a few screenshots of mixing sessions to new clients so that they can see how I like to organize and label my sessions. That gives them a good idea of how to deliver files to me. Other mixers may have an instruction sheet that they can send you that outlines their expectations.
Comping
It’s important to make all of your final edit decisions before sending your session off to a mixing engineer. Don’t leave it up to the mixer to determine if the second verse was better on take five or take seven. Listen closely to each take and identify the best parts of each performance. Using your DAW, you can edit or “comp” them together to create one ultimate performance. If you feel like there is a valuable alternate take of a guitar solo or vocal part, you can include it as an “option” track and explain why you included it.
Edit & Consolidate
While some mixers also provide editing services, it typically adds to the cost since editing requires additional time. If you’re going to pay for a pro mixing engineer, you want them to spend their time mixing, rather than tweaking tracks you should have edited yourself.
Start by removing any unnecessary tracks. If they’re not working now, the mixing engineer isn’t going to be able to save them. If it’s muted or buried in the mix, get rid of it. Delete it from the session entirely. Remember, whatever tracks you deliver will end up in the final mix. Ask about using folder tracks or track stacks before delivering a mix. MIDI tracks should always be rendered as audio tracks.
Remove any unwanted noise from all tracks, and don’t be afraid to cut out “silence” in-between parts. Sometimes sounds can go unnoticed during recording, but they’ll all get amplified in the mixing stage, so don’t risk it! Listen carefully for clicks and pops that need to be cleaned up before mixing. Any track that contains a lot of edits should be listened to in solo to make sure the edits are clean and free of clicks. Consolidate the track if necessary and don’t forget to delete unused playlists.

Use Logic’s “Join Regions per Tracks” command or Pro Tools “Consolidate” command to create one file per track, instead of many edits on each track.
Clean Up Your Levels
Your session should open with a decent monitor mix of your song. If you deliver stems, many mixers prefer that your stems play at the same volume as they did in your mix. That way, all your stems set to 0 should re-create your rough mix. If your tracks or stems are overloading, then you should turn all of them down while trying to maintain the same relative balances between your tracks.
If your production contains volume or panning automation, you should include that in your delivery. The mixer can always turn off or edit your automation. The mixer should start where you left off. Don’t go back several steps by removing automation that makes your track work the way you want it to. The mixer can’t read your mind and may make different decisions than you want. This is especially true for background vocal blends. These blends are production choices that should be made by the producer and enhanced by the mixer.
Quantizing & Tuning
Don’t expect the mixer to correct timing problems. If there are any timing issues or transients that are off the grid, correct the problem before sending the session to a mixing engineer. You should tune all of your vocal tracks—and any instrument tracks that need it—before sending the mix off. Most mixers charge extra for vocal tuning, so if you have the software and the skills, save yourself some cash and take care of it yourself. If you are unsure of tuning, send the untuned version as an option and mention that it is there just in case.
Mixers hate getting updated files because you forgot to correct the timing or tuning of a track. It is not always as simple as swapping one file out for another, especially if the mixer has applied clip gain, reamped a sound or committed plugins on a track. Sometimes a client will ask me to check for timing issues on a vocal or specific instrument and I usually oblige, but timing and tuning can be subjective and it can be frustrating to go back and forth for these decisions that ultimately should have been made in the production stage.
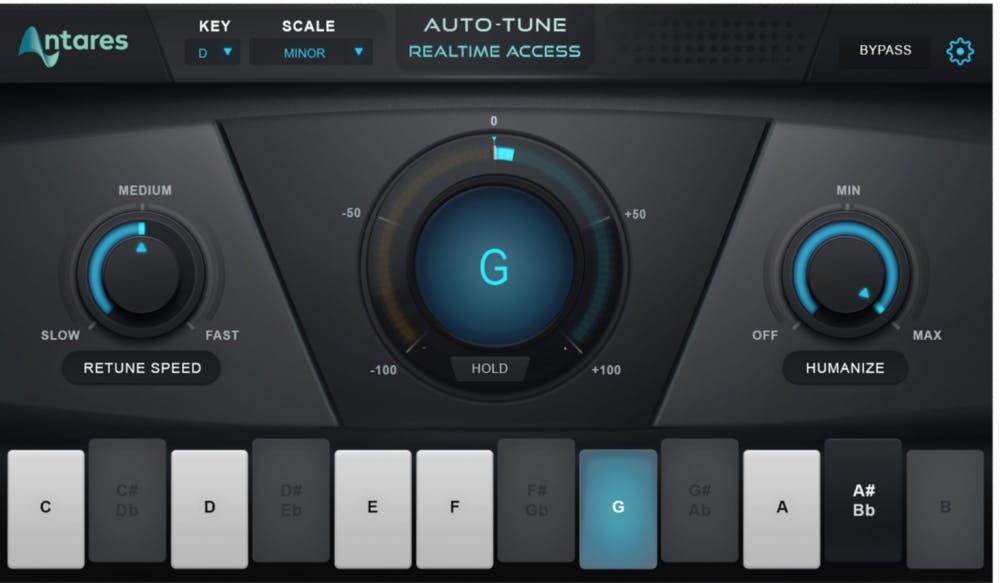
There are many versions of Antares Auto-tune and Celemony’s Melodyne, so if you are going to send tracks with these plugins active, make sure the mixer has a compatible plugin version.
Drum Samples, Amp Sims, and Effects
If you’re using any drum samples or amp sims in your recording, you should bounce them to their own tracks. Provide both the original recording as well as the enhanced track. The mixer may not use these printed tracks, but it often provides context on the type of sound you want, while still offering the mixer enough flexibility to do their thing.
The same goes for effects—if you absolutely love a specific effect or sound, don’t expect the mixing engineer to recreate it. Bounce the effects as a separate track and let the mixer enhance the sound. After all, there must be something great about the demo—otherwise, you wouldn’t be recording it, right? Be sure to clearly label these tracks and include a note to explain why they are included. I love to get a printed vocal reverb track. If it’s magic I can use it, or I can try to beat it with my own processing. At the least, I have the opportunity to enhance the original sound that everybody already loves.
Remember that if you prefer to leave drum triggers or effects running as plugins, be sure to coordinate with your mixer so that you know they have the same plugins and that you include the samples or presets needed for your project. Again, print and audio reference track along with the virtual track.
Send a Few Reference Tracks
Ever heard of demo-itis? It’s a made-up word for a very real phenomenon that occurs when you listen to a recording of a song for an extended period of time. Eventually, your brain starts to believe that’s the way the recording should sound. Every artist and producer suffers from it. That’s why it’s important to send the mixer the rough mix that you’ve been living with. Be sure to mention anything you don’t like about your mix, like “We never found a great vocal effect,” or “the kick should be more like xxxx.”
It helps show the mixer what you’re used to hearing so that the mixer doesn’t reinvent your mix in a totally different way than you are used to. If I feel like I have an idea that is very different from the rough mix, I will often send a sample of my idea to the client before I get too far into the mix. Sometimes it’s great and sometimes it’s just too different for them to accept. Keep moving the mix forward!
References
It’s also a good idea to include a few reference mixes along with the session files. You don’t actually have to send the audio files (although that can be helpful if you have high-resolution files), but send links to a few professionally released tracks that you think sound great. It could be something specific like the drum sound or guitar tone, or it could be something general like the feel of the mix. These reference mixes help the mixer make sure they deliver what you want to hear—not just what they think sounds good. I recently received a mix with one reference for the bass pump effect and one reference for the vocal sound. I love that!
Talk to Your Mixing Engineer
At the end of the day, every mixing engineer will have a different set of preferences. Open up a dialogue and make sure you’re both on the same page about your expectations. Be clear about how much the project will cost, when it will be done, and what it will sound like. And make sure you provide the mixing engineer with everything they need to get the job done.


